How to Automate Code Signing with Jenkins, Azure Key Vault, and AzureSignTool?
Professional software distribution dictates that software maintainability, assurance, and protection against tampering are achieved through code signing; it is a must.
It takes time and effort to manually sign everything with certificates, is prone to mistakes, and introduces security risks if certificates are copied from one system to another. That’s where automation comes in.
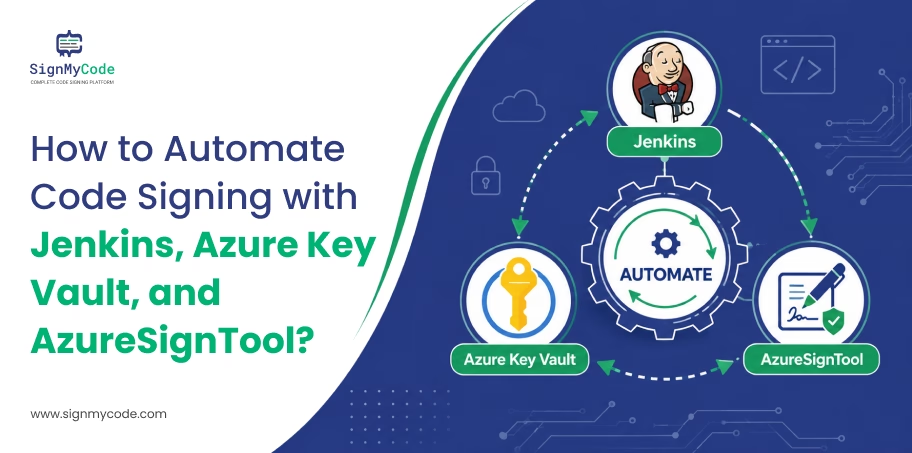
This guide teaches you how to start an automated pipeline for code signing with Jenkins, Azure Key Vault, and AzureSignTool.
You can continue to have your signing certificate securely encrypted in Azure Key Vault, but your CI/CD pipelines can now trigger signing automatically, minimising friction in the deployment process, while preserving security. We will be entirely concerned with what makes all of this just work, on the ground.
What You’ll Learn
- Enable Azure Key Vault for code signing and for storing and securing certificates.
- Set up Azure AD authentication for programmatic access
- Install and configure AzureSignTool on Azure build agent.
- Use Jenkins and Azure Key Vault & AzureSignTool.
- Create Jenkins auto-signing pipeline
- Sanity check signed executables for validity/trustworthiness
Prerequisites
You’ll need:
- A running process and administrator access.
- Azure Resources: an existing subscription, a Key Vault, and a valid code signing certificate in the Key Vault.
- Azure AD App Registration:
- AzureSignTool: Available as part of your Jenkins build agent
Requires a Windows environment to build, optionally. - Azure Key Vault Permissions: Admin access to both Jenkins and Azure Key Vault
- AzureSignTool: Available as part of your Jenkins build agent
Step 1: Prepare Azure Key Vault for Code Signing
- Create a separate Key Vault for your Azure subscription (or go to one you already created).
- In the Key Vault, upload your code signing certificate or create a new one directly into the vault. Your private key remains safe because Azure encrypts at rest.
- Next, configure access. You can use Access Policies (which is somewhat simpler but will be phased out), or more granular – RBAC (role-based).
- Enable your Jenkins service principal (or other user with the required access) for the “Crypto Officer” role or similar permissions to access certificates for signing operations.
- Check that everything has been set up correctly: go to Certificates, select your signing certificate, and make sure it is marked active. Test that your service principal can get it programmatically. This will avoid authentication surprises further down the pipeline.
Step 2: Register an Azure AD Application for Code Signing
- Go to Azure AD and register a new application – this will be the identity used for authentication by Jenkins.
- Upon successful registration, you’ll find 3 important values: copy the Application ID and Directory (Tenant) ID by heart and save them securely.
- Create a Client Secret (this is not a certificate, but a string of text). This is similar to a password to Jenkins to demonstrate itself.
- Specify app authentication time; calendar reminders thwart authentication failures when secrets expire.
- Set permissions for this application to access your Key Vault. Then set access policies for the Key Vault to include “Get” and “Sign” for the Vault on the certificate.
- Then assign the access policy for the Key Vault that includes “Get” and “Sign” on the Vault on the certificate.
- Before connecting via Wire in Jenkins, try with curl or PowerShell to check if you have the right credentials to confirm that they work locally.
Step 3: Install and Verify AzureSignTool
AzureSignTool is a tool in the command-line interface (CLI) for signing executables with certificates stored in Azure Key Vault. Install it using NuGet or the binary it is provided on GitHub.
Installation command:
dotnet tool install --global AzureSignToolOnce installed, check for correct operation:
AzureSignTool --versionAzureSignTool requires .NET Framework (or .NET Core for Windows Server). The following is a list of the dependencies that your build agent must have.
- To make sure that the tool can be called from your command line, do a simple authentication test: it ensures that your PATH is set properly and that the tool is available.
- Look over all the key command options: the `–azure-key-vault-url`, `–azure-key-vault-client-id`, `–azure-key-vault-client-secret`, `–azure-key-vault-tenant-id`, and `–file-digest` options.
- Once you know these, you won’t have to go through the trouble of troubleshooting later. For the detailed usage, refer to the reference: AzureSignTool –help.
Step 4: Store Credentials in Jenkins
Open Jenkins and browse to Manage Jenkins > Credentials. If it isn’t there, create a fresh credential and sign it. For sensitive values, use the Secret Text credential type to add credentials.
Keep four different keys:
- Azure Client ID (azure-client-id).
- Azure Tenant ID (azure-tenant-id)
- Client secret (indicated by azure-client-secret)
- A key vault name (type: `azure-keyvault-name`)
These are encrypted at rest with the master key by Jenkins. Use descriptive IDs for the organisation of credentials – this way pipeline scripts are readable and maintainable. Set domain scope (most of the time it should be set to global).
Check access by creating a test job to echo a credential. Otherwise, if Jenkins decrypts it with incorrect errors, your setup is not sound.
Note: Do not have sensitive values hardcoded in credentials in Jenkinsfiles, and always refer to credentials by the ID.
Step 5: Build a Jenkins Pipeline for Automated Code Signing
From code to a signed artefact, the whole signing process is controlled by your pipeline. Each segment performs a single task, which allows the pipeline to be easily readable and Maintainable.
Pipeline flow:
- Checkout fetches your source code from your repository.
- Build stage – This stage is used to compile your application into an executable.
- Locate Artefacts helps identify the binaries that should be signed in the image.
- Authenticate retrieves your Azure credentials from Jenkins and prepares them for AzureSignTool.
- Call AzureSignTool to sign the binaries with your Azure Certificate in Key Vault. It provides a trusted timestamp in your signature, so that the signature will not expire even if the certificate expires later.
- Distribute uploaded signed artefacts in your release repository or artefact server.
- The Audit trail feature is included in the archive feature
Sample Jenkinsfile:
pipeline {
agent {
label 'windows'
}
environment {
    AZURE_CLIENT_ID     = credentials('azure-client-id')
    AZURE_TENANT_ID     = credentials('azure-tenant-id')
    AZURE_CLIENT_SECRET = credentials('azure-client-secret')
    KEYVAULT_NAME       = credentials('azure-keyvault-name')

    KEYVAULT_CERT_NAME = 'my-code-signing-cert'
    BUILD_ARTIFACT     = 'bin/Release/MyApp.exe'
    SIGNED_ARTIFACT    = 'bin/Release/MyApp.signed.exe'
}

stages {

    stage('Checkout') {
        steps {
            checkout scm
        }
    }

    stage('Build') {
        steps {
            bat 'dotnet build --configuration Release'
        }
    }

    stage('Locate Artifacts') {
        steps {
            script {
                if (!fileExists("${BUILD_ARTIFACT}")) {
                    error "Build artifact not found: ${BUILD_ARTIFACT}"
                }
            }
        }
    }

    stage('Authenticate with Azure') {
        steps {
            echo 'Credentials loaded from Jenkins environment'
        }
    }

    stage('Invoke AzureSignTool') {
        steps {
            bat '''
                AzureSignTool sign ^
                  --azure-key-vault-url "https://${KEYVAULT_NAME}.vault.azure.net/" ^
                  --azure-key-vault-client-id "${AZURE_CLIENT_ID}" ^
                  --azure-key-vault-client-secret "${AZURE_CLIENT_SECRET}" ^
                  --azure-key-vault-tenant-id "${AZURE_TENANT_ID}" ^
                  --azure-key-vault-certificate "${KEYVAULT_CERT_NAME}" ^
                  --file-digest sha256 ^
                  --timestamp-rfc3161 "http://timestamp.globalsign.com/tsa/r6advanced1" ^
                  "${BUILD_ARTIFACT}"
            '''
        }
    }

    stage('Publish Signed Artifacts') {
        steps {
            archiveArtifacts(
                artifacts: "${BUILD_ARTIFACT}",
                fingerprint: true
            )
        }
    }

    stage('Archive Build Outputs') {
        steps {
            archiveArtifacts(
                artifacts: 'logs/**/*.log',
                allowEmptyArchive: true
            )
        }
    }
}

post {
    always {
        cleanWs()
    }
}
}
AzureSignTool parameters explained:
- –azure-key-vault-url: Full URL of your Key Vault (format: https://[vault-name].vault.azure.net/)
- –azure-key-vault-client-id: Service principal’s Application ID
- –azure-key-vault-client-secret: Client Secret (password for the service principal)
- –azure-key-vault-tenant-id: Your Azure AD Tenant ID
- –azure-key-vault-certificate: Name of the certificate in Key Vault (not the full URL)
- –file-digest: Hash algorithm for the file (sha256 is industry standard; sha1 is deprecated)
- –timestamp-rfc3161: URL of a trusted timestamp server (ensures signatures remain valid after certificate expiration)
Why Timestamping Matters:
Timestamps can be used to verify that the code was signed at a certain point in time. If you don’t have them, whether a part of the code was signed years ago, your signature is invalid on the signature when your certificate expires. A timestamp server is a trusted witness that can prevent the problems of signatures being revoked downstream.
Step 6: Verify Digital Signatures
- Just sign your executable, right-click it, then click Properties in the window that opens, and click the Digital Signatures tab.
- The certificate information is displayed, along with information about the certificate’s issuer and the time of the certificate’s signature.
- If it appears as a green checkmark and there are no Warning icons, it means that the signature is accepted by the operating system.
- Check the chain of certificates to ensure that it ultimately leads to the trusted root certificate authority.
- Check to ensure that the date of the signature is the date it was actually signed, and it will not expire if your certificate expires.
Using PowerShell: Get-AuthenticodeSignature -FilePath “C:\path\to\MyApp.exe” | Format-List
This retrieves the signer name, the authority’s name and contact information, the signer’s timestamp, the Signer’s certificate’s Status (Valid or NotSigned), as well as the certificate’s Thumbprint. Use this to verify success after you sign your pipeline and before publishing at the end of your pipeline.
Step 7: Automate Builds and Continuous Signing
- Set up the triggers for Jenkins to run when the repository is committed or at a specified time.
- For Git and Subversion, use Poll SCM; for immediate builds, use webhook-based triggers.
- Configure Jenkins to do automatic signing during all releases without user interaction. Include this pipeline in your CI/CD pipeline when you have finished the build and prior to publishing the artefacts.
- Only scheduled builds use the cron syntax: H 2* * * signs builds nightly.
- Create a Release Policy: Production builds will be signed, and Development builds won’t be signed.
- This keeps quality control killed on non-critical builds and doesn’t take up any memory. Keep items different for every archive, signed from unsigned.
Conclusion
So, you’ve automated code signing with Jenkins, Azure Key Vault, Azure SignTool, and eliminated manual certificate handling to enhance the security of your releases. All built artefact signatures are now automatic and encrypted, with trusted timestamps for code signing, making it quick and easy to sign as part of the CI/CD workflow.
Keep track of the expiration dates of any certificates and regularly renew credentials; expand the pipeline to sign more artefacts as the release process scales.

Code Signing with Azure Key Vault
Leverage the Cloud Based Software Security by Securely Store your Private Key and Code Signing Certificate to Microsoft Azure Key Vault.
Get Azure Key Vault Code Signing Certificate