
Exporting Your Code Signing Certificate as a PFX File in Chrome
Note: This is Outdated Content After New CA/B Code Signing Baseline Changes Effective June 2023. The Code Signing Certificate is not exported; private keys must be marked as non-exportable!
When a Certificate Authority issues the Code Signing Certificate, it first gets downloaded in the browser. And to utilize it for signing purposes, you have to export it to the local machine.
Nowadays, Chrome is the most popular web browser among software publishers. And if you, too, have to export your certificate as a PFX file from Chrome, then you are at the right place.
Following the procedure, you can seamlessly export your Code Signing Certificate from Chrome to your system.
Follow the Steps to Export the Code Signing Certificate in Chrome
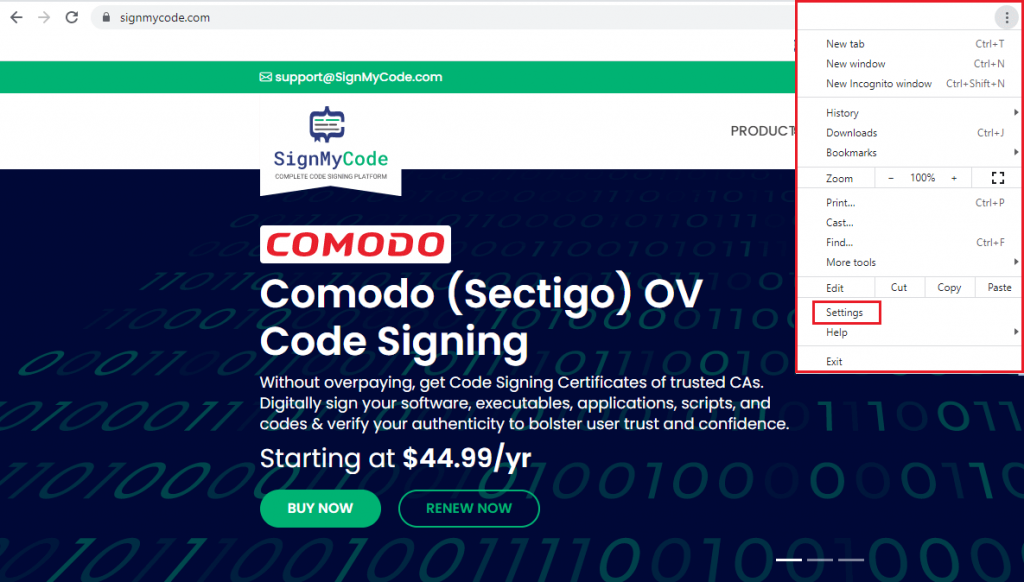
Step 1: Navigate to Chrome Browser Settings
Click on the three dots symbol in the upper right corner. It will open the menu and select “Settings” from the given options.
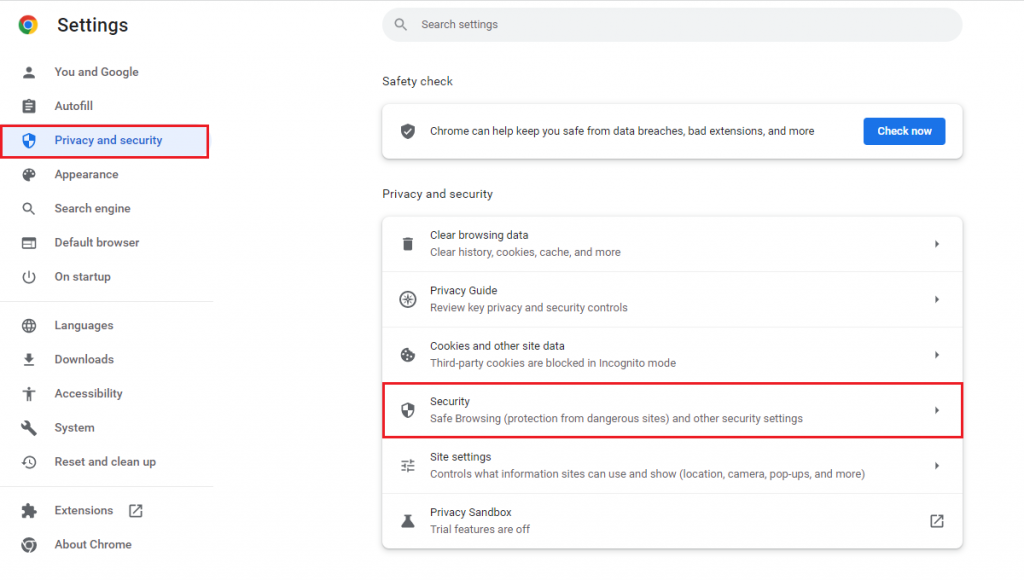
Step 2: Go to Privacy and Security Options
Once the settings are opened. Select the “Privacy and Security” options from the menu list on the left. Then select the Security option from the Privacy and Security menu.
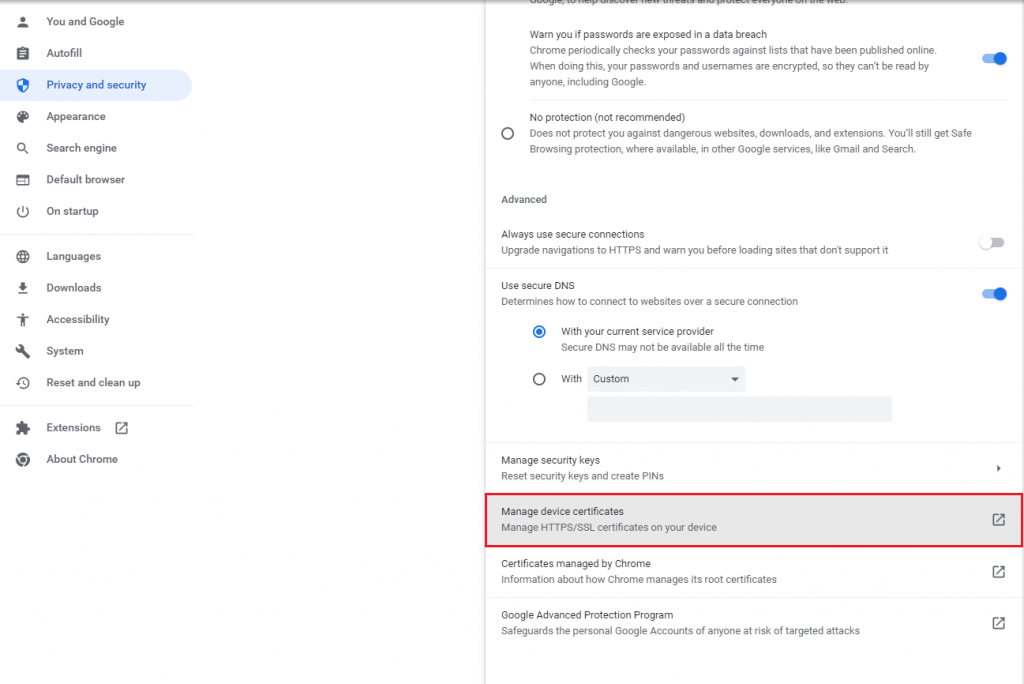
It will open additional settings. Further, scroll down and select “Manage Device Certificates” under the advanced option.
Step 3: Select Certificate and Export
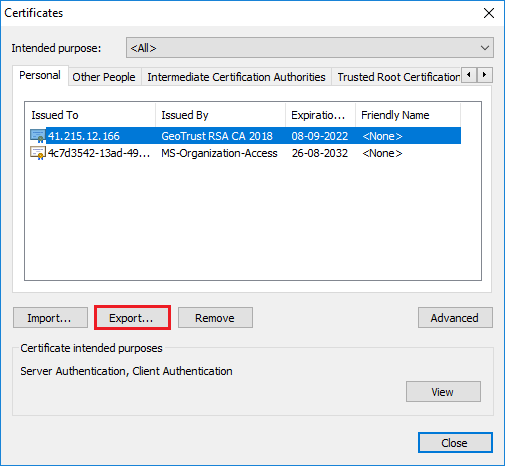
A new window will get opened after you click on Manage Device Certificates. Under the “Personal Tab,” you will find the details of the available certificates.
Select the certificate you want to export by clicking on the Export button. Further, you will see a Certificate Export Wizard, and to move forward, click on the “Next” button.
Step 4: Export Private Keys with Certificate
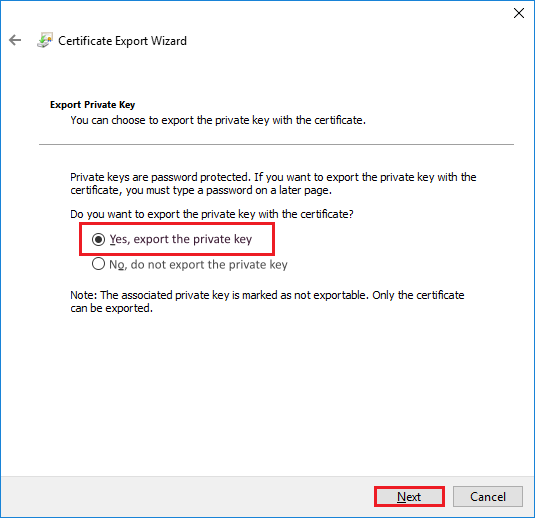
The Wizard will provide you with the option to export private keys. Select the first option, “Yes, export the private key,” and then click on the “Next” button.
Step 5: Select Code Signing Certificate File Format
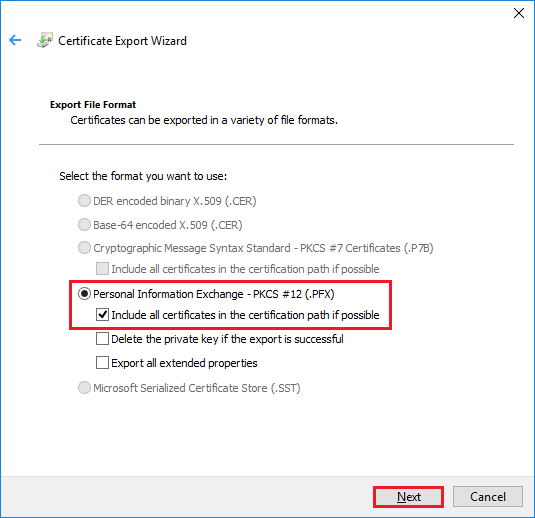
Once you confirm the exportation of private keys, the Export wizard will provide multiple file format options. You must select the “Personal Information Exchange (.PFX)” format along with the sub-option to “include certificate path.” And click on the “Next” button.
Step 6: Confirm Password
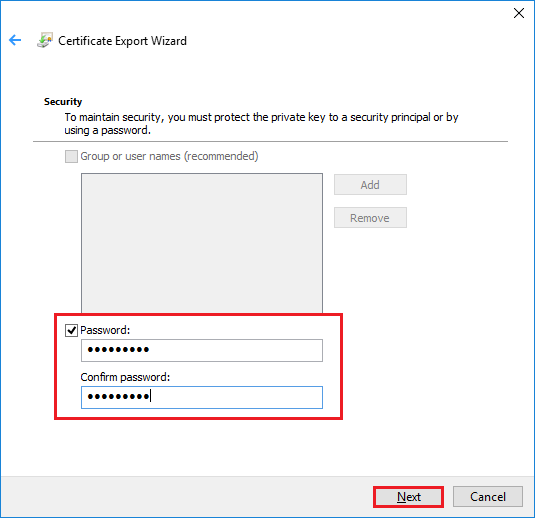
Following the selection of file format, Export Wizard will confirm your authenticity. You must “enter the password” associated with your Code Signing Certificate and confirm it by retyping. And again, click on the “Next” button.
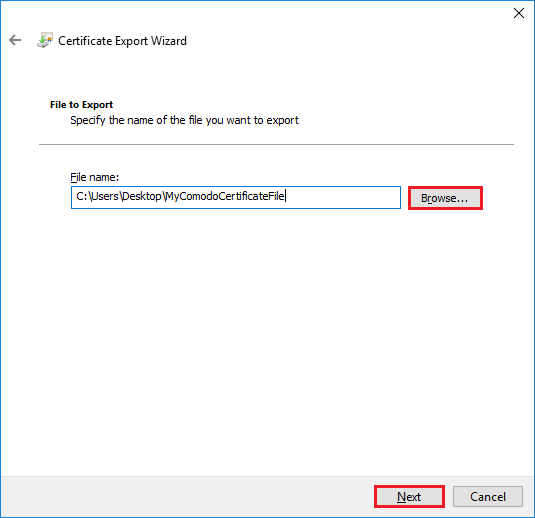
Step 7: Select Location To Save
Now you have to select the location on your system where you want to save the Code Signing Certificate in PFX format. Click on the “Browse” button to choose the location on the local drive and click “Next.”
Step 8: Review and Finish
At the final step, Wizard will show all the settings. “Review” them and click on the “Finish” button. On successful exportation, the system will display the message “The export was successful.” Now you can go to the selected location and access the Code Signing Certificate file.
Conclusion
As Chrome is one of the most used browsers, every software publisher must know how to export a Code Signing Certificate as a PFX file. The procedure is quite simple and seamless. You have to go to settings; then, under privacy and security, you will find the option to manage certificates.

Cheap Code Signing Certificates
Prevent Code Tampering and Authenticate Code Integrity by Digitally Sign your Code with Trusted Code Signing Certificates.
Starting at Just $215.99/Year
