
What is a PFX Certificate? How to Create a PFX File?
Note: This is Outdated Method due to New CA/B guideline, From June 2023, All Code Signing Certificates will stored on FIPS 140-2 or Common Criteria EAL 4+ compliant Hardware Security Module (HSM) or Yubikey USB tokens. So, code signing certificates will no longer be exportable or no direct link issuing process through PFX File.
With the increase in cyber threats, security professionals prefer Software Publisher Certificates to add an extra layer to applications. It helps to tamper-proof the software and build its reputation across digital platforms. And whenever a Certificate Authority issues a such certificate, the developer/publisher receives a PFX file.
However, in some cases, publishers also receive two files, one containing the private key and the other storing the certificate. Due to it, signing software gets complicated, as new-age systems require PFX files to perform operations.
But you don’t need to worry, as we have got every solution for you. If you receive two different files, you can follow the further provided methods to create a PFX file.
So, let’s get started.
What are Personal Information Exchange (.pfx) Files?
A PFX (.pfx) file is a collection of cryptographic keys, the digital certificate, and the intermediate authority’s certificate, which help to strengthen the application’s security.
Primarily, Code Signing Certificates and SSL certificates are issued with a .pfx extension. It aids in securing the confidential certificate and private key details away from malicious actors, as you can password-protect such files.
In addition, a .pfx file can contain the certificate in different formats, including .cert, .crt, and .pem. The private and public keys can be in the X.509 format.
Nowadays, whether it’s a Windows, Linux, or macOS-based device, each one of them requires the certificate files in PFX format.
Moreover, systems utilize different PFX file names, such as PKCS#12 or .p12. You must input the PFX file if you ever find a system requesting files in the mentioned formats.
However, PKCS#12 is the format used by the .pfx file, but the files are considered the same.
Recommended: How to Convert Certificate from .pfx to .cer Format on Windows 10?
A Brief About PKCS#12 and its relation to PFX Files?
PKCS#12 is the file format used by the PFX files. It defines the structure and how the private key and associated certificate will get stored. Such files are archives containing multiple cryptographic objects within them.
Whenever you avail yourself of a Code Signing Certificate to tamper-proof the software, the Certificate Authority issues the certificate with a .pfx extension. The private key and certificates reside inside that file, following the PKCS#12 format. Moreover, you can think of the PFX file as a complete package, which you must sign your executable files.
Recommended: How to Convert a PFX Certificate to JKS, P12, CRT?
Furthermore, the private key and the associated certificate are two primary objects in a PFX file. Sometimes, the Certificate Authority provides both objects in different formats, and you have to create a PFX file using them. And we will undergo the complete PFX generation process in a further section.
Why are the Private Key and Public Key Stored in a PFX File?
Private Key and Public Key get stored in a PFX file to streamline security operations, especially when code signing and configuring an SSL on multiple servers. When an organization requires configuring SSL on a different server, it needs to transfer both keys. And for it, PFX files get used.
By using a PFX file, you don’t have to maintain different files and secure them from malicious actors. Administrators have to secure and retain the integrity of a single file, containing all the essential components required to perform appropriate operations.
Generation of PFX/.p12 File
If your Certificate Authority has provided separate files for the private key and certificate, you can utilize any of the following two methods to create a single PFX file. The first method uses the command line interface, and the second method uses a GUI-based wizard. You can go for any mechanism that is convenient for you.
Method 1: Command Line Interface Approach
To archive a .pvk (Private Key File) and a .cert/.spc (Certificate and Public Key File) into a single .pfx file, follow the below steps:
Step 1: Open the Command Prompt on a Windows-based computer system.
Step 2: Run the command:
Pvk2Pfx -pvk PrivateKeyFile.pvk -pi Pvkpassword -spc CertificateFile.spc -pfx NameofPfxFile.pfx -po PfxFilePassword -f| Keyword in Command | Replace With |
| PrivateKeyFile.pvk | Name of the Private Key File |
| Pvkpassword | Password used to protect the private key file |
| CertificateFile.spc | Name of the file containing certificate with extension .cert or .spc |
| NameofPfxFile.pfx | Set the name with which you want to save the PFX file |
| PfxFilePassword | Set the password, with which you want to secure the PFX file |
In addition, Pvk2Pfx is the keyword used for utilizing the tool for converting a non-pfx file to .pfx. Once the command executes successfully, you will get the PFX file, containing the private key, public key, and digital certificate.
In addition to it, you can also use OpenSSL Command Line Interface to generate a PFX file. For it, follow the below procedure:
Step 1: Install OpenSSL on your system. On OSX devices, it is available by default.
Step 2: Open OpenSSL and you will see a command line interface.
Step 3: Change the current directory to a location, where the certificate and private are present.
Step 4: Run the command:
openssl pkcs12 -export -out PfxFileName.pfx -inkey PrivateKeyFile.key -in certificateFile.crtIn the above command, set the name of the PFX file, and input the name of the file containing the private key and certificate file in place of PfxFileName.pfx, PrivateKeyFile.key, and certificateFile.crt.
Method 2: Using the GUI-based Wizard
For this method also, you will need a Windows OS running computer system. The steps are quite simple and even a beginner can perform them. Before starting the process, must confirm that you are using the same system on which the certificate was generated; Otherwise, you will trigger an error. The procedure includes:
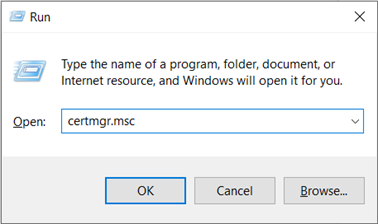
Step 1: Through the Run dialog box, open Certificate Management Console by typing “certmgr.msc” and clicking on the Ok button.
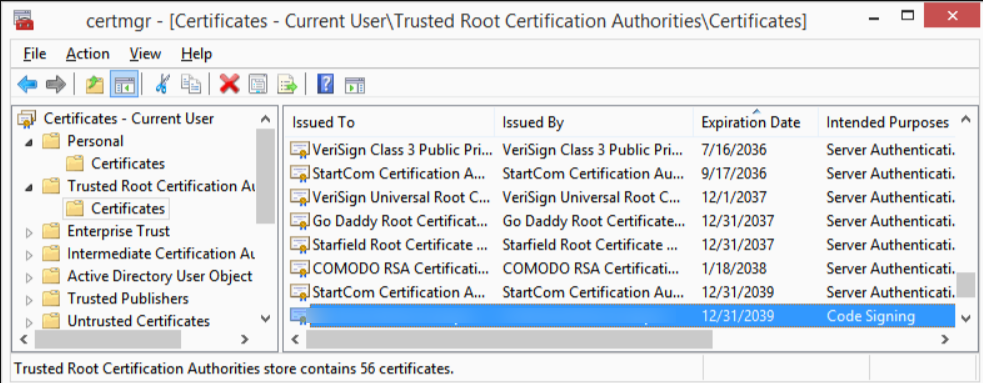
Step 2: It will display all the folders, containing different certificates. Select your certificate and double-click on it.
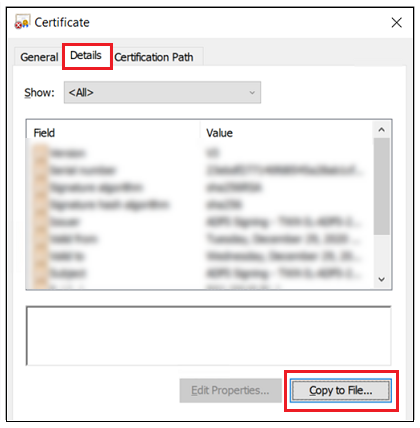
Step 3: Go to the Details tab and click on Copy to File button. It will open the Certificate Export Wizard.
Step 4: First, click on the Next button and then select the Yes, export the private key option.
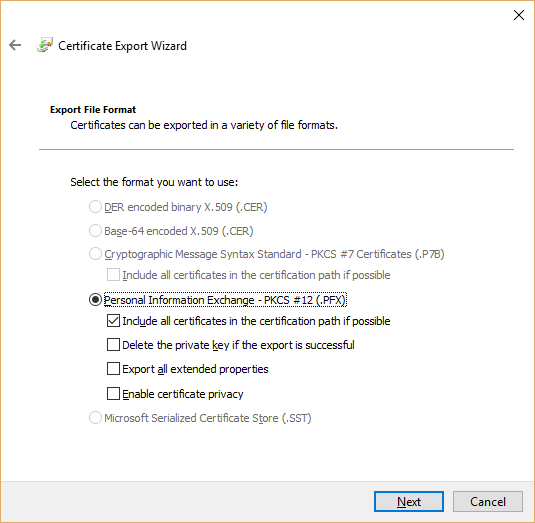
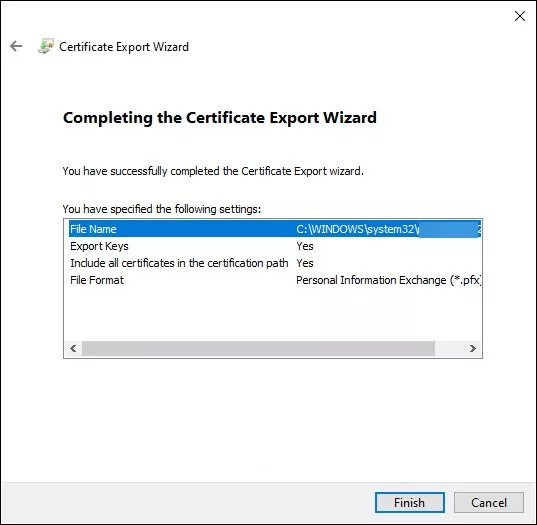
Step 5: As you move further, select Personal Information Exchange – PKCS #12 (.PFX) and under it choose to Include all certificates in the certificate path if possible and enable the certificate privacy option.
If you need any additional files, you can choose the option accordingly.
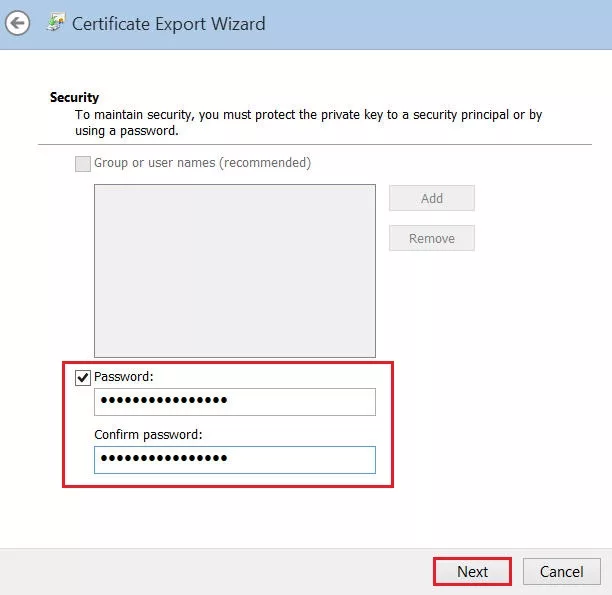
Step 6: Further, set the password and encryption standard to follow.
Step 7: Using the Browse button, select the location, where you want to store the PFX file and click on Next.
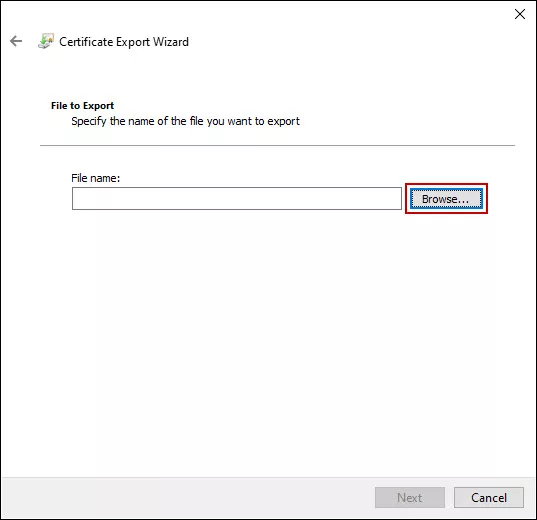
Step 8: Confirm the settings and click on Finish.
A Primary Differentiation To Know: .pfx vs .cert Certificate Files
Many people get confused between the .pfx and .cert files. And the primary reason behind the confusion is that most personnel think that they can use any file for security purposes, as it contains the certificate.
Recommended: How to Convert a PFX Certificate to JKS, P12, CRT?
However, there’s a significant difference between .pfx and .cert files, which everyone must understand to prevent complications while using digital certificates.
| Basis | .pfx File | .cert File |
| Usage | Used to store the digital certificate and associated objects in a single file. | Used to store digital certificates with only one cryptographic key. |
| Objects in File | .pfx contains the following objects: Digital Certificate Private KeyPublic Key | .cert stores the below objects: Digital Certificate Public Key |
| Shareability | You must not share the .pfx file with anyone, as it contains the private key. Always keep it secure using multiple security mechanisms. | Sharing it provides no harm, as it only contains the public key, which is meant to get distributed. It helps the systems to verify your authenticity. |
| Requirement | It is a must for organizations to perform essential security operations, such as code-signing software. | It is a crucial file to create a .pfx file by storing it in the PKCS#12 archive format. |
| Which File To Consider? | Always prefer CA to provide the certificate in the .pfx format, as it saves time, effort, and resources. | You can consider the .cert file according to your requirements. |
| Issuer | Certificate Authority issues .pfx file. However, sometimes CA provides two different files and you have to combine them to create the PFX file. | Certificate Authority provides the certificate after validating your details. |
| Security | The password configuration option is available. | You cannot password the file. |
Where To Get a Software Publisher Certificate?
To protect the software from unauthorized modifications and to build a reputation across digital platforms, a Software Publisher Certificate is a prime requirement. It’s a digital certificate that gets used in the PFX format to digitally sign executable files, including .exe, .app, .xpi, .ps1, and more.
Getting such a certificate in PFX format is always better for securely and effortlessly securing the software. The best place to purchase it is SignMyCode. It’s an all-in-one platform, offering all types of Code Signing certificates from top Certificate Authorities, who issue certificates in PFX format. In addition, SignMyCode will also provide:
- Availability of all three Certificates, including IV, OV, and EV Code Signing Certificate
- Support Services in your time zone and too 24/7
- Resources, such as guides and manuals from professionals
- Amazing deals and offers on Code Signing Certificates
- 100% guarantee for certificate’s authenticity
Concluding Up
With the advancement in system and security, PFX files are preferred to store the digital certificate and associated keys. However, some CAs still issue the certificate and private key in separate files.
But you can integrate them and create a single PFX file using the command prompt and Certificate Export Wizard. It helps to create an archive of the public key, private key, and the digital certificate with .pfx extension, following the PKCS#12 format.

Cheap Code Signing Certificates
Prevent Code Tampering and Authenticate Code Integrity by Digitally Sign your Code with Trusted Code Signing Certificates.
Starting at Just $215.99/Year
