
How To Install an IV (Individual) Code Signing Certificate?
Individual Validation Code Signing Certificate is particularly for developers, who work independently and publish their software. Such developers are not a part of an organization, but its also necessary for them to digitally sign their applications, scripts, and other executable files.
When a Certificate Authority issues an IV Code Signing Certificate, the developer can’t use it instantly. However, the certificate’s proper installation is required. And here you will get the complete procedure, explaining every step to cover to install an IV Code Signing Certificate.
Note: As per the new CA/B (Certificate Authority/Browser) changes, Now, All Code Signing Certificate now generated and stored on physical tokens and HSMS. (Applicable from June 1st, 2023)
So, What’s in the Package you Received from your CA?
So based on new requirements of issuing OV and Individual Code Signing Certificates, the installation process is changed now. You will receive the enrollment package including USB Token from CA ensures that only authorized individuals can access the certificate and use it for signing the code along with instructions to setup.
QUICK NOTE: It’s important to know that while the overall process remains the same across certificates, there may be slight variations in the package contents based on the specific Certificate Authority you are dealing with.
Setup Individual Code Signing: Installation Guide (As Per New CA/B Requirement Starting from June 1, 2023)
Let us begin!
STEP 1: Installing Safenet Authentication Client
To successfully install Safenet Authentication Client, it is recommended to follow the instructions provided in the letter received from the Certificate Authority.
The letter should contain a URL that grants access to the required software, SafeNet Authentication Client. Download the appropriate installer for the machine on which you intend to perform the signing process.
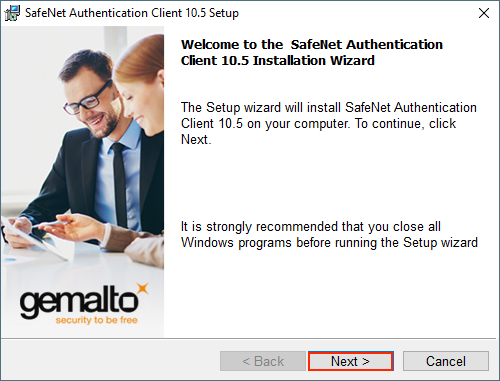
Once the installer has been downloaded, please follow the installation steps.
After the installation is complete, it is advisable to reboot your system to ensure the SafeNet Authentication Client has been successfully installed. Once the reboot is done, you can use your OV or EV (Extended Validation) Code Signing certificate.
STEP 2: Plugging in the USB Token
Before plugging in the USB token, launch the Safenet Authentication Client software that was recently installed. Once the software is open, you can safely insert the USB token into your system.
Upon inserting the USB token, the SafeNet Authentication Client should automatically detect and display your card within the application interface, as depicted in the example.
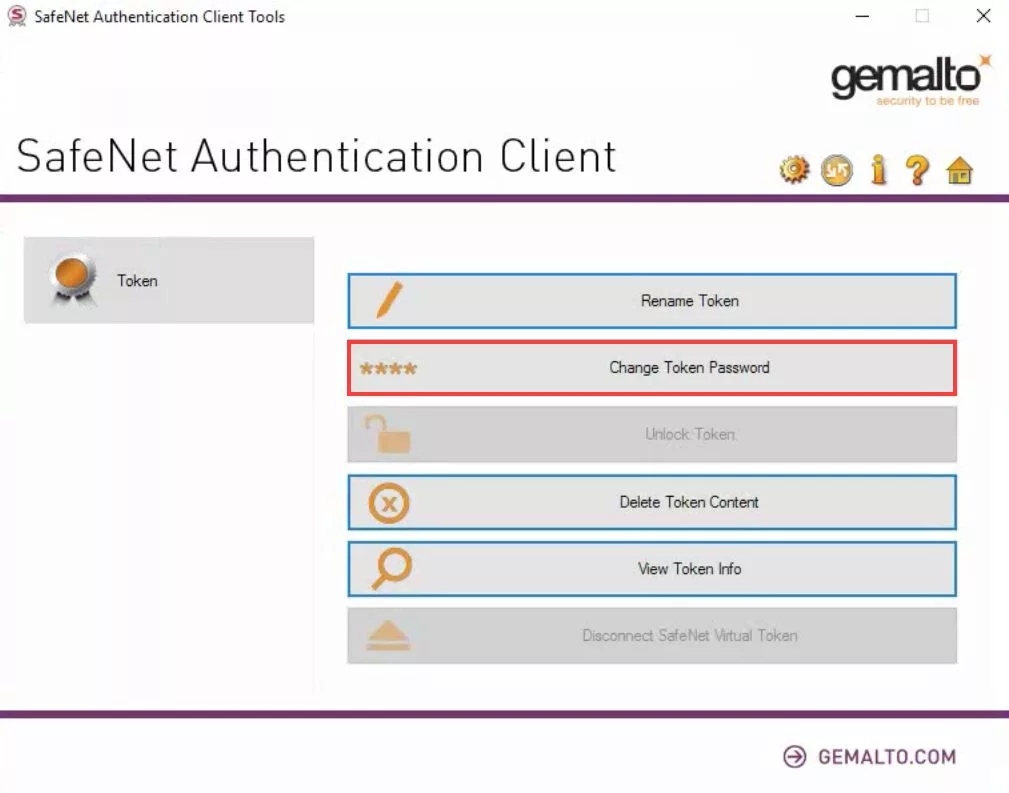
STEP 3: Changing the Token Password
Although not mandatory, changing the password for your token is recommended. To do this, locate the option to “Change Token Password” within the Safenet Authentication Client software. By selecting this option, you will be presented with an interface to modify the token’s password.
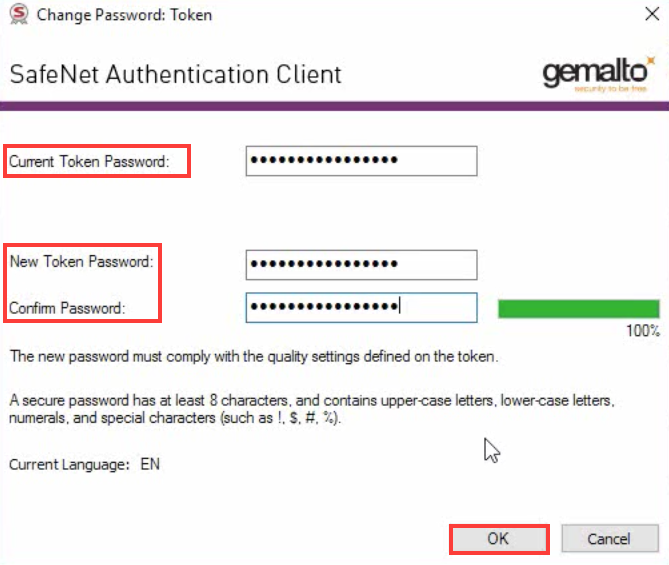
To change the password, input the existing password, which should have been provided to you by the Certificate Authority via email. Then, choose a new and unique password that satisfies the security requirements set by SafeNet.
STEP 4: Collecting the Certificates
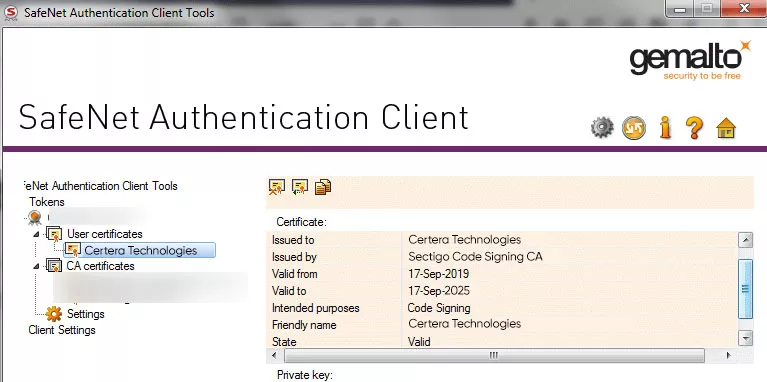
To collect the certificate necessary for signing your application, locate and select the “Gear” icon. You can find it within the Safenet Authentication Client software. This action will modify the interface, displaying a sidebar similar to the example shown under this step.
Within the sidebar, you will find tokens and dropdown menus. Click through the dropdown menus until you locate the specific certificate associated with your company, as demonstrated in the example.
With these steps completed, you can begin signing your application using your IV/EV/OV Code Signing certificate!
Recommended: Signing Executable Files Through Microsoft SignTool
——————————————————————–
Outdated Individual Code Signing Installation Process Applicable Only if you Buy Before May 15, 2023)
Prerequisites To Complete Before Installation
Before you start with the Individual Code Signing Certificate installation, verify that you have completed the following tasks:
- The validation process has been completed successfully and you have the email for the same from CA.
- The IV Code Signing Certificate is available on the hard disk of the local machine instead of the Web browser.
- The certificate must be in the .pfx format (single file), rather than two separate files (.pvk and .cert/.crt/.spc). If the CA provides you with two files, you can effortlessly convert them to a PFX file.
The Procedure To Follow For IV Certificate Installation
For installing the Individual Validation Code Signing Certificate, you must execute the following steps in the provided sequence.
Step 1:
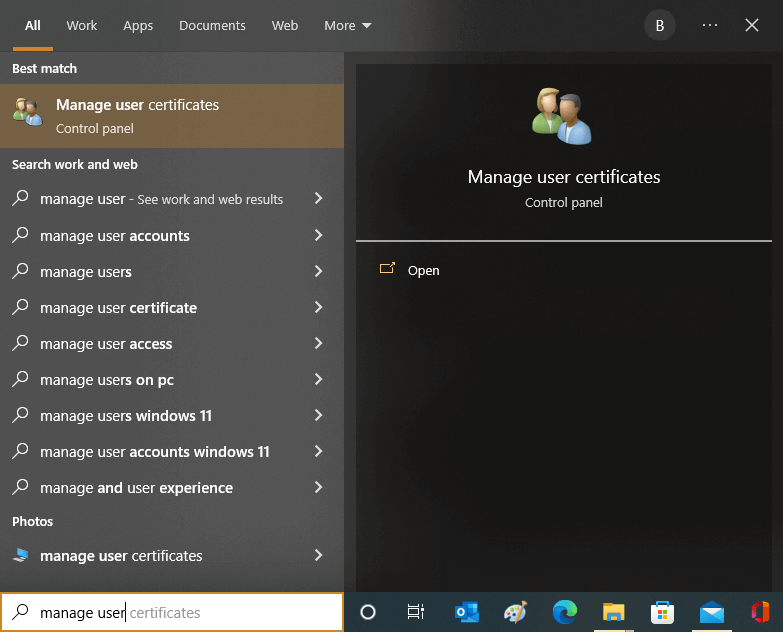
On your Windows computer system, search for “Manage User Certificates” or open the run dialog box and type “certmgr.msc”.
Step 2:
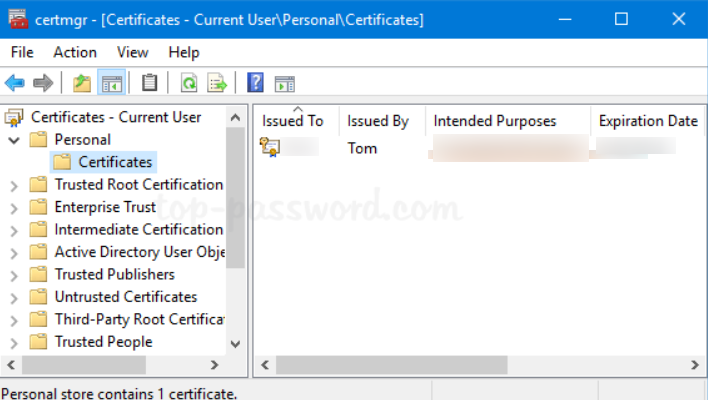
Once your certificate management console gets opened, you will see multiple folders under Current User.
Step 3:
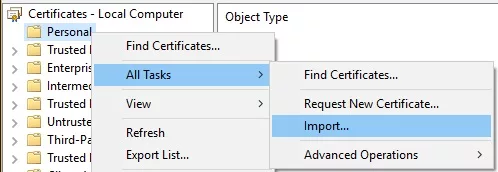
Select the Personal folder and right-click on it. Further, go to All Tasks and then select the Import option.
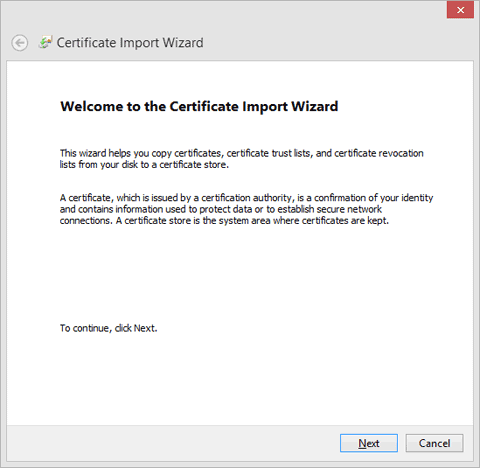
Step 4:
You will see Certificate Import Wizard on your screen. Click on the Next button to start it.
Step 5:
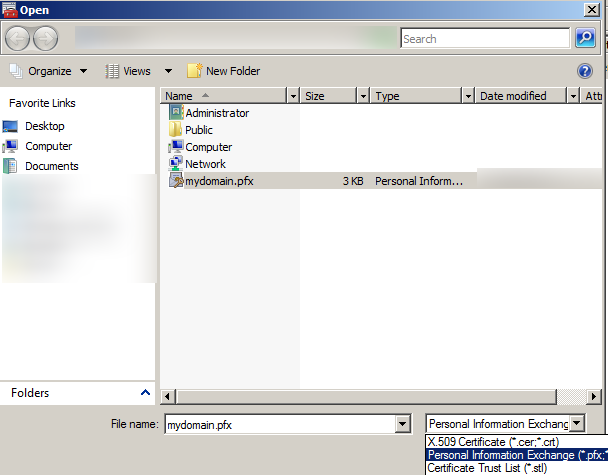
Wizard will ask you to select the certificate file. You must use the Browse button to choose the correct file.
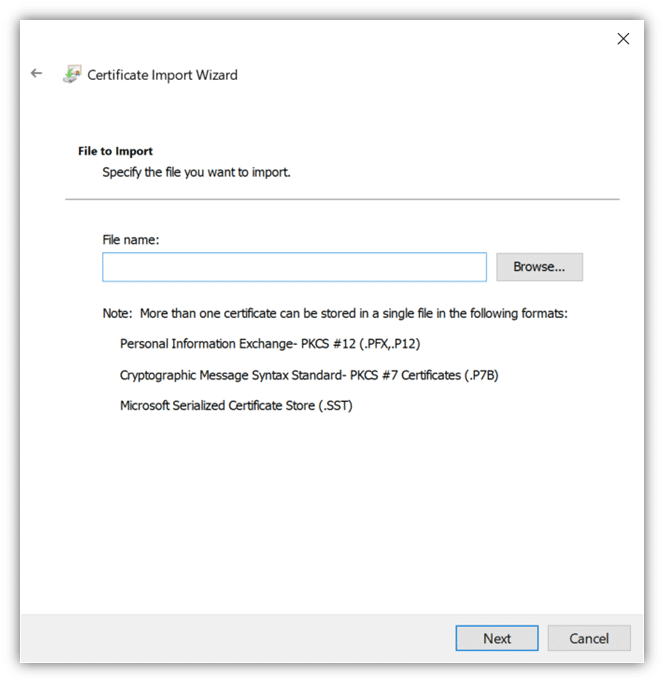
If the .pfx file doesn’t show up, select the Personal Information Exchange option from the menu beside the File name field.
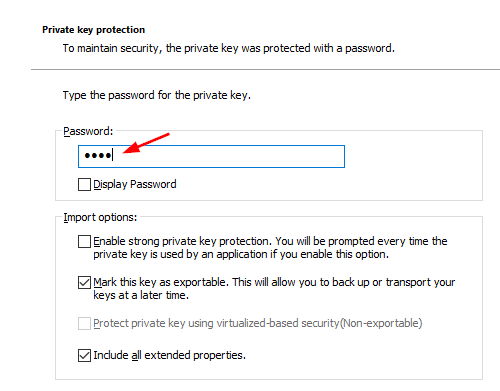
Step 6:
Click on Next and input the password associated with your IV Code Signing Certificate.
Step 7:
Select the folder, in which you want to store the digital certificate. For the IV certificate, select the Personal folder through the Browse button. And choose Place all certificates in the following store option.
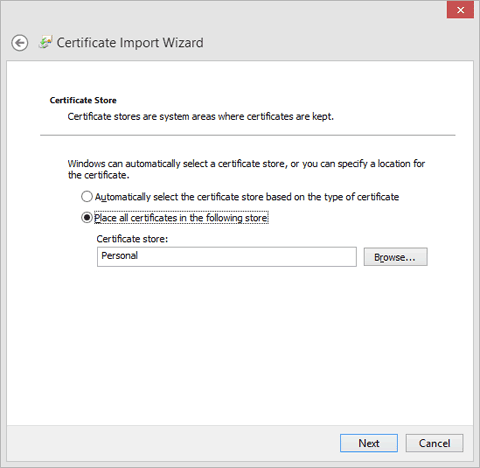
Step 8:
Move forward by clicking on Next. Verify the details and Finish.
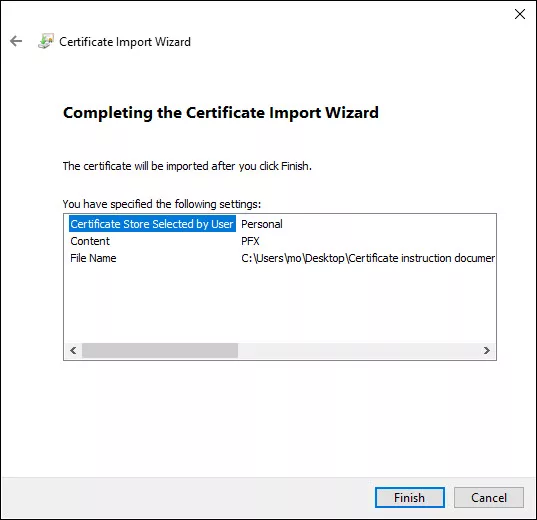
After completing all the mentioned procedures, Wizard will display a process completion message. As a result, your IV Code Signing Certificate will successfully get installed on your system. Now, you can use it for signing any executable file, including applications, scripts, and more.
Wrapping Up
To install an IV Code Signing Certificate, the developer or publisher must follow the prerequisite checklist. It helps to complete the requirements to smoothly complete the installation process.
And always prefer to use PFX files, as it’s easy to manage, install and utilize. Additionally, you should use the Certificate Import Wizard to undergo an error-free and seamless procedure.
Buy Comodo Individual Code Signing Certificate and Prove your Identity as a Trusted Individual Software Publisher!

Cheap Code Signing Certificates
Prevent Code Tampering and Authenticate Code Integrity by Digitally Sign your Code with Trusted Code Signing Certificates.
Starting at Just $215.99/Year
