
Quick Guide to Install a Code Signing Certificate on MS Windows
Note: This is Outdated Conted due to New CA/B Baseline After June 2023
Like other technical tasks, code signing certificate installation is more accessible through specific predefined steps. However, if you’ve never installed a code signing certificate and are using it for the first time, you may find it a little tricky to know how to install it.
You may have found guides showing how to generate a CSR to install your code signing certificate, and you may have even learned how to install it using specific tools with interfaces. But what happens in the background isn’t something everyone is familiar with.
So if you’ve purchased a code signing certificate by yourself and want to install it on MS Windows operating system, it may become challenging as you may not have installed it often that you know about all the steps.
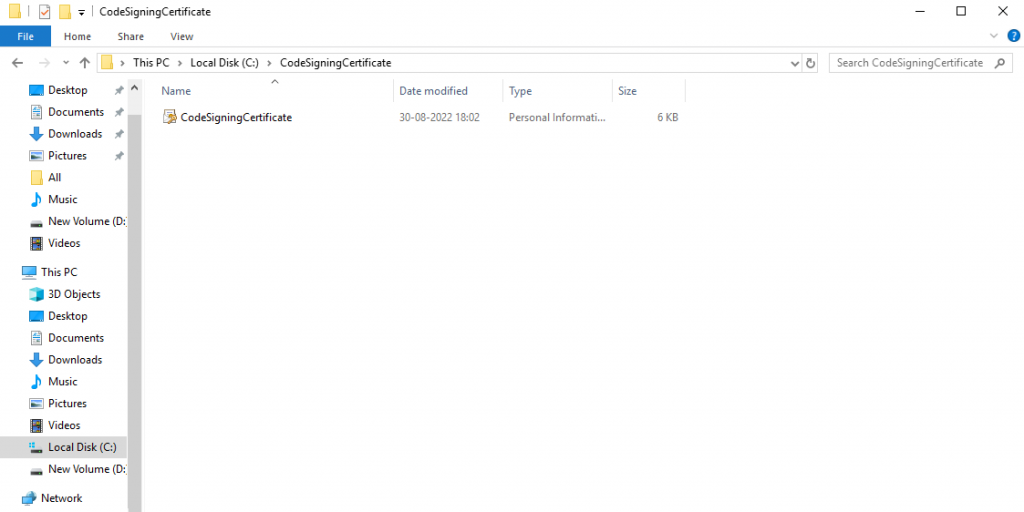
Therefore, here we’ve broken down the easy-to-follow process of importing a code signing certificate to the personal folder of your device within Windows built-in console Certificate Manager (CertMgr.msc).
How to Install a Code Signing Certificate on MS Windows?
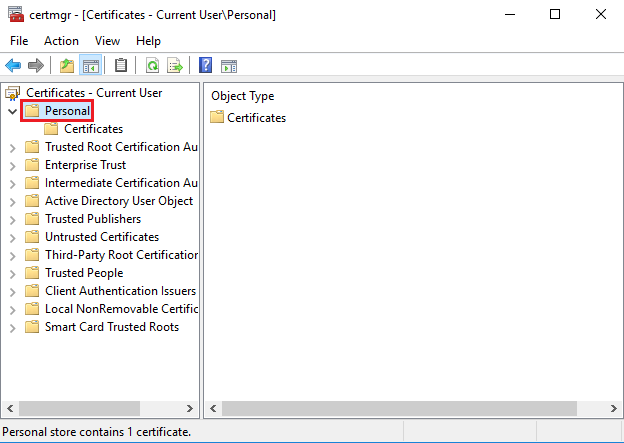
Click on the Start menu, and type “Manage User Certificates.” Once Manage User Certificates show up, select it.

Once the Manage User Certificates opens, double click the folder named Personal from the left side menu. It’ll open another menu with a folder beneath it called as Certificates.
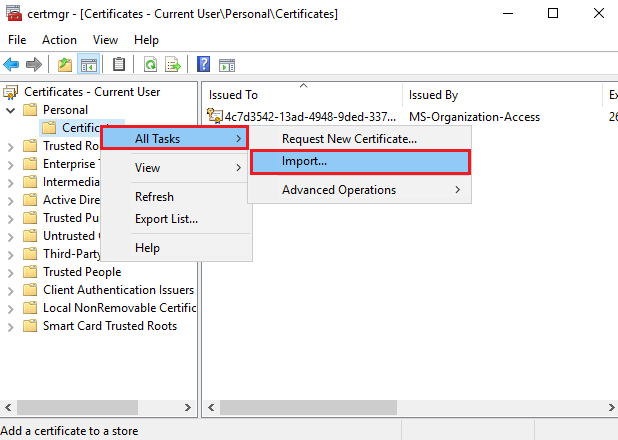
Select the Certificates folder and right-click on it. Go to All Tasks > Import. It’ll open the new window of Certificate Import Wizard.
Furthermore, click the Next button once the built-in Certificate Import Wizard opens.
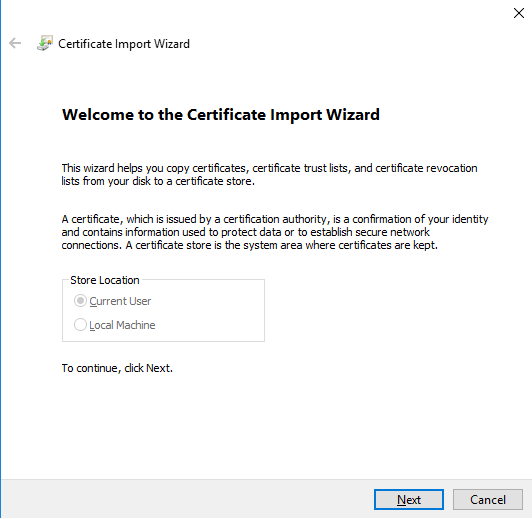
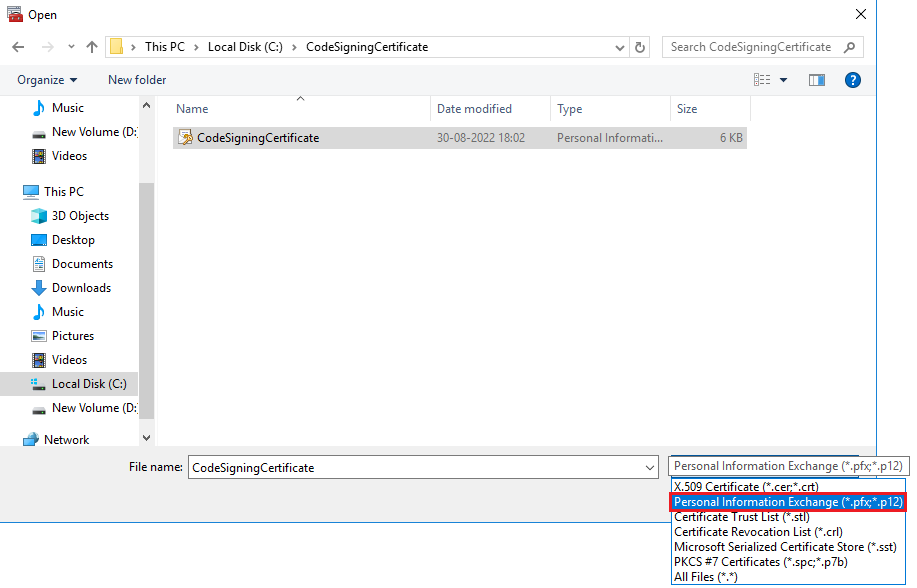
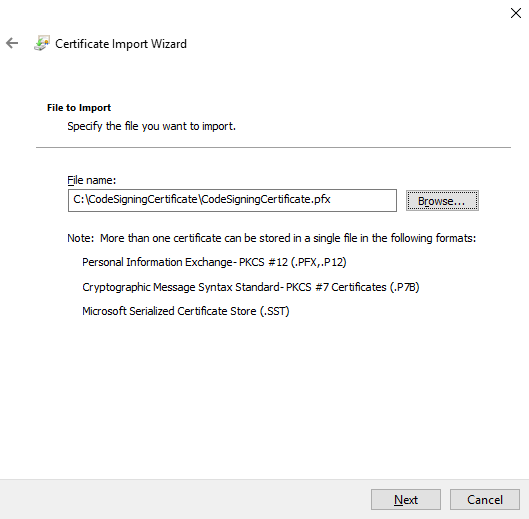
Once you click the Next button, the File to Import window will open. Click Browse and a new screen will open from where you can select your code signing certificate file, which is the PKCS file (.pfx).

Note: For instance, if the file isn’t displayed, and you’re seeing .crt or .cer files, select Personal Information Exchange from the bottom drop-down menu near the file name field. And then, you should find the certificate with file format .pfx, or else it could also be PKCS12 or .p12 file.
Note: The .pfx file is your code signing certificate combined with the private key. So, if you don’t find the file, you’ll need to combine your key and code signing certificate file and generate the .pfx file. Similarly, it’s only possible by using the same computer in which you generated your CSR (Certificate Signing Request).
And some of the ways you can do this are:
- Using OpenSSL for creating PKCS code signing certificate – Here, OpenSSL is an open-source command line console that lets you manually handle digital security certificates and their associated cryptographic keys.
- Certificate converter tool that makes your converting or certificate and key files combining process easier.
After selecting the .pfx file, press Open, and it’ll take you back to the previous window of Certificate Import Wizard. And, now you should be able to see your code signing certificate as selected with the entire path in the empty browse field. Now, press Next.
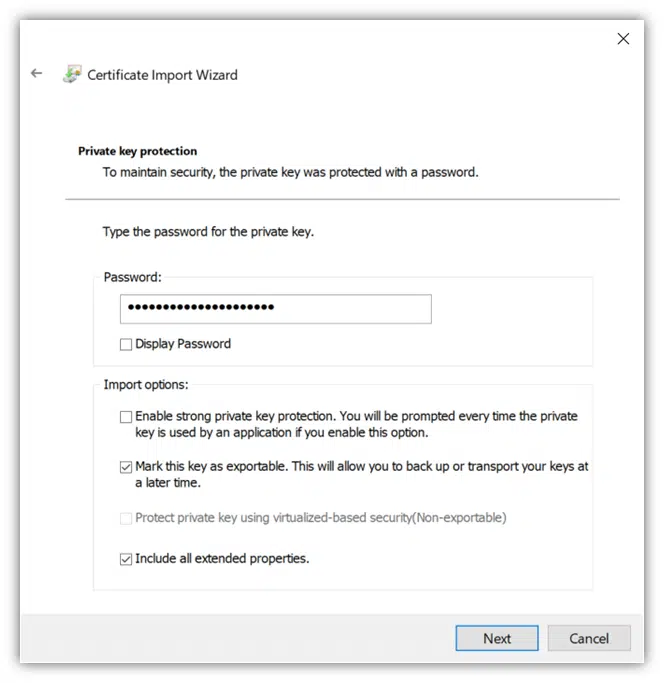
Once the next window opens, enter the password of your code signing certificate. Your password is the same one you created at the time of generating your code signing certificate.
In addition, you can mark the key as exportable or leave the option open based on your requirement. And then press Next.
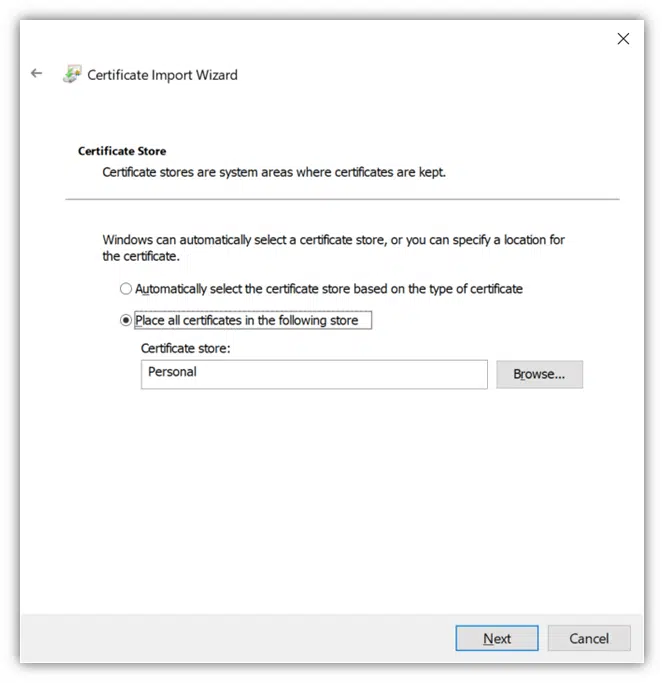
Further, you’ll require to select where within the Certificate Store device you would like to import or install your code signing certificate. Usually, the Personal folder is selected by default in your Certificate Store.
Though, you can choose any specific location you want. And then click Next.
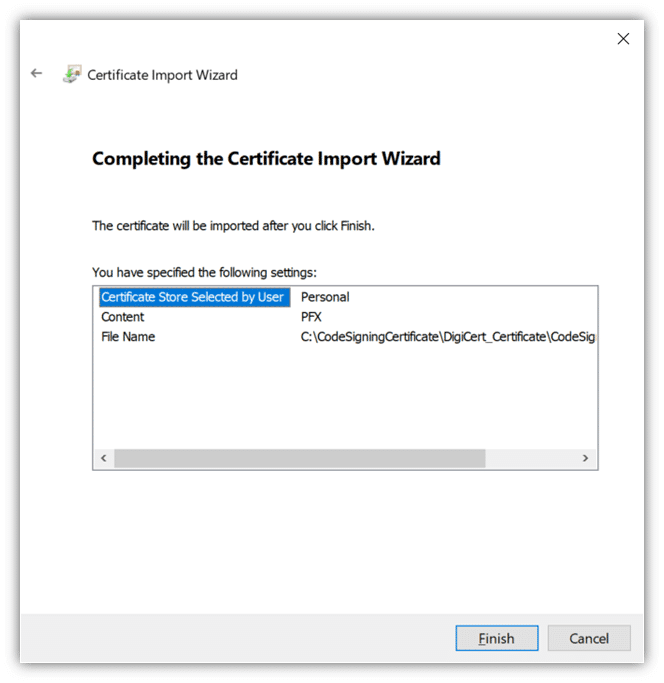
Once Next is pressed, you’ll be forwarded to the final step, where the Certificate Import Wizard screen will show the information to ensure everything is correct. And once you click Finish, the certificate import process finishes.
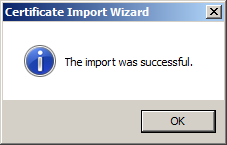
You’ll be displayed the message “The import was successful.”
And then it’s recommended once it’s imported, you verify whether it’s working as it should be. And to verify, you’ll need to go back to the Windows Certificate Manager screen and navigate to the Personal > Certificates folder. You should be able to see your newly installed code signing certificate listed within it.
Lastly, once you find your code signing certificate is listed, you can be confirmed it’s installed accurately on MS Windows.
Quickly Digitally Sign your Software or Application to run smoothly and securely with Best Code Signing Certificate at just $215.99/yr

Cheap Code Signing Certificates
Prevent Code Tampering and Authenticate Code Integrity by Digitally Sign your Code with Trusted Code Signing Certificates.
Starting at Just $215.99/Year
