
Microsoft SignTool: Signing Executable Files Through a Seamless Approach

Code Signing Certificate has become a prominent security solution for every software publisher and developer. And after purchasing it, there are still a lot of queries that arise before tamper-proofing the source code.
And then a big question also comes, How to sign executable files using Code Signing Certificate? The simple yet most accurate answer to it is Microsoft SignTool. Whether you have an IV, Standard, or EV Code Signing Certificate, you can use SignTool to unleash the potential of any digital certificate.
A lot of developers need help using SignTool. But, with this step-by-step guide, you will learn digital signing and timestamping of an executable file in just a few steps. Let’s get started.
What is Microsoft SignTool and its Usage
SignTool is a program available for the Microsoft Windows operating system. It’s a tool you can access through a command-line interface for signing and timestamping applications, software packages, and other executable files.
It is, by default, available in the Windows Software Development Kit. And you can effortlessly find it in the Bin folder inside the Windows SDK folder, stored in C:\ drive. However, if you are utilizing Visual Studio for code development. Then, you can access SignTool from within the app, as it comes in the Visual Studio installation package.
Steps to follow to Digitally Sign an Executable File with SignTool
Signing an executable file is a smooth five-step procedure. You can complete it within minutes by following the below instructions.
Step 1: Accessing the Command Prompt to run SignTool Commands
To utilize the SignTool, you must open the Command Prompt in Administrator mode. You must open the startup menu and search for Command Prompt or cmd. Further, you have to:
- Right-click on the Command Prompt icon.
- Select “Run as Administrator”
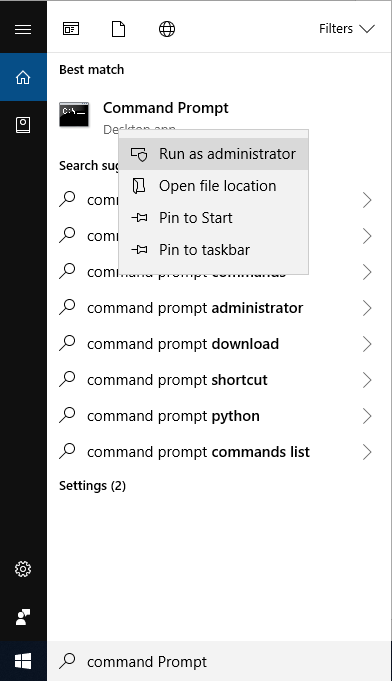
Once the system runs, you will get a dialog box to provide permission. After selecting the appropriate response, Command Prompt with administrator controls will get opened.
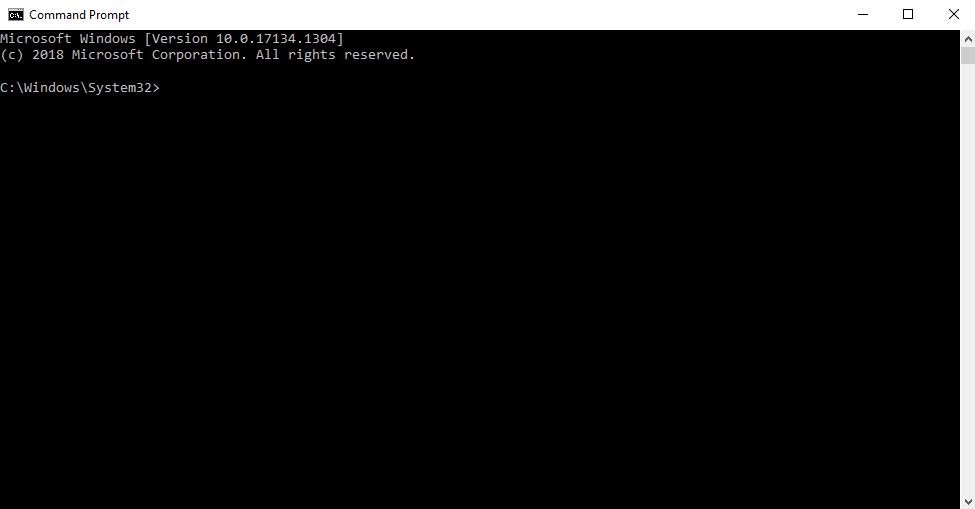
Step 2: Logging In as Administrator
Sometimes, you have to log in using default system credentials to access the administrator controls. And once the system verifies it, a new window will get displayed as below.
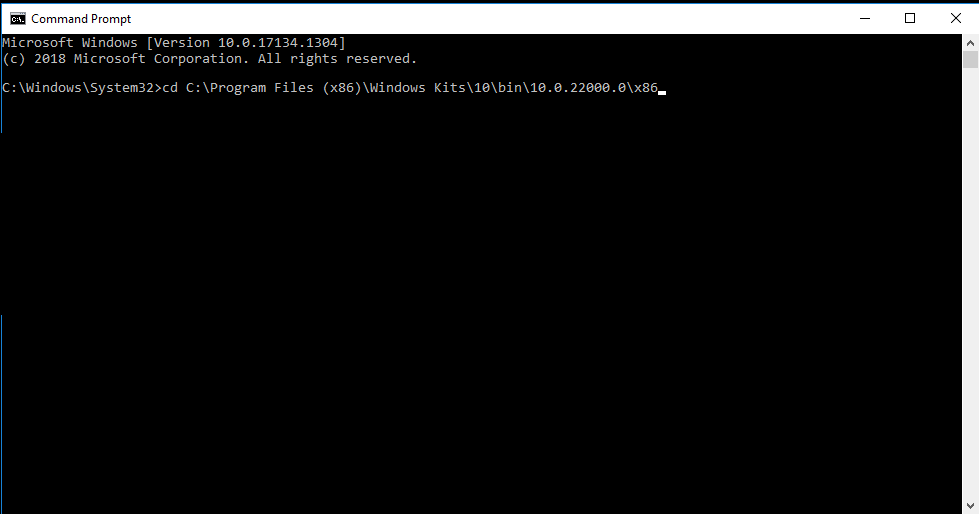
Step 3: Navigate to the SignTool directory.
To complete step 3, you must know the exact location of SignTool in your system. Primarily, it is available in the C drive by default. If you have saved it in a different file, you must use the path to that particular location in the command.
You have to run the following command:
cd C:\Program Files (x86)\Windows Kits\10\bin\10.0.22000.0\x86The ‘cd’ command gets used to change the current directory. It will help you access and utilize files inside the SignTool directory.
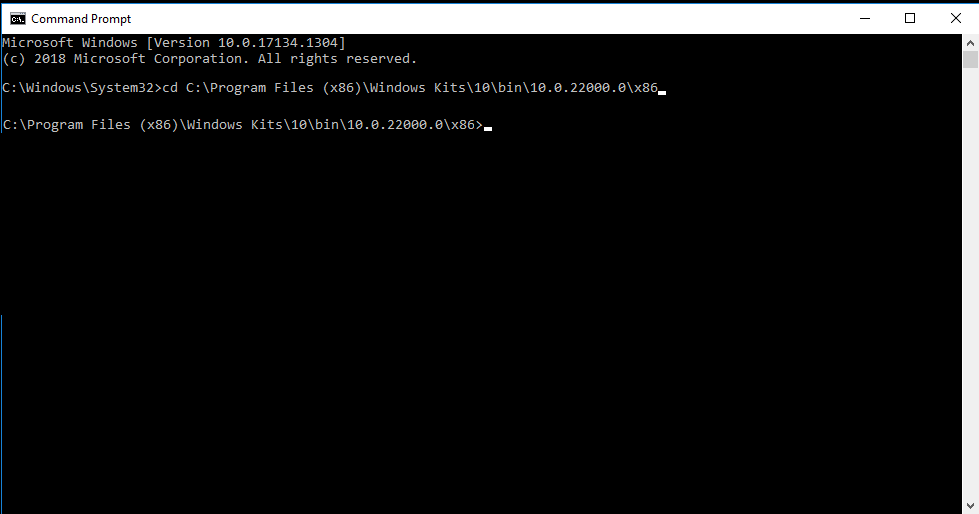
After writing the above command and hitting enter, you will see a command prompt similar to the one below. Now you are in the SignTool directory, enabling access and utilizing its resources.
Step 4: Signing the Executable File using IV, OV, and EV Code Signing Certificates
You must run the following command to sign the file per your requirements.
To Timestamp and Digitally Sign an executable file simultaneously:
.\signtool sign /tr http://timestamp.digicert.com /td SHA256 /fd SHA256 “c:\path_to_your_file\software.exe”For timestamping purposes, you must write down the address to a timestamping server of your Certificate Authority. The above command illustrates the address to DigiCert Timestamping Server. You can replace it with your CA’s address, and your software will get a timestamp and a digital sign.
Recommended: Sign Executable Files Using EV Code Signing Certificate
In addition, you will see a confirmation message when your file gets digitally signed.
To Sign a complete Application Package:
signtool sign /tr http://CAtimestamp.server.com /td SHA256 /fd SHA256 /a "C:preserve the environment by providing coverage \filepath\Mydriver.dll.To secure an app package using a code signing certificate, you have to define the hashing algorithm, path to the file, and password in the command.
Step 5: Verifying the Signature
After running the appropriate command to sign the software, it is crucial to validate it. And for it, you have to run the below command:
signtool verify /v /pa "C:\filepath_to_your_exe_file\software.exe"To execute the command, you have to define the path to the signed executable file. And, if it gets signed, you will get an output.
Wrapping Up
Microsoft SignTool is the primary solution software publishers use to sign their software, application package, and executable files.
It comes in handy with Windows SDK and Visual Studio. You only have to install the Code Signing Certificate and hardware token to sign. Then, you have to open the Command Prompt and run the command as mentioned above according to your requirements.
Furthermore, you can also verify whether your executable file gets signed or not. If you are a software developer, you must know about SignTool and its fundamental commands. It will help you solidify code security, optimize brand reputation, and enhance user trust.

Cheap Code Signing Certificates
Prevent Code Tampering and Authenticate Code Integrity by Digitally Sign your Code with Trusted Code Signing Certificates.
Starting at Just $215.99/Year
