
How to Solve svchost.exe High CPU Usage in Windows 11?

If you find multiple svchost.exe instances running simultaneously in your system, then it can lead to high CPU usage. Here, we are going to explain some of the different tactics to help you fix Svchost.exe’s high CPU usage in Windows.
Let’s begin!
What is svchost.exe?
Svchost.exe, short for “Service Host” or “Svc Host,” is a system process responsible or liable for hosting over one service for Windows operating systems. Because it acts as a container for multiple Windows services, svchost.exe takes up a bigger chunk of memory, which leads to high CPU usage and ends up dragging the system performance.
What causes svchost.exe High CPU Usage?
Here are some of the reasons that cause svchost.exe high CPU usage.
Viruses and Malware:
Malware or viruses disguise themselves as svchost.exe processes and consume CPU resources to perform malicious activities. So, it’s vital to regularly scan the system for malware or viruses and keep the antivirus software up to date.
Windows Updates:
One common cause is Windows Update running in the background. When Windows is downloading, installing, or configuring updates, svchost.exe may consume high CPU resources.
Background Processes:
Different background processes running on your system, such as scheduled tasks, maintenance activities, or applications with high resource demands, may indirectly contribute to svchost.exe’s high CPU usage.
Faulty Windows Services:
Certain Windows services hosted by svchost.exe may malfunction or become stuck in a loop, which, unfortunately, results in high CPU usage.
Protect your Code against Tampering
Code Signing Certificates ensure the software’s integrity and authenticity, and get rid of the Unknown Publisher Message and Other Security Warning from Windows.
Ways to Fix svchost.exe High CPU Usage?
Here are some of the different ways to fix svchost.exe high CPU usage.
Execute a Malware Scan to check for Viruses
Step 1. Press the “Win” key and write “Windows Security”. Press Enter.
Step 2. In the appeared window, click on “Virus & Threat Protection”. Then, under the “Current Threats” option, click on “Scan Options”.
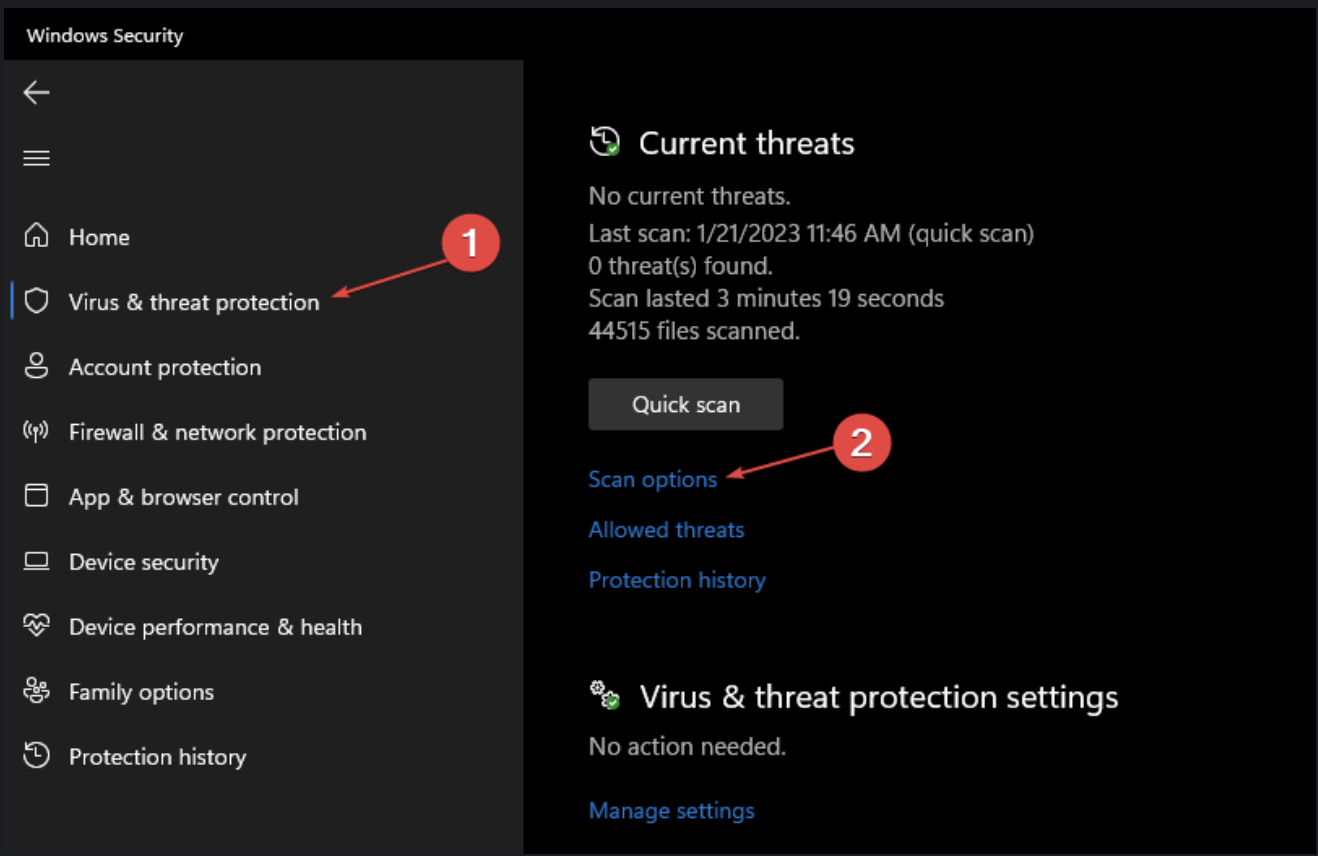
Step 3. In the available options, Select “Full Scan” and click the “Scan Now button” to initiate the virus scan procedure.

Step 4. Wait till the procedure is complete, then restart your system and check if the error is fixed.
Find and Disable the Service that Causes High CPU Usage Issue
Step 1. Open the task manager by right-clicking on the start menu.
Step 2. Go to the Details tab and right-click on the “svchost.exe” to select “Go to Services”.

Step 3. In the popup window, you have to right-click on any of the Processes to click on Stop.
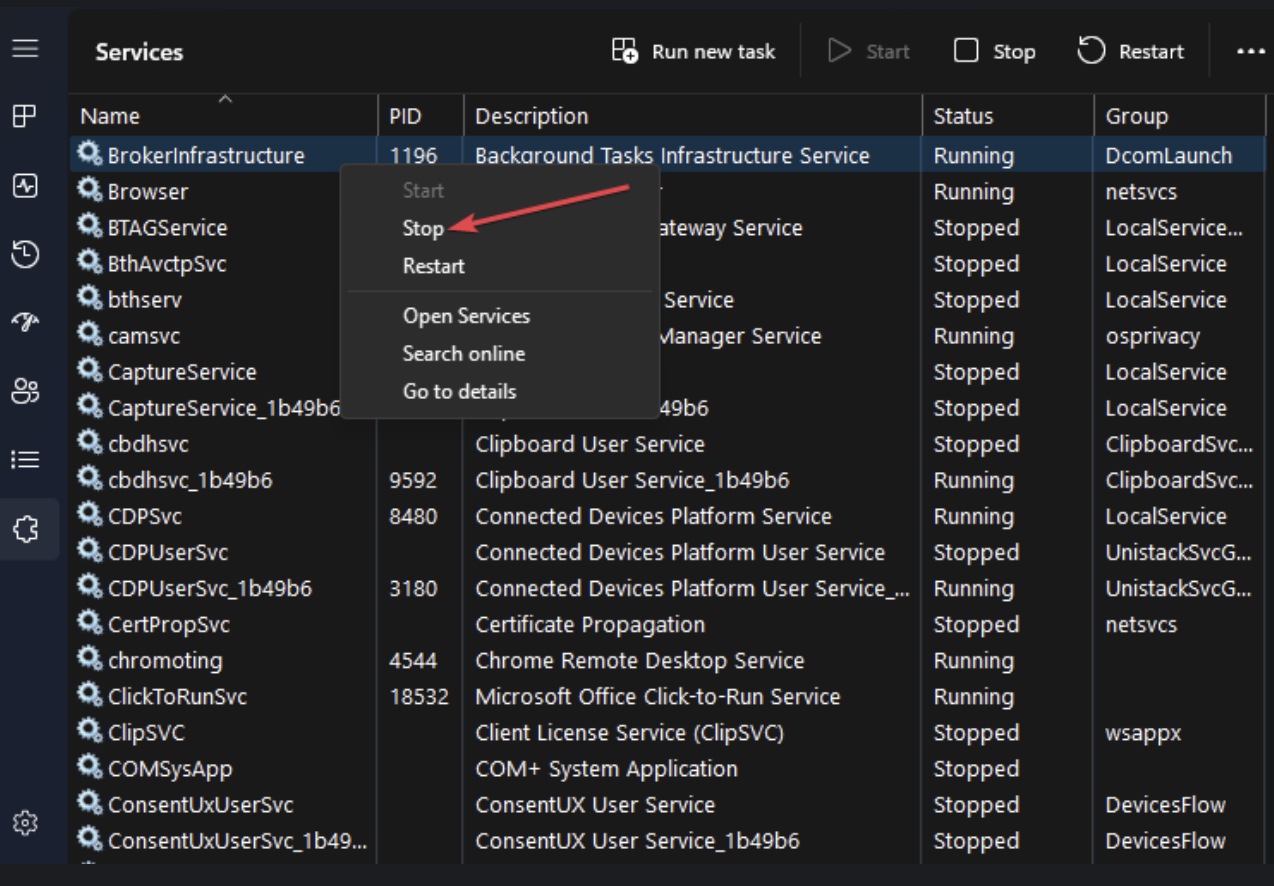
Step 4. Repeat the steps until you find the faulty process that is causing the error.
Step 5. Once you are able to find the problematic service, right-click on it to select the Open Services button.
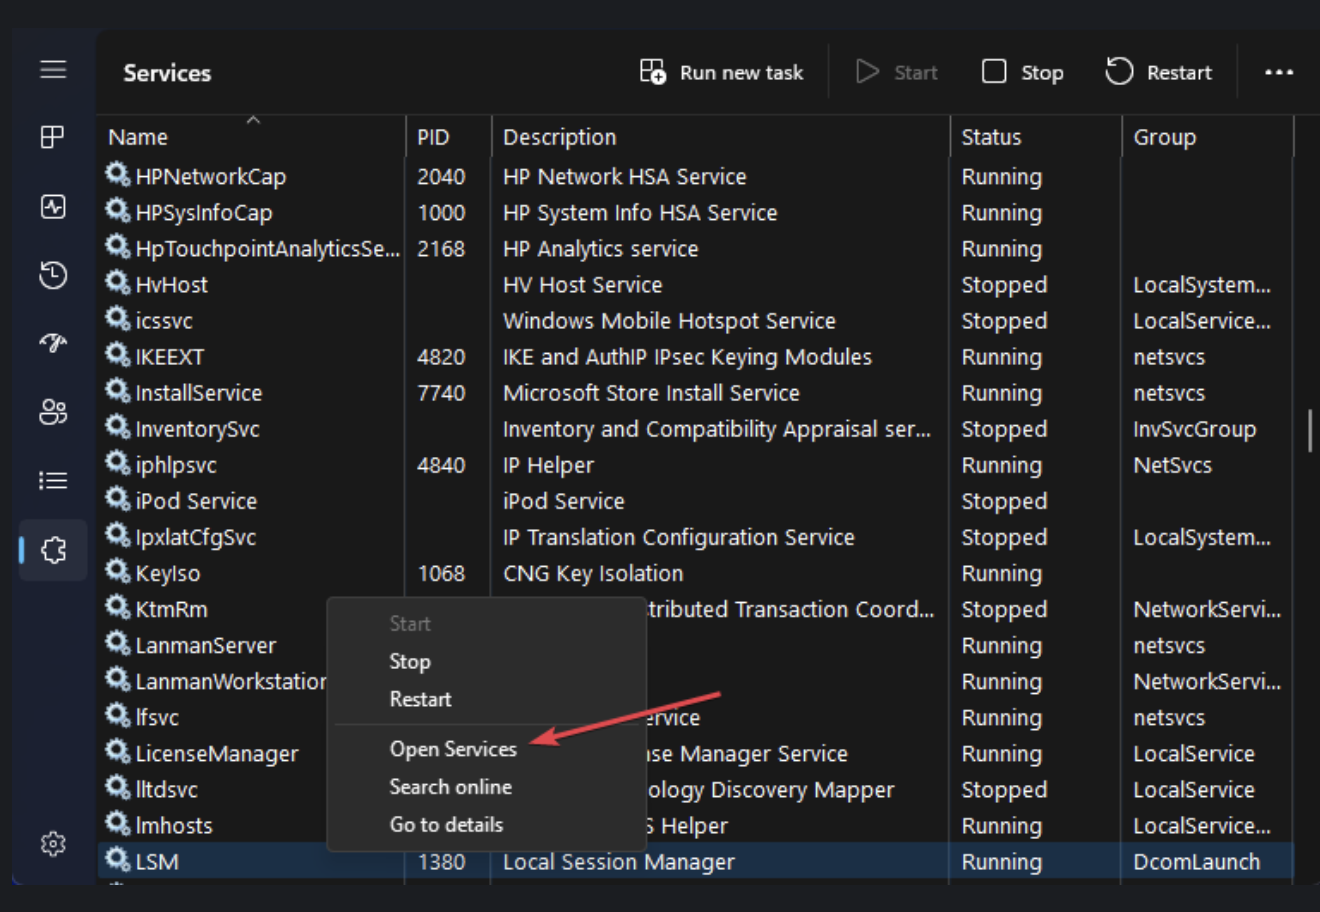
Step 6. Go to the Service window and right-click on the process name triggering the error. Here, we are taking Windows Update and click on Properties.
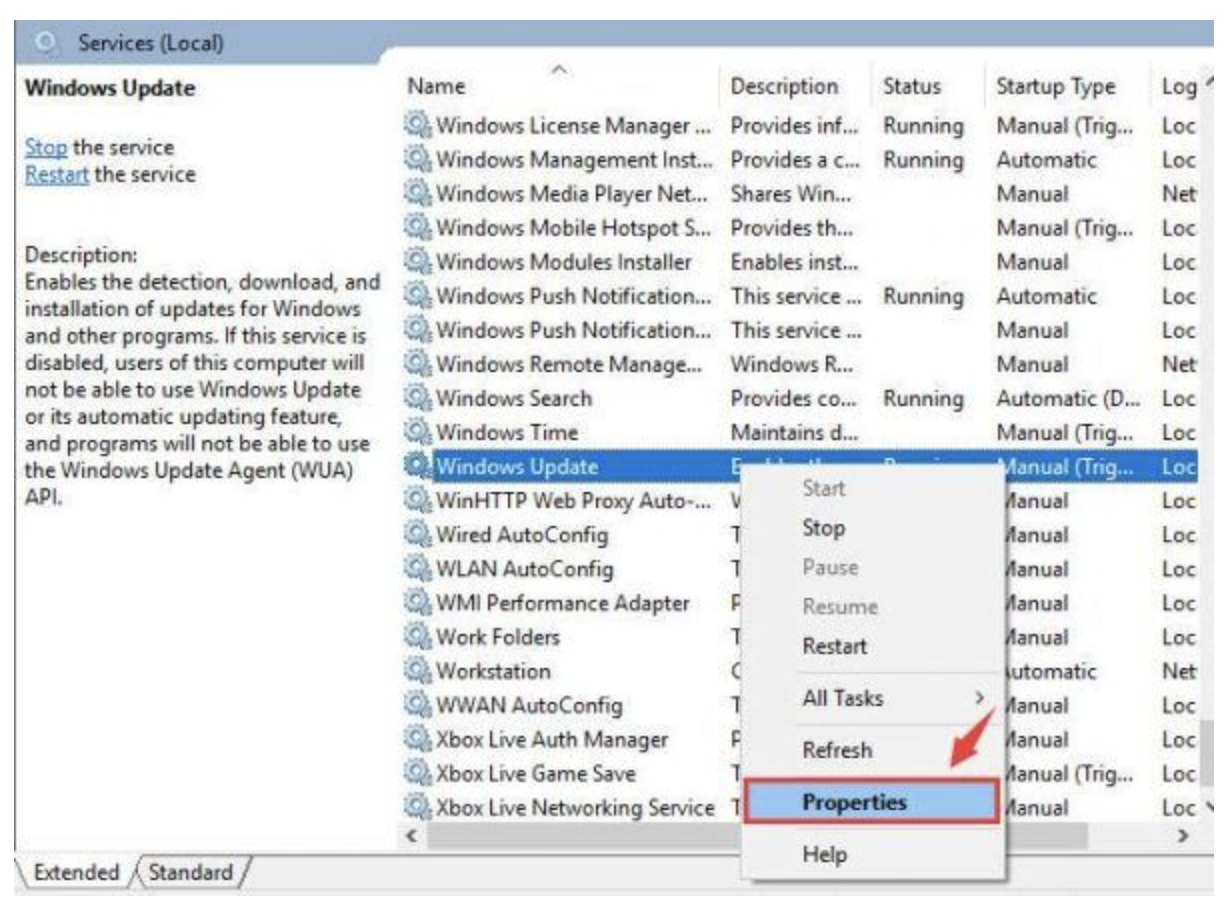
Step 7. Change the Startup Type to Disable and click “OK” to apply the changes.
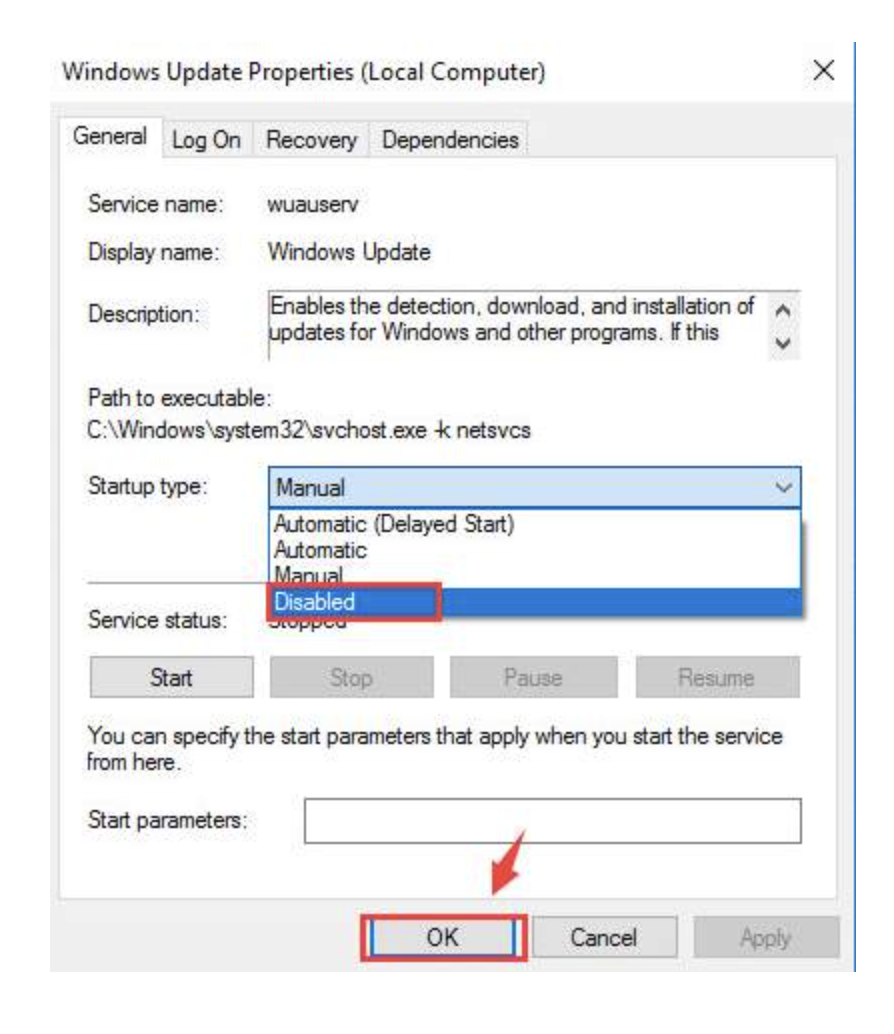
Step 8. Restart your system to check if the problem is resolved.
Clear Event Viewer Log
Large log files in Windows are the reason behind the excessively high usage of the CPU. Here’s how you can fix it:
Step 1. Press the Windows (Win) logo key and R simultaneously to open the “Run” dialog box. Then type “eventvwr” and press Enter.

Step 2. On the left side of the popup window, click Application under Windows Logs. On the right side, click Clear Logs.
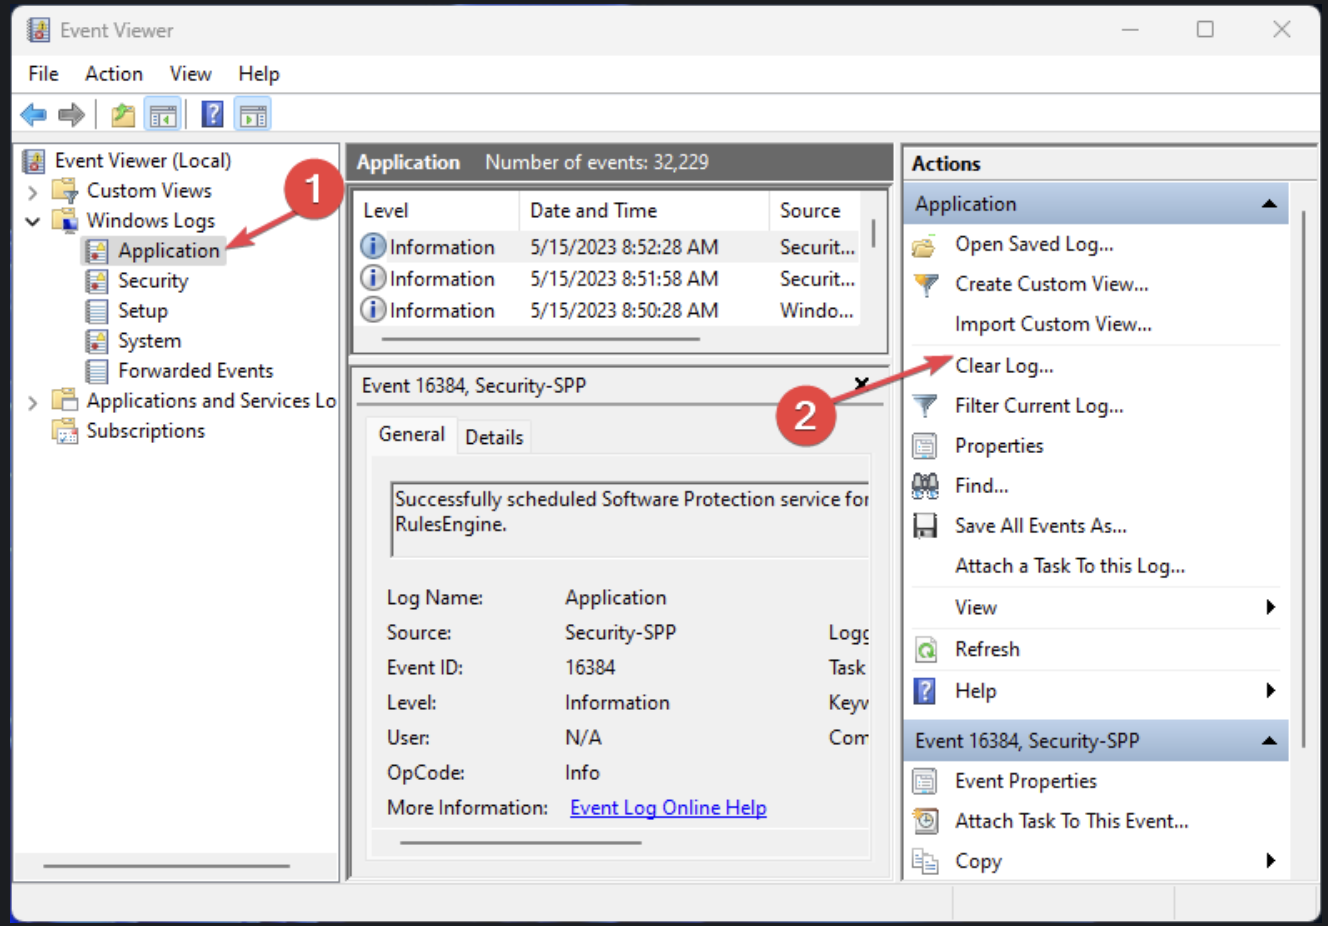
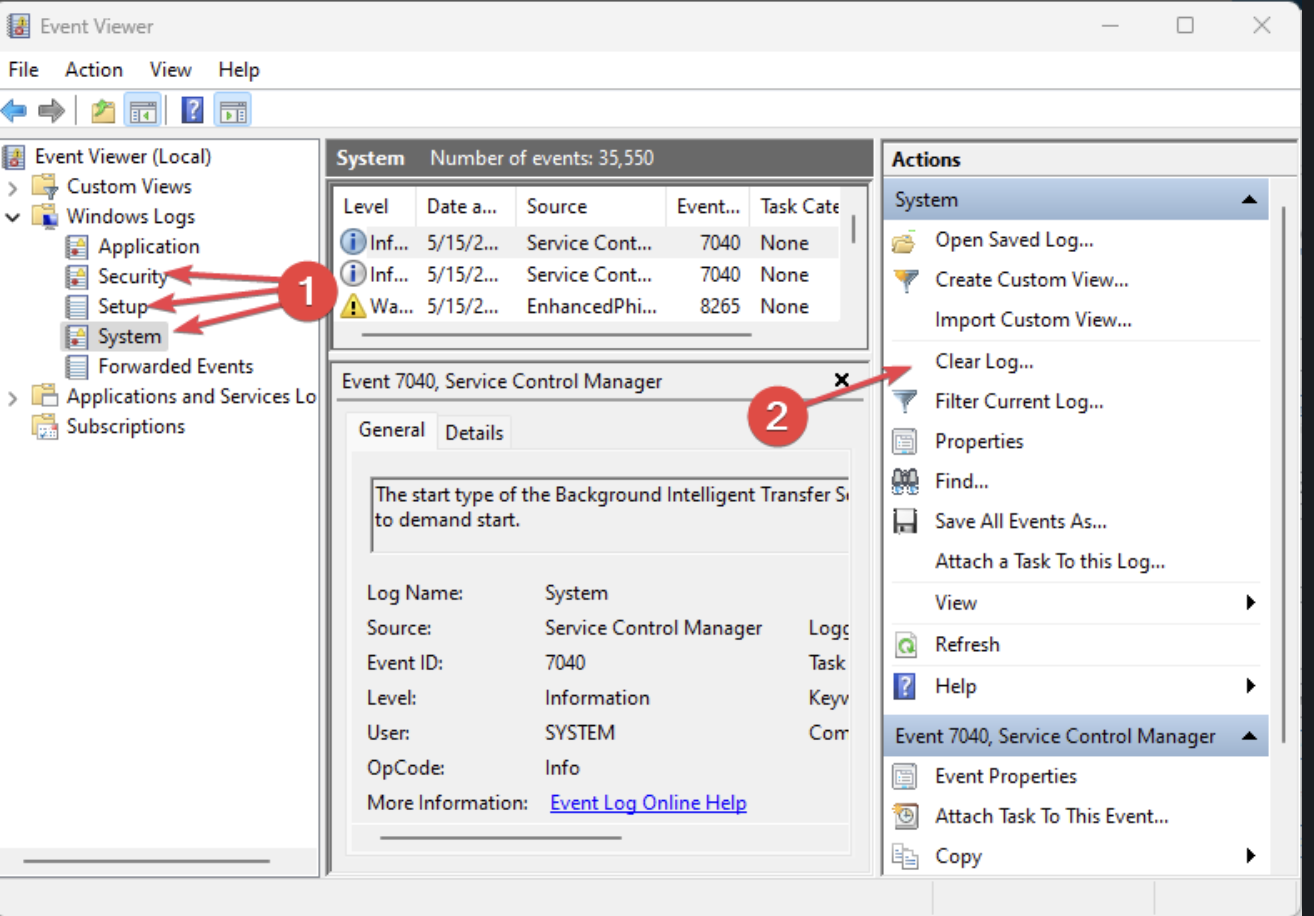
Step 3. Now, you have to repeat the same process to clear the Security, Setup, and System logs.
Step 4. And you are done! Restart your system to check if the problem is resolved.
Diagnose and Troubleshoot Windows Updates
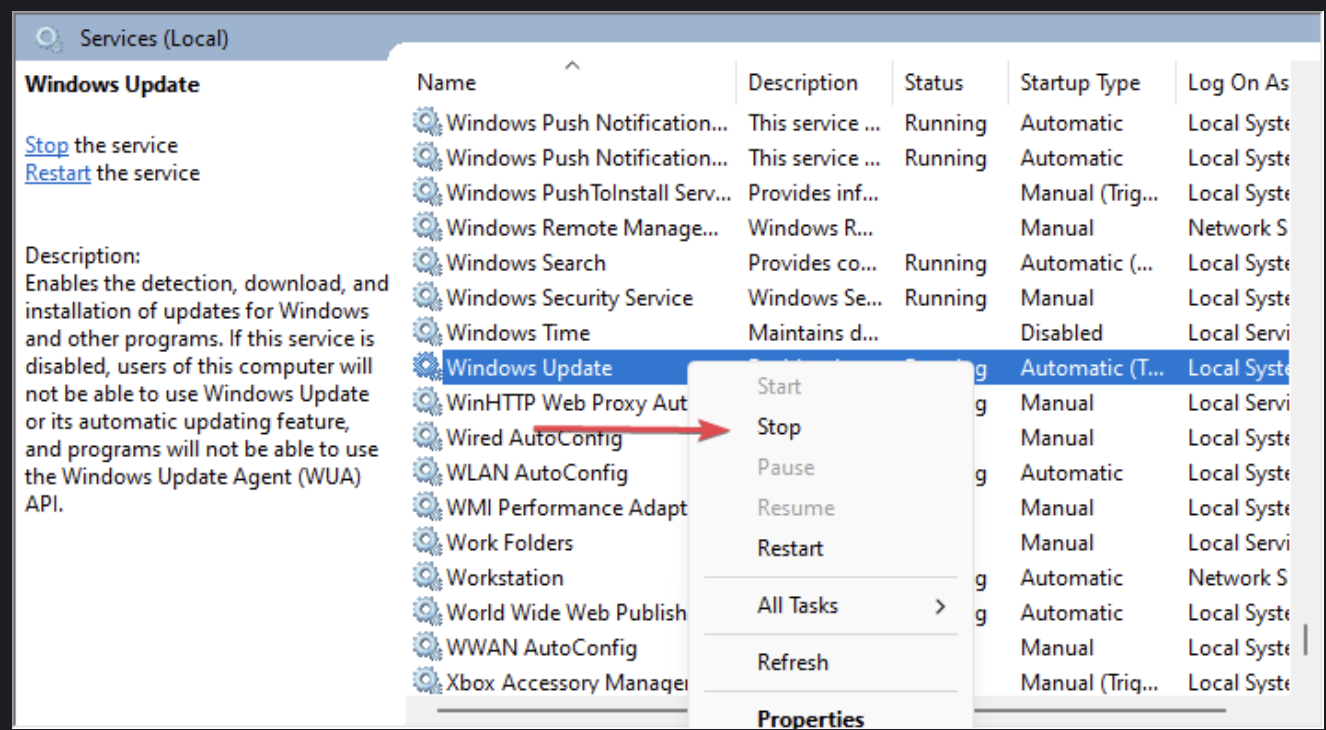
Step 1. Press the Windows (Win) logo key and R simultaneously to open the “Run” dialog box. Then type “services.msc” and press Enter.

Step 2. Find “Windows Update” in the services window, right-click on it, and click Stop.
Step 3. Open File Explorer (Press the Win key + E) and navigate path C:\Windows. Then, find the SoftwareDistribution folder, right-click on it, and select Delete.
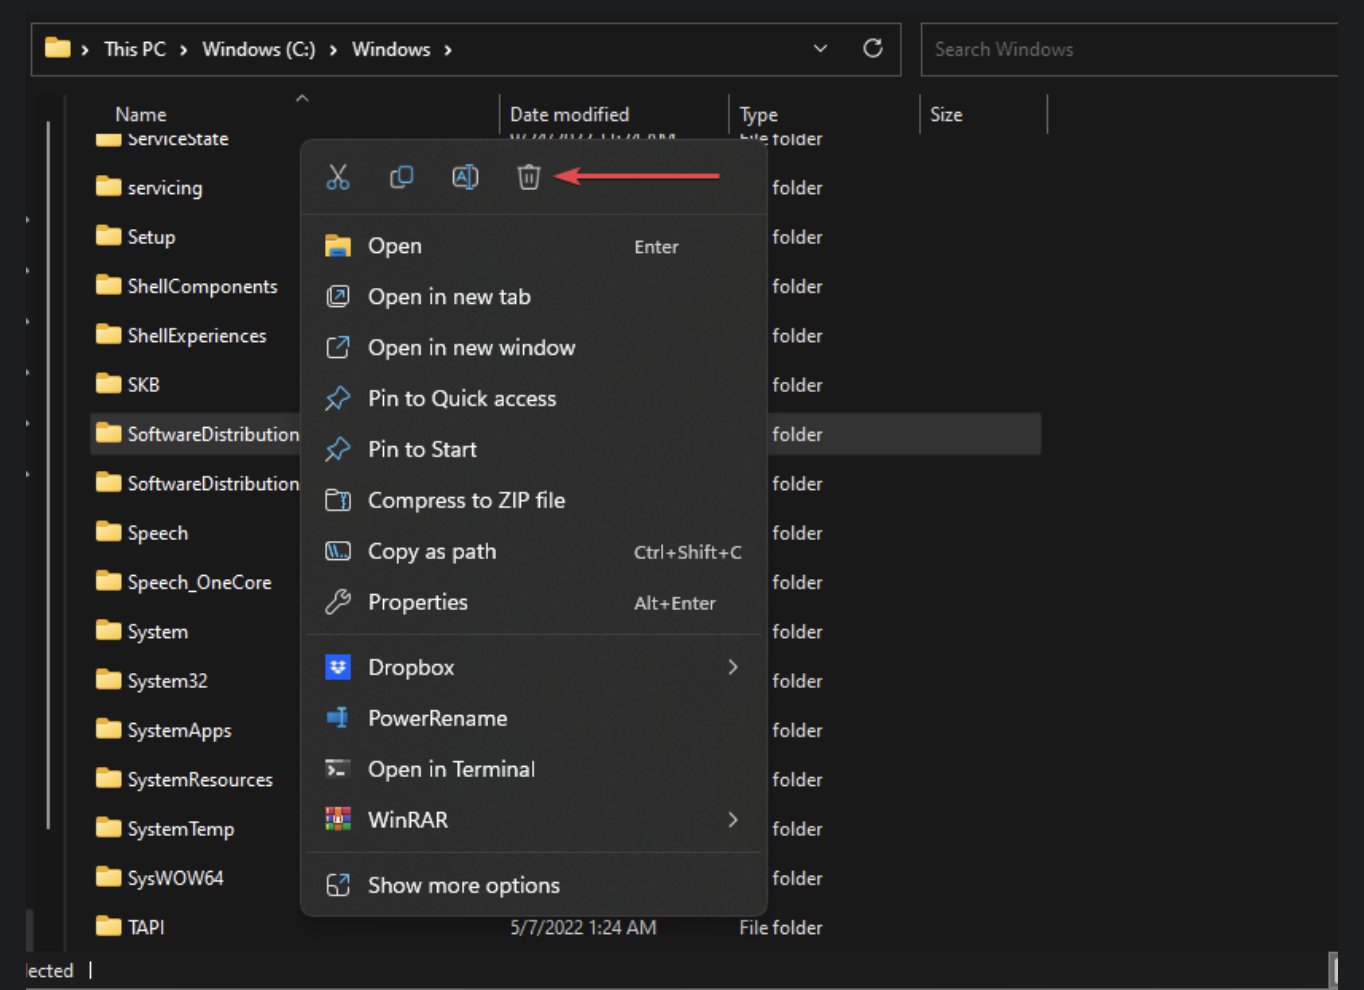
Here you go! Restart your system now!
Run the System File Checker Utility
With that being said, high CPU usage errors usually happen due to corrupt system files. By running an SFC scan, you can repair those corrupt files and fix the issue. Here’s how to do it:
Step 1. Press the Win Key, type “CMD,” and select Run as Administrator.
Step 2. If you haven’t given app administrative access, Click Yes in the User Account Control window.
Step 3. After the command prompt opens, write sfc /scannow and hit “Enter”.

Wait until the scan is complete, and then restart your system.
The Bottom Line
Here we go! Hope the above-explained ways help to fix svchost.exe High CPU Usage. As you have already seen, resolving this issue is not a hectic task, you can do it seamlessly by following some simple steps.
Microsoft Authenticode Signing
Verify the Integrity of your Software by Adding Authenticode Signature on 32/64 bit Software Binaries using Code Signing Certificate.
Buy Authenticode Code Signing Certificates
