
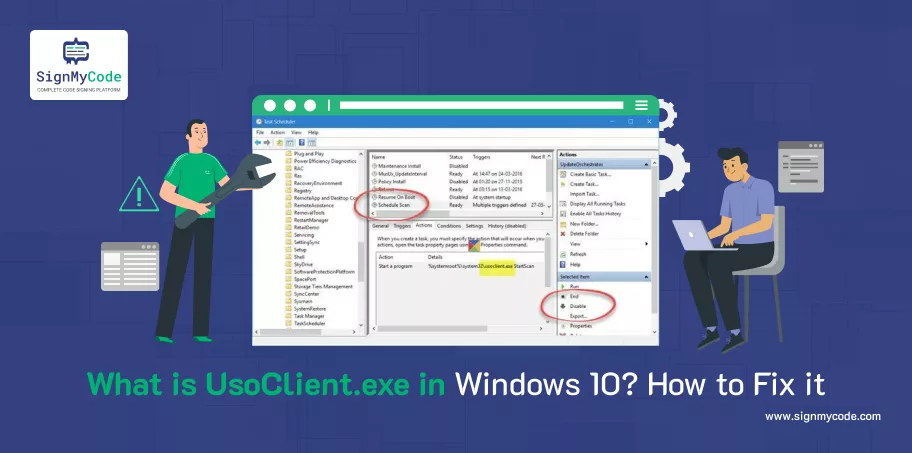
What is UsoClient.exe in Windows 10/11? How to Fix or Disable it?
Are you getting a UsoClient.exe CMD popup every time you start your system? If yes, then this post is for you!
Here we’ll answer:
- What Is UsoClient.exe?
- Is UsoClient.exe a virus or malware?
- How to disable the UsoClient.exe through different methods?
Let’s begin to know more!
What Is UsoClient.exe?
USO stands for Update Session Orchestrator. The UsoClient.exe file is an executable file associated with the Windows operating system. It is an important part of the Windows Update service and is responsible for:
- Checking,
- Downloading, and
- Installing updates for the Windows operating system.
Further, the usoclient.exe file is located in the System32 folder with a size of 19.5 KB and runs in the background.
Protect your Code against Tampering
Code Signing Certificates ensure the software’s integrity and authenticity, and get rid of the Unknown Publisher Message and Other Security Warning from Windows.
Is UsoClient.exe a Virus?
This is the most asked as well as concerned question, i.e, Is UsoClient.exe a Virus?
To check this, verify UsoClient.exe’s location. If it is there or located in C:\Windows\System32, then it’s safe to use. But if it’s located other than the specified location, you must do a scan with antivirus software and eliminate the chances of having a malicious file in your system.
How to Disable the UsoClient.exe using the Task Scheduler?
Follow the below steps to disable the UsoClient.exe using the Task Scheduler.
Step 1. Start the process by opening the Run dialog box by pressing the keys WIN + R together. Then, type taskschd. msc, and press Enter.

Step 2. Now, the Task Scheduler window will appear. In the left window pane, navigate to the below location.
Task Scheduler –> Task Scheduler Library –> Microsoft –> Windows
Step 3. Under the Windows section, click on UpdateOrchestrator. In the UpdateOrchestrator folder, select the Schedule Scan task and click on Disable.
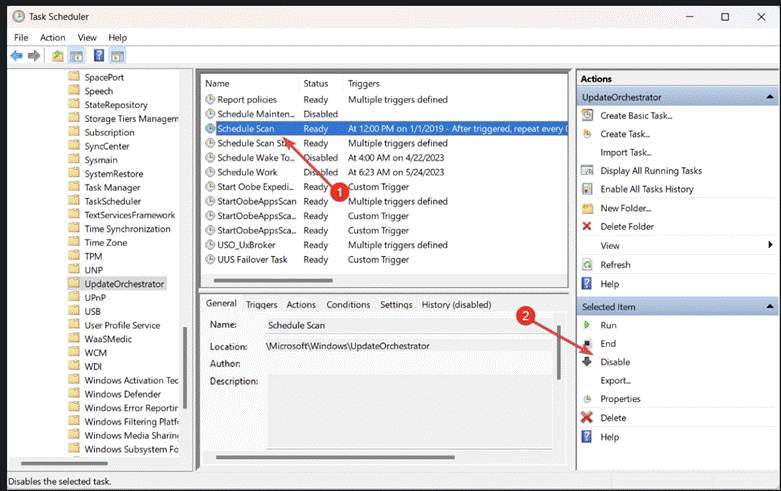
After following all the above steps, you’ll no longer see the UsoClient.exe CMD pop-up. Just close the Task Scheduler window and restart your system.
How to Disable the UsoClient.exe using Registry Editor?
Follow the below steps to disable the UsoClient.exe using the Registry Editor
Step 1. Start the process by opening the Run dialog box by pressing the keys WIN + R together. Then, type “regedit” and press Enter.
Step 2. In the Registry Editor window, head to the below location from the left window pane.
HKEY_LOCAL_MACHINE\SOFTWARE\Policies\Microsoft\Windows
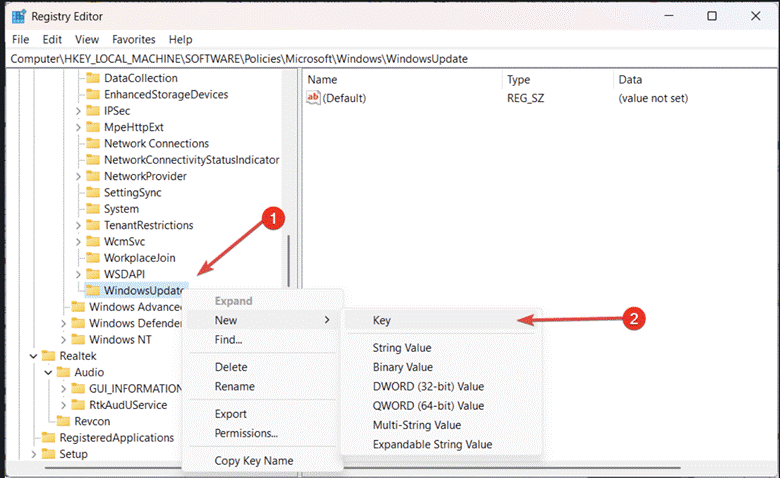
Step 3. Select the WindowsUpdate folder. If you are not able to find the folder, right-click the Windows folder. Select New and then choose Key.
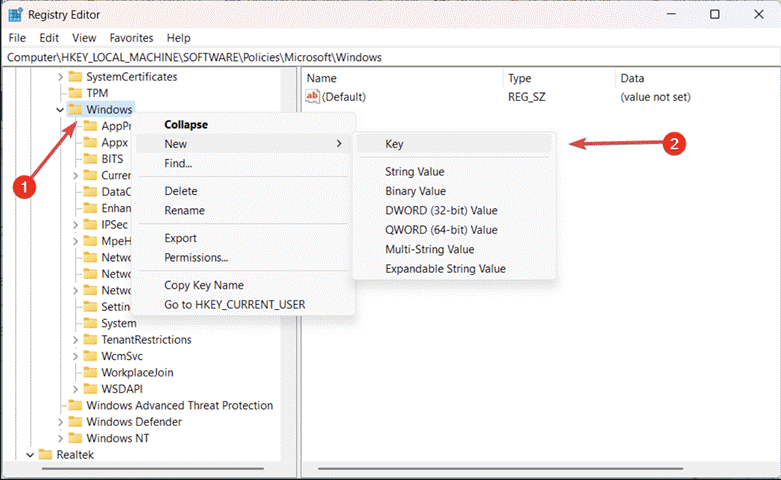
Step 4. Rename the key WindowsUpdate and press Enter.
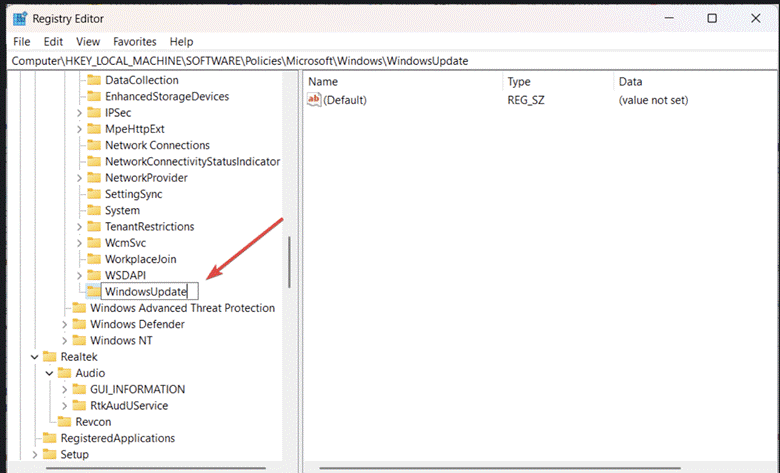
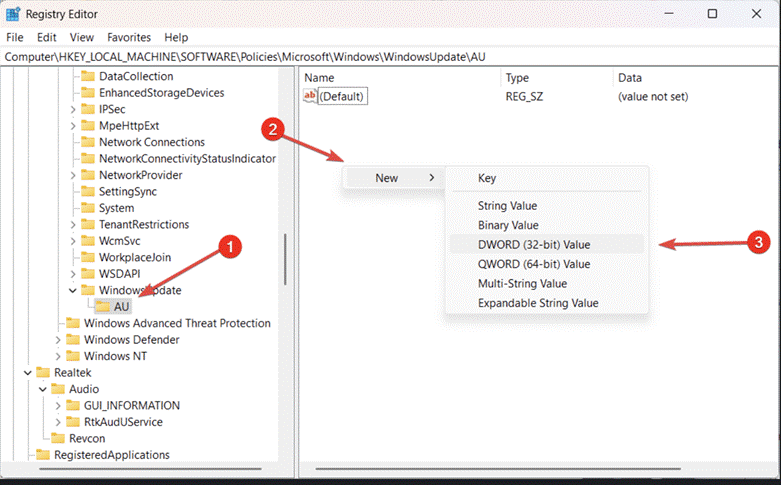
Step 5. Now, you have to do some steps again. Right-click the WindowsUpdate key to select New. Then, choose the Key option again and name it AU.
Step 6. In the selected AU folder, right-click on the empty space in the right window pane. Select New and then choose DWORD (32-bit) Value.
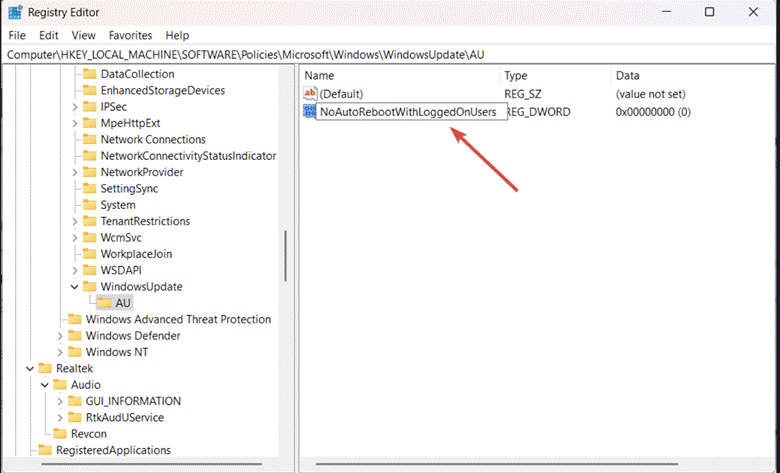
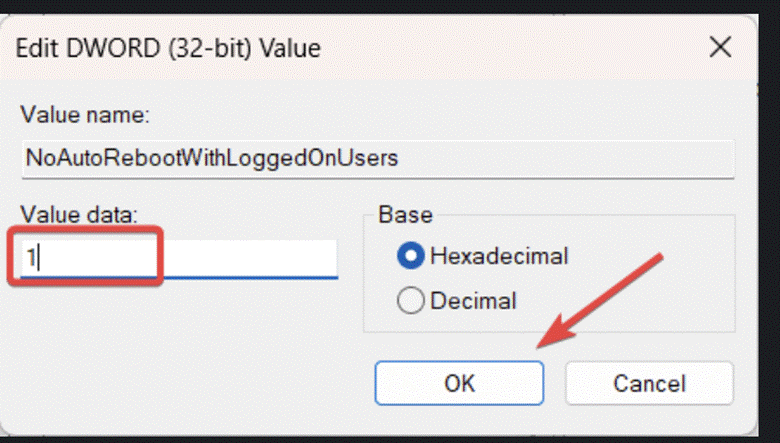
Step 7. Finally, rename the newly created value to NoAutoRebootWithLoggedOnUsers. Then, double-click on it and set its value to 1.
Step 8. Shut the Registry Editor window and restart the PC or system.
Pro Tip: If you wish to re-enable the usoclient.exe file, then go back to the same location. Then, either delete the NoAutoRebootWithLoggedOnUsers entry or set its value to 0.
How to Disable the UsoClient.exe using the Group Policy Editor?
Follow the below steps to disable the UsoClient.exe using the Group Policy Editor.
Important: The Group Policy Editor methods only work for Windows 10 Pro, Education, and Enterprise editions.
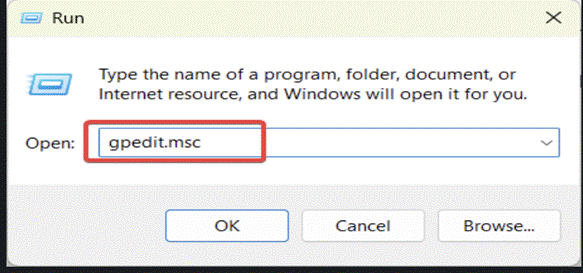
Step 1. Start the process by opening the Run dialog box by pressing the keys WIN + R together. Then, type “gpedit. msc” and press Enter.
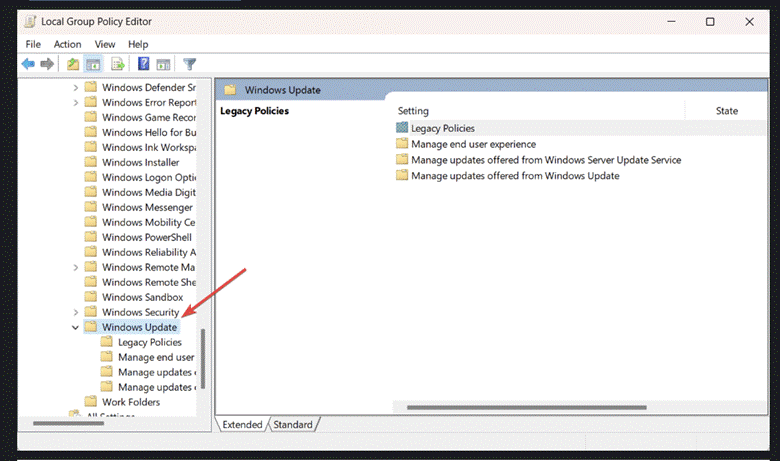
Step 2. Navigate to the below location in the Group Policy Editor window.
Computer Configuration > Administrative Templates > Windows Components > Windows Update
Step 3. Then, in the left window pane, select Windows Update.
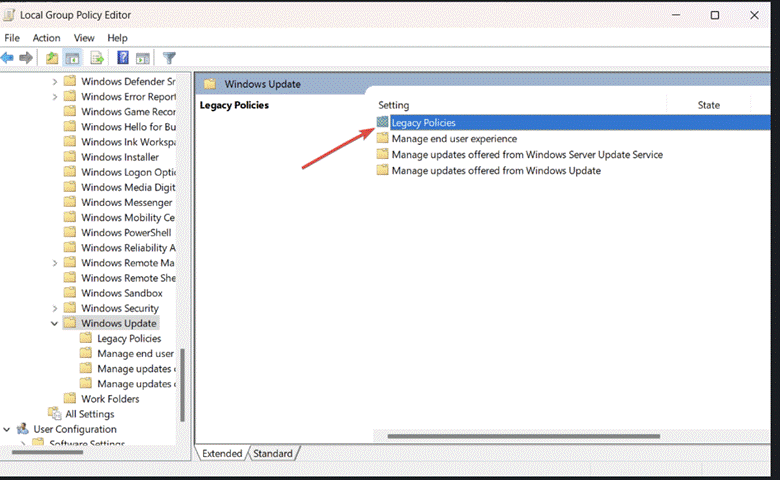
Step 4. Double-click on the Legacy Policies and select “No auto-restart with logged-on users for scheduled automatic updates installations.”
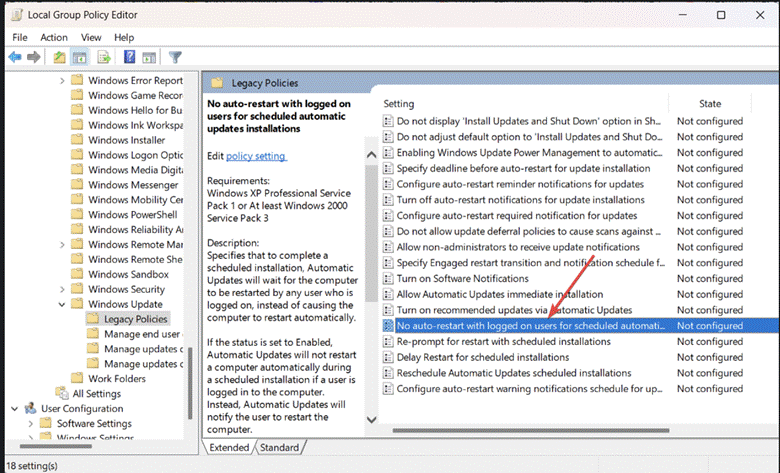
Step 5. Select the Enable option in the pop-up window and click OK to save the changes.
To save the changes, close the Group Policy Editor and restart your system.
Conclusion
Here we go! Use the above methods to disable the UsoClient.exe and ensure a smooth and seamless user experience.
Also, it is worth remembering that usoclient.exe keeps your Windows operating system updated and secure. You should not disable this until you find a malicious activity happening on the system.
Microsoft Authenticode Signing
Verify the Integrity of your Software by Adding Authenticode Signature on 32/64 bit Software Binaries using Code Signing Certificate.
Buy Authenticode Code Signing Certificates
