
What is msmpeng.exe Antimalware Service Executable? How to Stop its Excessive CPU Usage?

Antimalware Service Executable is an integral part of the Windows Defender mechanism. It secures the system from significant malware to ensure data integrity, availability, and confidentiality.
However, numerous users have reported high CPU usage when the msmpeng.exe process runs. If you, too, face this issue, you can follow the procedures listed in this blog to save CPU resources and maintain performance.
Code Signing Certificates ensure the software’s integrity and authenticity and Get rid of the Unknown Publisher Message and Other Security Warning from Windows.
What is msmpeng.exe?
msmpeng.exe is also known as Antimalware Service Executable. msmpeng is a process executed by the Windows Defender utility software. Its primary function is scanning the system, detecting malware files, and quarantining or removing them. This program constantly runs by default on your system, as it supports real-time protection.
In addition, it also scans the downloaded files to protect you from adware, spyware, keyloggers, and other such malware. However, it’s reported that sometimes it uses exceptionally more CPU resources, leading to slowing down the entire system.
To learn about the reasons behind more CPU utilization, look at the next section.
Why msmpeng.exe Antimalware Service Executable Consume High CPU Resources?
There are numerous reasons behind the antimalware service’s high CPU usage. But the primary ones are as listed below:
- While providing real-time protection against malware, the process must constantly scan the system and maintain the network. Due to this, more power is required.
- Low CPU cores or outdated hardware can cause the system to lag and even crash.
- The outdated software and hardware drivers can also be a primary reason.
- An encrypted malware running in the background can fluctuate the functioning of msmpeng.exe.
Similarly, more reasons can be discovered depending on the use case and system specifications.
Approaches To Reduce Antimalware Service Executable CPU Usage
The top approaches you can use to minimize CPU utilization by the antimalware service executable (msmpeng.exe).
#1: Disable the Functioning of Windows Defender
As you know, msmpeng.exe is a Windows Defender process. So, if you disable it, the Antimalware Service Executable will automatically stop, and CPU resources will be saved.
However, before disabling Windows Defender, you should install a third-party, legitimate anti-malware or system security solution.
To disable Windows Defender by using the registry editor, follow the procedure below:
Step 1: Open the run dialog window using the Win + R keys combination.
Step 2: Input the “Regedit” and click on “OK” to access the Registry Editor.
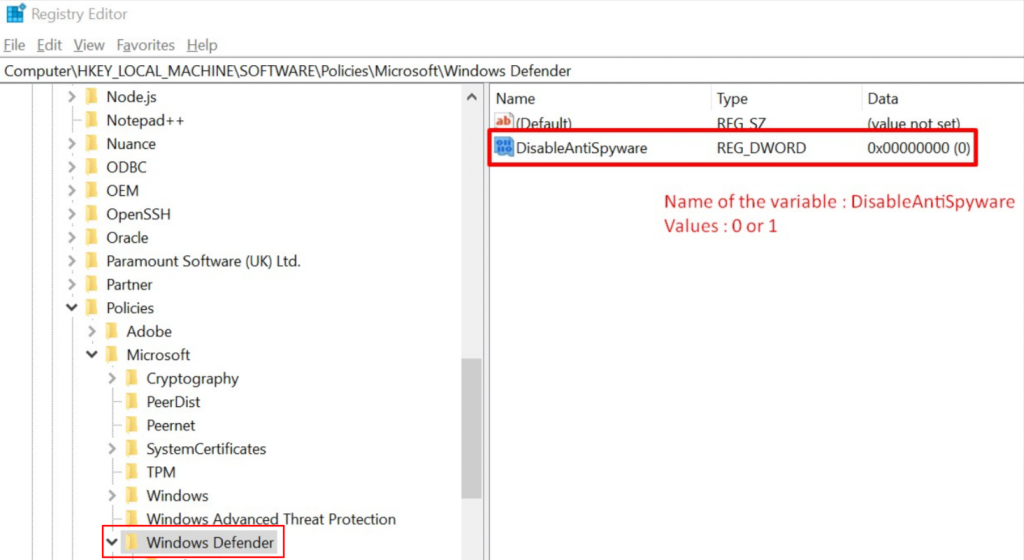
Step 3: By using the navigation pane, follow the path below:
HKEY_LOCAL_MACHINE\SOFTWARE\Policies\Microsoft\Windows DefenderStep 4: In the Windows Defender folder, find the “DisableAntiSpyware” registry and double-click on it.’
Step 5: Modify the value of the registry to 1, and Windows Defender will be disabled on your system.
Further, if “DisableAntiSpyware” is not available, you should execute the steps below:
Step 1: Go to “Registry Editor” and use the right-click on it.
Step 2: Choose “New” >> “DWORD (32 bit)”.
Step 3: Set the name of the new registry as “DisableAntiSpyware” ,use the double-click to reach settings, and change the value to 1.
#2: Modify the Windows Defender Scheduling Configuration
The full scan performed by Windows Defender is scheduled by default. It gets executed when you turn on the system or at any time according to the schedule. Due to this, the computer starts to lag in between and utilizes more CPU.
To modify the schedule, undergo the following process:
Step 1: Open the “Task Scheduler” with the help of the Windows search feature.
Step 2: Go to “Task Schedule Library” and double-click on it.
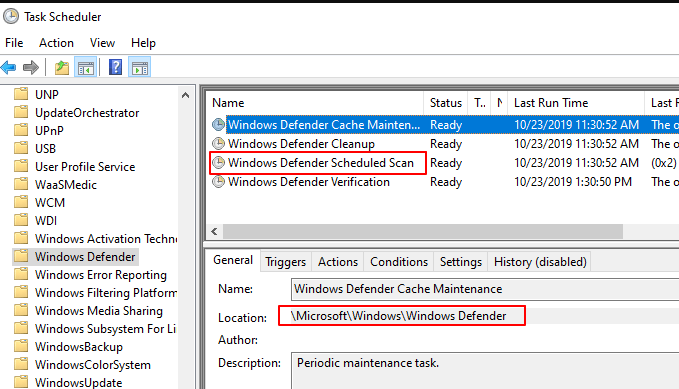
Step 3: By expanding the folders, navigate through the following path.
Library/Microsoft/Windows/Windows Defender.
Step 4: Under the “Windows Defender” folder, find the “Windows Defender Scheduled Scan” option and open it by double-clicking.
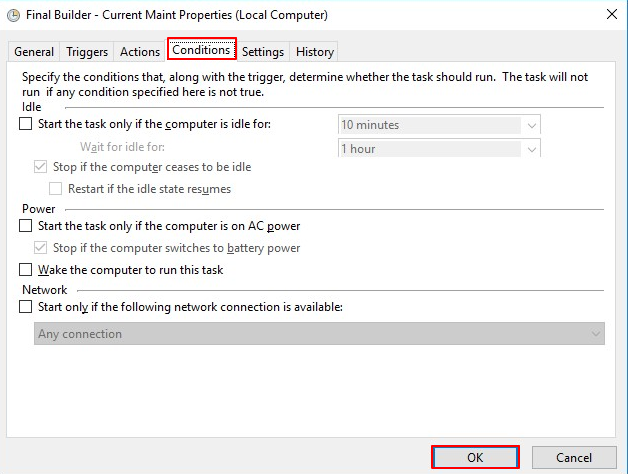
Step 5: Go to the “Conditions tab” of the new window and uncheck all displayed options.
Step 6: Click on “OK” and the previous schedule data will be removed.
Further, you should schedule the scans per your needs and business requirements by following the below process.
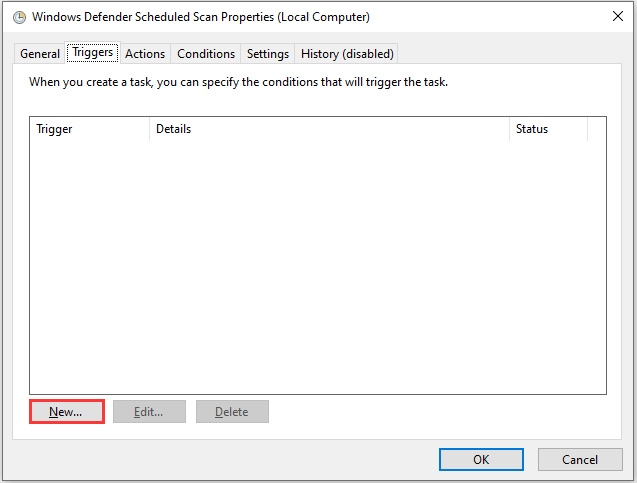
Step 1: Go to “Windows Defender Scheduled Scan” and double-click on it.
Step 2: Navigate to the “Triggers” tab and click on “New”.
Step 3: Generate a new scan schedule per business requisites.
Step 4: Select the “Day of the scan” and hit the “OK” button.
Step 5: Now, repeat the same procedure for the following:
- Windows Defender Cleanup
- Windows Defender Cache Maintenance
- Windows Defender Verification
#3: Add msmpeng.exe to the Windows Defender’s Exclusion List
To stop the self-scanning functionality of Windows Defender, you can follow the process below.
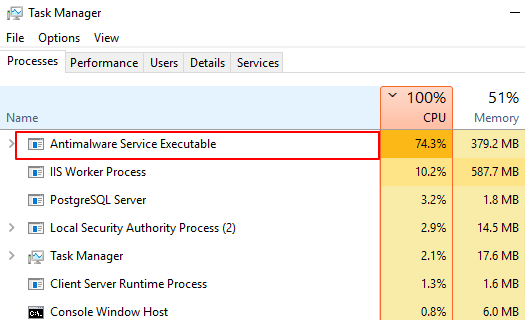
Step 1: Access the Task Manager by using the Ctrl + Shift + Esc key combination.
Step 2: A list of active processes will be displayed, from which you need to discover the “Antimalware Service Executable.”
Step 3: Once you find the process, use the right-click to open its location.
Step 4: Copy the complete path of Antimalware Service Executable.
Step 5: Open the “Windows Defender” using the start menu.
Step 6: Go to “Virus & threat protection” and then open their settings.
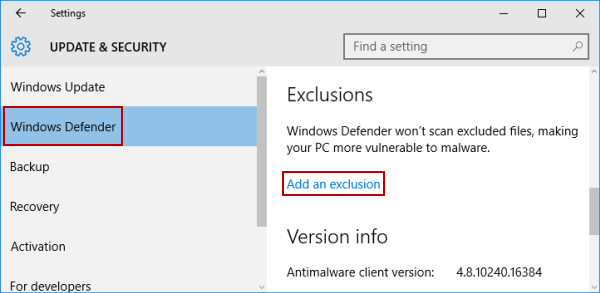
Step 7: Scroll until you locate the “Exclusions” option.
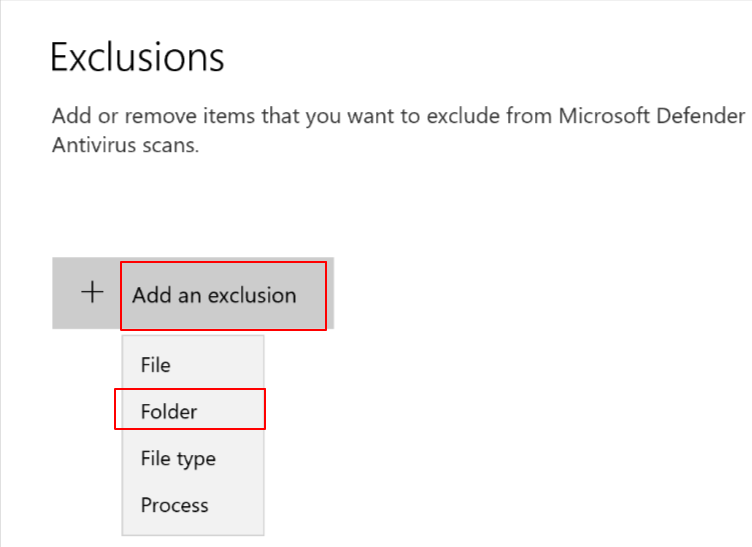
Step 8: Click on the “Add or remove exclusions” option >> “Add an exclusion,” >> “Folder.”
Step 9: Paste the path that you copied in Step 4.
Step 10: Click on “Open”.
As a result, when Windows Defender initiates the scan, it will not include its file and the folders that include it. Thus, the CPU resource utilization will be minimized.
Also Read: How to Use Windows Defender to Scan for Malware?
Concluding Up
The antimalware service executable scans constantly and provides real-time protection. Due to this, it sometimes uses additional CPU cores, leading to the slowing down of other processes and applications. To minimize CPU usage, follow the three main approaches listed above.
Disabling Windows Defender, putting the process in the execution list, and modifying the scheduled scan will help you with this issue. You can go for any of the approaches, but remember to install third-party antivirus software if you disable Windows Defender. As a result, CPU utilization will be minimized.
Microsoft Authenticode Signing
Verify the Integrity of your Software by Adding Authenticode Signature on 32/64 bit Software Binaries using Code Signing Certificate.
Buy Authenticode Code Signing Certificates
