
Step by Step Guide to Sign an EXE or Windows Application
In this article, you will learn about why to sign your Windows application and a step-by-step guide on How to Sign an EXE or Windows Application.
Code signing is a way to give assurance that the software is from a verified and genuine software publisher. Singing Windows EXE files with a code signing certificate ensures that the executable files or Windows applications are not altered or modified by malicious actors.
The Windows application signing process involves embedding a digital signature in the .exe executable files that can be verified for code authenticity. Similarly, you can get this code signing certificate from a trusted certificate authority like Certera, Sectigo, Comodo and DigiCert.
In addition, the OS will also check whether the issuing authority mentioned in the certificate is the same one that has issued the certificate and if the certificate is still valid or not. If such checks pass through, your .exe executables will run without any warnings.
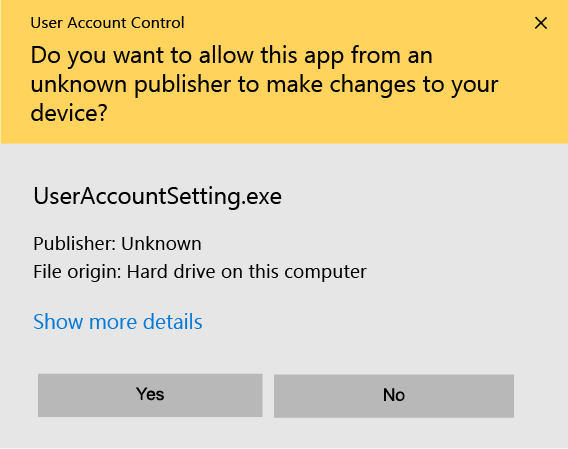
For instance, if you don’t sign your executable, Windows will throw an unknown publisher error:
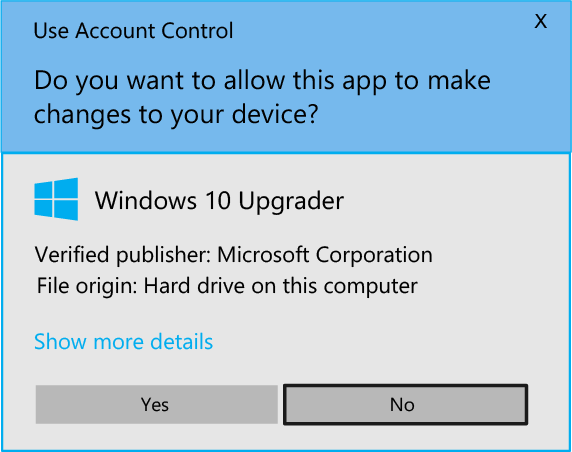
But if you sign an EXE or application with a code signing certificate, Windows will display a verified publisher message as shown below:
Now, let’s explore why signing a Windows EXE file is important:
Why Sign Your Windows Applications?
Windows application signing helps prove to your users that your software is authentic and trustworthy. As seen above, the operating system will show that the code-signed software is from a verified publisher. This boosts trust and confidence in your users and reduces the software abandonment rate.
A genuine certificate from trusted code signing certificate providers is also necessary for enhanced security. Here, the issuing authority guarantees that the software is free from malicious code or vulnerability.
This further increases users’ trust in your Windows application and improves the installation ratio.
Thus, application signing is necessary to state your EXE apps are safe for people to download, install, and use.
How to Sign an Application?
Once your application is ready for distribution, you must obtain a code signing certificate from a certificate authority.
Since there were specific steps that need to be followed for both the code signing certificates, now we have common steps applicable for both OV and EV code signing.
As of June 1, 2023, there is a new requirement for OV (Organization Validated) Code Signing Certificates. The condition states that the private key associated with the OV Code Signing Certificate must be stored in a Hardware Security Module (HSM) compliant with FIPS 140 Level 2, Common Criteria EAL 4+, or an equivalent security standard.
Prerequisites to Sign an EXE or Application
To begin signing an EXE or application, specific requirements need to be met to ensure validity, just like when signing an official document in the presence of an authority.
While Mac applications require an Apple Developer ID certificate, this section focuses on the signing process for Windows EXE and applications. Similar to macOS, there are specific prerequisites that need to be fulfilled.
These prerequisites include:
Windows Device:
You will need a computer or device running the Windows operating system to sign.
Purchase a Valid Code Signing Certificate:
Obtaining a valid code signing certificate from a trusted certificate authority is essential.
Microsoft SignTool:
Microsoft SignTool is a command-line tool tied to the Windows Software Development Kit (SDK). SignTool is used to digitally sign executable files, libraries, and other types of code. You must have SignTool installed on your Windows device to proceed with the signing process.
Recommended: How to Create & Verify a Windows Authenticode Signature Using SignTool?
SafeNet or FIPS 140 Level 2 Approved Device:
If your specific requirements demand compliance with FIPS 140 Level 2 for enhanced cryptographic security, you should use a FIPS 140 Level 2 approved device such as SafeNet. SafeNet is a hardware security module (HSM) that provides the necessary security for cryptographic operations during code signing.
Recommended: What are SafeNet Luna Network HSM 7 and Thales Luna Network HSM 7?
Now, you can be equipped with the necessary prerequisites to initiate the signing of EXE or application files on the Windows platform. You are ensuring a Windows device, a valid EV code signing certificate, Microsoft SignTool, and a SafeNet or FIPS 140 Level 2 approved device (if required).
Detailed instructions and specific steps may vary depending on your development environment. So, it is recommended to consult the documentation provided by your certificate authority and Microsoft for accurate guidance on utilizing your EV code signing certificate. It also includes SignTool for Windows application signing.
Use of Microsoft SignTool
Microsoft SignTool is a Windows Software Development Kit (SDK) command-line tool. It offers various functionalities for digital signing, timestamping, and verifying files, executables, scripts, and applications.
- With Microsoft SignTool, you can digitally sign your files to establish their authenticity and integrity. This is particularly important for ensuring trust in your code and tamper-proof verification.
- Additionally, SignTool allows you to apply timestamping to your signed files, providing an extra layer of validity. The timestamp indicates the time the file was signed, even if the certificate expires in the future.
- SignTool also offers the capability to verify signatures and timestamps applied to files. This verification process ensures the validity and integrity of the signatures, ensuring they have not been tampered with since their application.
SafeNet for Additional Security
In terms of cryptographic device setup, it is recommended to use SafeNet or any other hardware security module (HSM) that is compliant with the National Institute of Standards and Technology’s (NIST) Federal Information Processing Standards (FIPS) 140 Level 2.
These devices adhere to the U.S. government’s computer security standard for validating cryptographic modules.
While SafeNet is mentioned as an example, there are alternative options available, such as:
- PingOne Cloud Platform
- Okta Single Sign-On
- RSA SecureID Access
Exploring these options and selecting the most suitable device for your organization’s needs is advisable.
It is crucial to emphasize that installing SafeNet or a compatible alternative is necessary to utilize Extended Validation (EV) certificates.
Furthermore, starting on June 1st, 2023, Organization Validation (OV) certificates will also be required. These certificates demand the added security and protection that an HSM provides to store the private key securely.
NOTE: Take the time to research and evaluate the available options, ensuring you choose the device that aligns with your organization’s requirements. This will enable effective management and safeguarding of your code signing certificates.
The Process to Sign an EXE Using SignTool and Code Signing Certificate
To sign an EXE using your OV or EV Code Signing Certificate with Microsoft SignTool, follow these five steps:
Step 1: Insert Your Hardware Token
Take the hardware security token provided by the Certification Authority (CA) that contains your code signing certificate and private key. Plug it into your Windows device for secure access.

Step 2: Open SafeNet (or other FIPS Level 2-approved device)
If you have chosen a different FIPS Level 2-approved device instead of SafeNet, open it and ensure it is appropriately set up as recommended in the previous section.
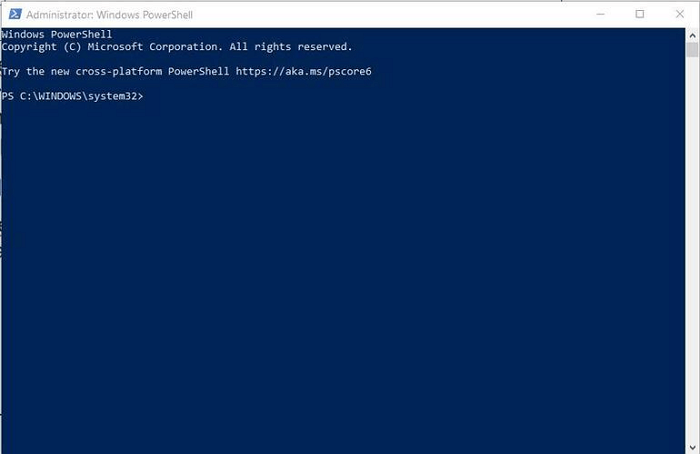
Step 3: Open PowerShell
PowerShell is a command-line interface similar to the classic Windows Command Prompt. Open PowerShell as an administrator by following these steps:
- Click on the Start button.
- In the search box, enter “PowerShell.”
- Choose “Run as administrator” when launching the Windows PowerShell program.

- You will know now that you have what you need to sign your EXE using Microsoft SignTool.
NOTE: If Linux or macOS are your preferred operating systems, you may sign your Windows EXE and applications using programs like Jsign or Osslsigncode.
Step 4: Enter the Signing and Time Stamping Command
Signing your code is essential, but remember to timestamp it to avoid issues with expired certificates.
Extend the validity of your signature by timestamping your code using the script below:
.\signtool sign /tr http://timestamp.digicert.com /td SHA256 /fd SHA256 “c:\path_to_your_file\software.exe”Also, replace “c:\path_to_your_file\software” with the actual file path of the EXE or application you want to sign.
Step 5: Enter Your SafeNet Password
At this point, SafeNet (or the authentication tool you’re using) will open a window and prompt you to enter the password for the hardware token.
If this is your first time using a SafeNet token, you may need to install the authentication client software and initialize the token by following the instructions.
You will receive the package from CA, including the USB Token and the Letter
Installation of SafeNet Authentication Client
All you need to do is download and open the suitable installer for the machine you will be using while signing in the software or applications such as SafeNet Authentication Client.
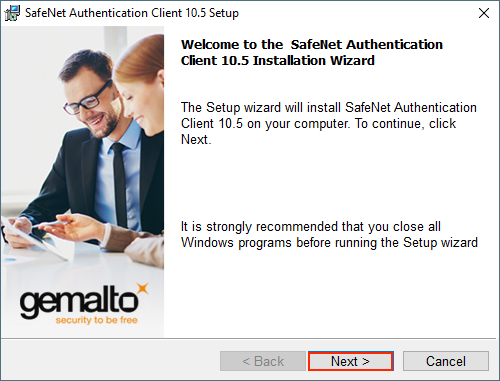
Step 1: In SafeNet Authentication Client Setup, the Welcome to SafeNet Authentication Client Installation Wizard page will look like this. You have to click on ‘Next.’
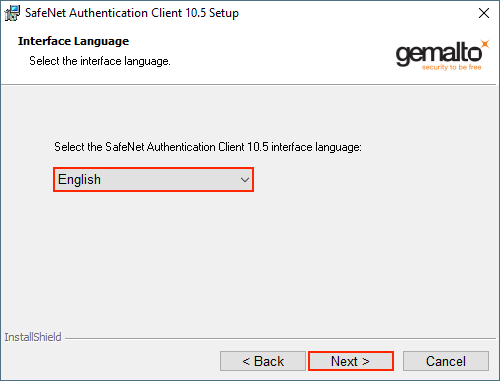
Step 2: On the Interface Language page, you will find the drop-down list. From there, pick the language you want for the interface and click ‘Next.’
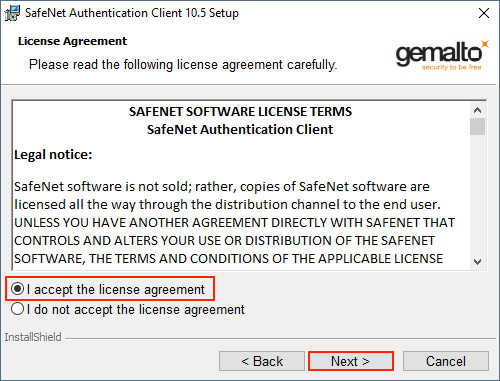
Step 3: Read the license agreement on the License Agreement page. After reading, select “I accept the license agreement” and then ‘Next.’
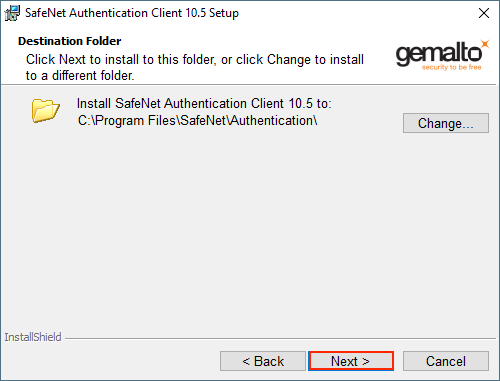
Step 4: Select the location you want to install the SafeNet Authentication Client Software from the Destination Folder page and then click ‘Next.’
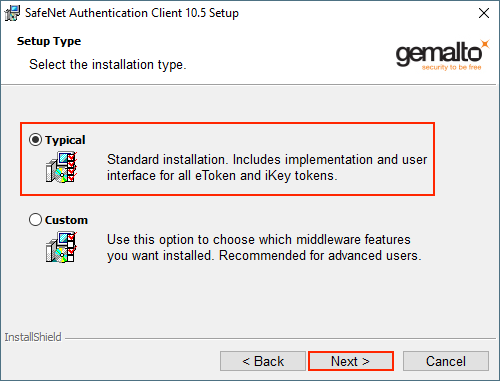
Step 5: The Setup Type page will look something like this. On this page, select ‘Typical’ for the installation type and then click ‘Next.’
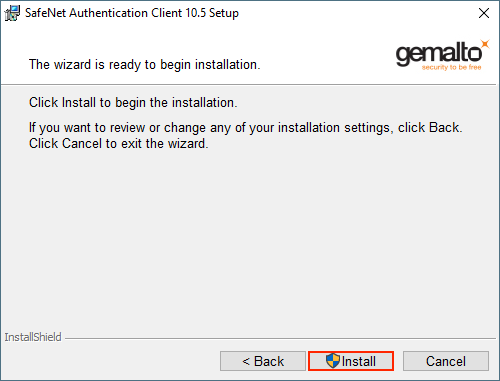
Step 6: ‘The wizard is ready to begin installation’ page will appear where you have to click Install. It might take several minutes to process the installation process.
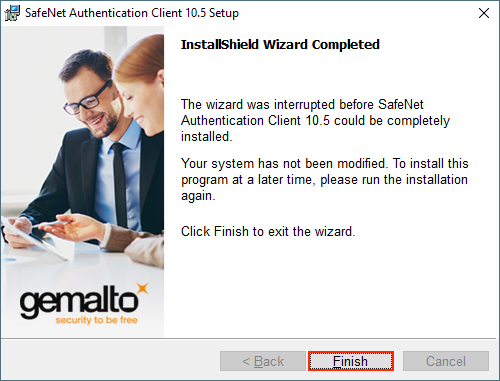
Step 7: Click on ‘Finish‘ on the SafeNet Authentication Client to exit SafeNet Authentication Client Setup. Voila! You have now successfully installed the SafeNet Client Software.
After the successful installation of the installed software, let us now move to set up your OV or EV Code Signing Certificate.
Setting up your Code Signing Certificate
After successfully receiving the token from your Code Signing Certificate Provider, You can follow the steps to activate the token:
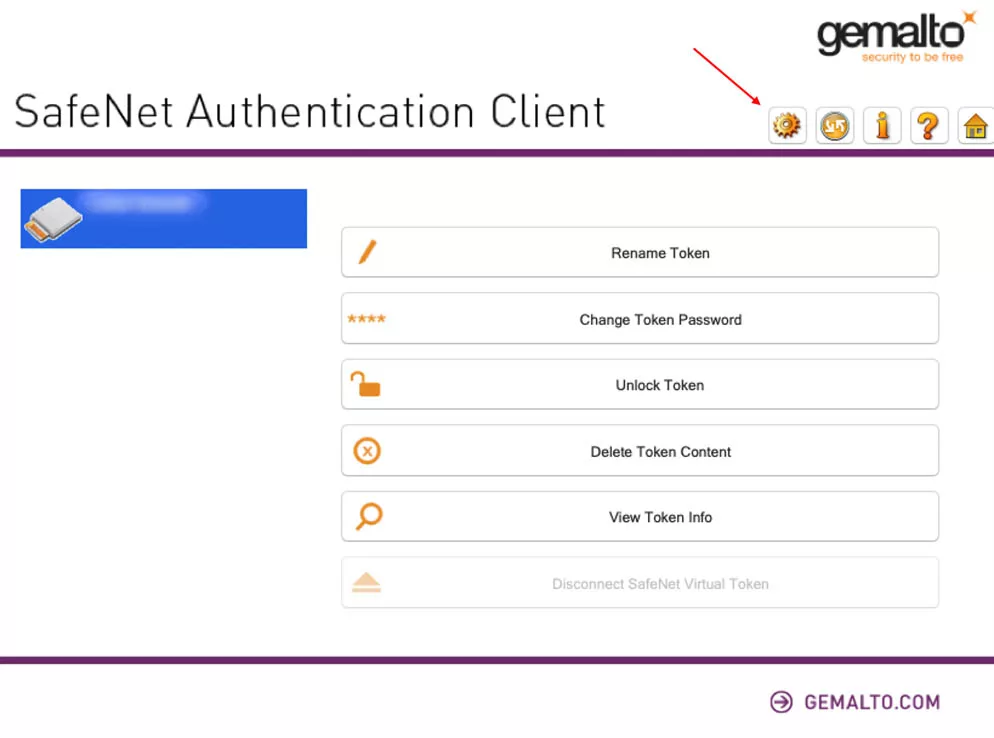
Step 1: For the activation of your Code Signing Cert, plug in your Code Signing USB Token and run the SafeNet Authentication Client Software.
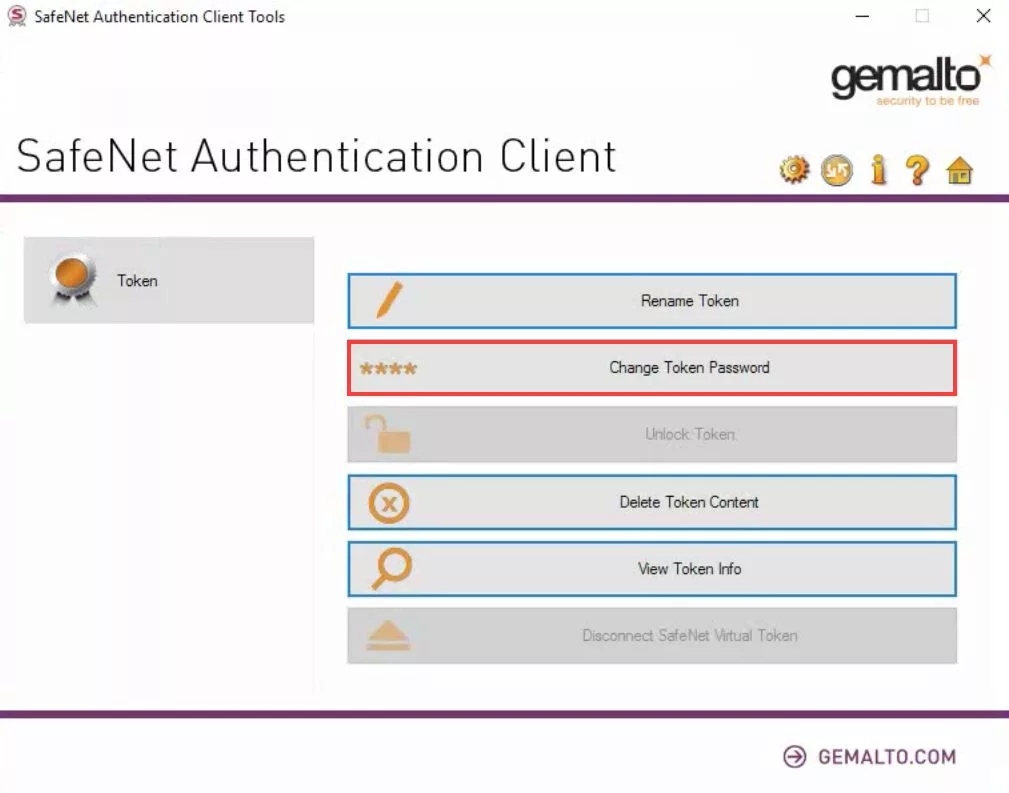
Step 2: In the SafeNet Authentication Client Tools window, click on ‘Change Token Password.‘ While this step isn’t mandatory, we recommend you ‘Change Token Password.’ It will open the interface to change the password for the token. Input a distinct password.
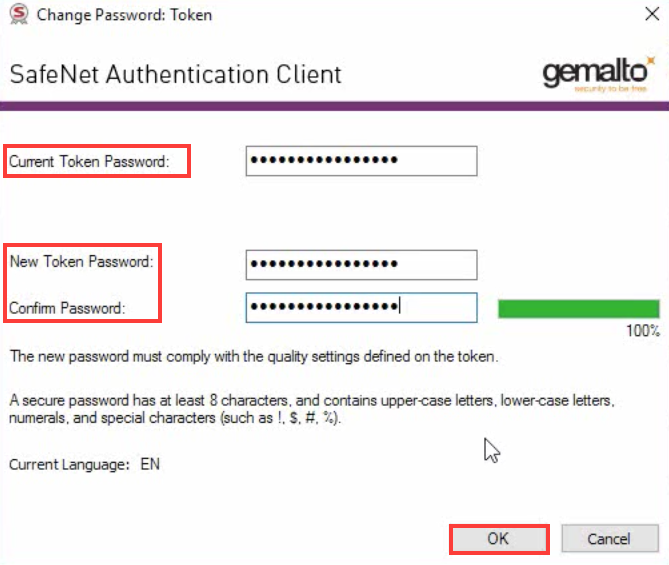
Step 3: You will see the New Token Password and Confirm Password boxes. You can create and confirm your new token password that meets the security needs of SafeNet with the help of the password in the email format you received from the Certificate Authority. Now, click OK.
Once you enter the password, congratulations! You have successfully signed your EXE or application.
NOTE: You may use steps three and four above to sign your EXE using an OV code signing certificate instead. Starting June 1st, 2023, OV certificates will also be subject to the complete EV signing procedure outlined above.
Testing Method for your Signed EXE
Ensuring that your signed EXE has been executed correctly and that your customers will have a seamless experience during installation is crucial. To achieve this, you can follow these steps to test your signed EXE and verify its signature:
STEP 1: Upload the Signed EXE or Application to a Test URL
If your organization uses Confluence or a similar platform, create a test page and restrict its access to authorized individuals. Upload your signed EXE or application to this hidden URL. This will allow you to simulate the installation process and ensure everything functions as expected.
STEP 2: Download and Test the Signed EXE or Application
You should download the signed code onto a test machine for comprehensive testing. It’s advisable to involve multiple colleagues to participate in the testing process.
Ask them to access the designated URL and download the code onto their machines. Testing on different machines provides a broader perspective and helps identify potential issues across various environments.
STEP 3: Verify the Signature by Right-Clicking on the Signed Code
After downloading the signed code, you can verify its signature to confirm its authenticity. Follow these steps:
- Right-click on the signed code file.
- Select “Properties” from the context menu.
- In the Properties window, navigate to the “Digital Signatures” tab.
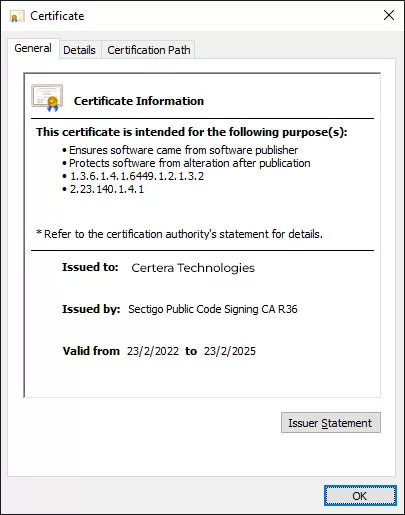
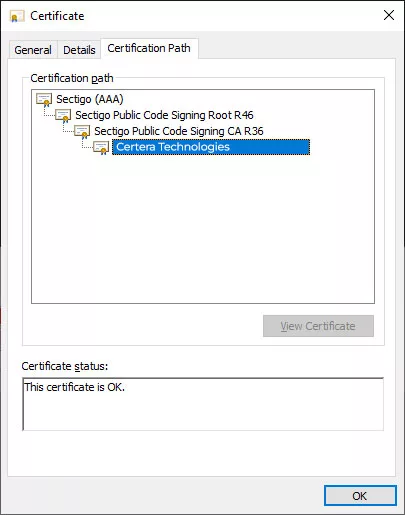
- Verify that the signature details match the information on your code signing certificate. This step ensures that the code has not been tampered with and originates from a trusted publisher.
By conducting these tests, you can be confident that your signed EXE or application is functioning correctly and that the signature is valid. It helps you deliver a secure and trusted product to your customers, minimizing potential installation issues and enhancing their overall experience.
Suppose everything goes according to the process we outlined above. In that case, you and the other testers of the executable should be able to see the code signing certificate details (including time stamping) like the examples ahead.
Safeguarding Private Keys and Integrating Code Signing Practices
Protecting your private keys and implementing robust code signing practices are crucial to maintaining the security and integrity of your organization’s IT environment. Here are some essential steps to follow:
Conduct an inventory of your keys:
Take stock of all the keys within your organization’s IT infrastructure. This comprehensive inventory will clearly understand the number and types of keys used.
Store keys securely:
Utilize certified hardware security modules (HSMs) to store your keys securely. Some trusted options include Thales Luna, Microsoft Azure Key Vault, Egnyte, SafeNet. These HSMs offer advanced security measures to safeguard your private keys from unauthorized access.
Role-based Access Control:
Defines roles and responsibilities for individuals involved in the code signing process. Create separate roles for those authorized to submit code for signing and those authorized to approve signing requests. Ensures no single individual can perform both roles independently.
Regularly monitor and track the use of private keys and code signing certificates to identify suspicious activities and issues.
Integrate Code Signing with DevOps:
Formalize and integrate the code signing process into your software development lifecycle (SDLC). Doing so ensures that codes are signed only after undergoing necessary checks, such as quality assurance (QA), virus scanning, and penetration testing.
Integrating code signing with DevOps promotes a culture where security is prioritized throughout the software development process (devsecops).
By following these best practices, you enhance the overall security posture of your organization, mitigating the risk of unauthorized access and potential attacks.
Protecting private keys and integrating code signing into your SDLC will help maintain the integrity and trustworthiness of your software, enabling you to deliver secure and reliable applications to your users.
Final Words
As a Windows EXE application developer, you must sign your executables with appropriate measures. You must ensure your audience stays away from any digital vulnerability when installing and using your application. This can easily be dealt with by digitally signing your Windows EXE files.
However, sometimes, it can get complex for beginners, or you may not always remember the step-by-step process. Thus, this guide provides a step-by-step process for signing an application or EXE file. We hope this was helpful for you in getting started!

Cheap Code Signing Certificates
Prevent Code Tampering and Authenticate Code Integrity by Digitally Sign your Code with Trusted Code Signing Certificates.
Starting at Just $215.99/Year
