
How to Install OV Code Signing Certificates [A Step-by-Step Guide]?

A survey says that 43% of customers lose trust in businesses due to bad reviews by people. So if your software is garnering bad reviews, losing customers is inevitable.
However, if you can find an Organization Validation Code Signing Certificate offered by a trustworthy Certificate Authority (CA), your software will be far more secure.
Some of the major features of this code signing certificate are:
- Protect your intellectual property
- Prevent security warning labels
- Efficient monitoring and enforcement
- Meet platform requirements
But being a software developer, you probably know all of the above. So let us come directly to the point and discuss how to install OV Code Signing Certificates.
With the introduction of new CA/B (Certificate Authority/Browser) changes, there have been updates in the way code signing certificates, such as OV (Organization Validated) and EV (Extended Validation) certificates, are same for key storage.
One significant change is that these certificates are now stored on physical tokens, ensuring enhanced security. Consequently, the installation process remains consistent across different types of certificates.
What’s in the Package you Received from your CA?
Although the specific contents of the package may vary slightly depending on the Certificate Authority, you are working with. Several standard items are typically included in the package. These items are designed to facilitate the installation and use of the code signing certificate.
USB Token:
The primary component of the package is a USB token. This token is a secure container for your certificate, protecting it with its associated private key. The USB token ensures that only authorized individuals can access the certificate and use it for signing the code.
Installation Guide Letter:
Additionally, the package will typically contain a letter from the Certificate Authority. This letter is official documentation and includes essential information regarding your code signing certificate. It may provide instructions on installing the certificate, guidelines on its usage, and other relevant details.
QUICK NOTE: It’s important to know that while the overall process remains the same across certificates, there may be slight variations in the package contents based on the specific Certificate Authority you are dealing with.
Setup OV/EV Code Signing: Installation Guide
To begin installing your OV or EV Code Signing Certificate, we will divide the process into 4 short and crisp steps. Let us start the methods!
STEP 1: Installing Safenet Authentication Client
To successfully install Safenet Authentication Client, it is recommended to follow the instructions provided in the letter received from the Certificate Authority.
The letter should contain a URL that grants access to the required software, SafeNet Authentication Client. Download the appropriate installer for the machine on which you intend to perform the signing process.
Once the installer has been downloaded, please follow the installation steps.
After the installation is complete, it is advisable to reboot your system to ensure the SafeNet Authentication Client has been successfully installed. Once the reboot is done, you can use your OV or EV (Extended Validation) Code Signing certificate.
STEP 2: Plugging in the USB Token
Before plugging in the USB token, launch the Safenet Authentication Client software that was recently installed. Once the software is open, you can safely insert the USB token into your system.
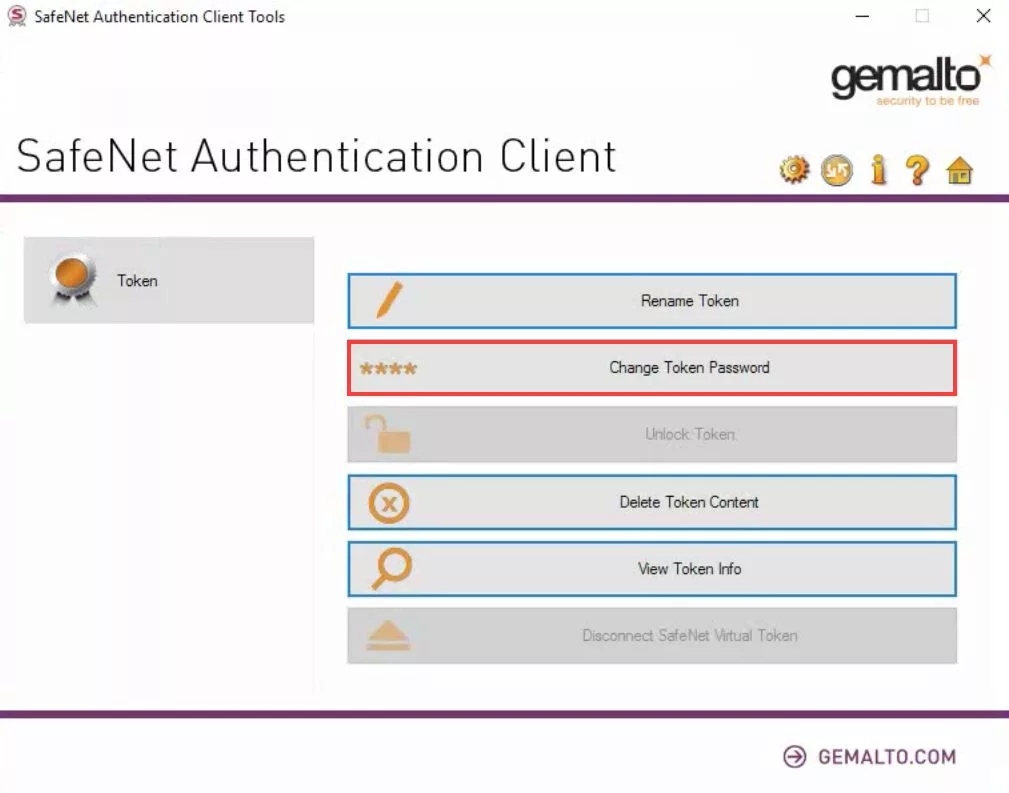
Upon inserting the USB token, the SafeNet Authentication Client should automatically detect and display your card within the application interface, as depicted in the example.
STEP 3: Changing the Token Password
Although not mandatory, changing the password for your token is recommended. To do this, locate the option to “Change Token Password” within the Safenet Authentication Client software. By selecting this option, you will be presented with an interface to modify the token’s password.
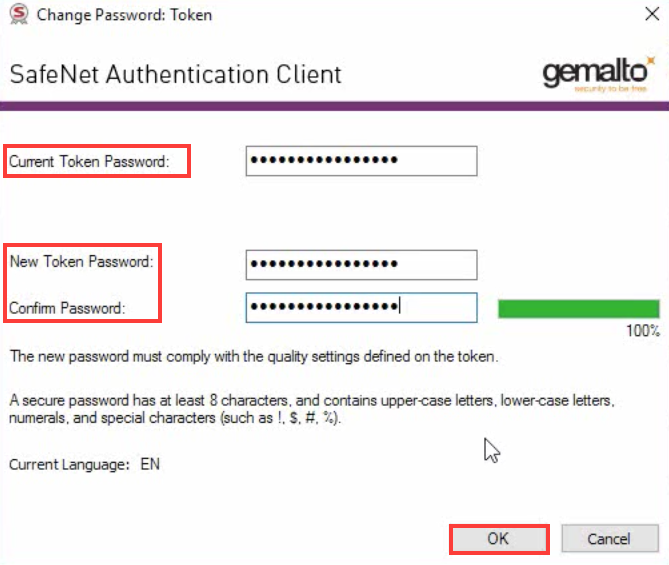
To change the password, input the existing password, which should have been provided to you by the Certificate Authority via email. Then, choose a new and unique password that satisfies the security requirements set by SafeNet.
STEP 4: Collecting the Certificates
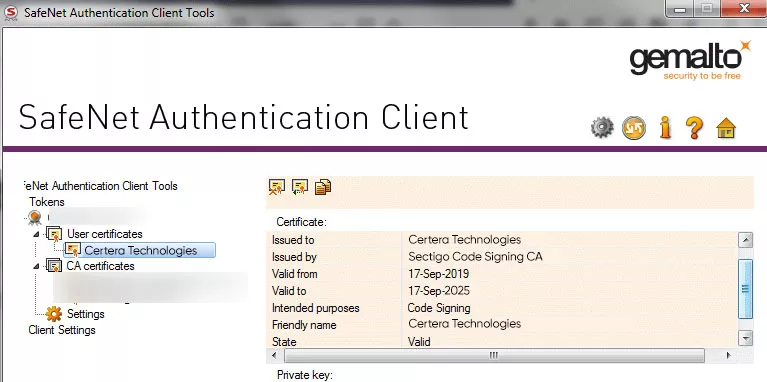
To collect the certificate necessary for signing your application, locate and select the “Gear” icon. You can find it within the Safenet Authentication Client software. This action will modify the interface, displaying a sidebar similar to the example shown under this step.
Within the sidebar, you will find tokens and dropdown menus. Click through the dropdown menus until you locate the specific certificate associated with your company, as demonstrated in the example.
With these steps completed, you can begin signing your application using your EV/OV Code Signing certificate!
Recommended: Signing Executable Files Through Microsoft SignTool
———————————————————————————————————————————-
Outdated OV Code Signing Installation Process Applicable Only if you Buy Before May 15, 2023)
The first step to installing an OV Code Signing Certificate is CSR generation. Most CAs nowadays offer key generation tools that can be used through the browser. These SSL tools help in security key pair generation and creating CSR. Each pair has a private and public key; both keys are vital for the entire Code-Signing process.
So let us now proceed to the installation part:
Step 1- Download the Certificate
Upon the generation of CSR, it is sent to the Certificate Authority for authentication purposes. After a stringent authentication process, the CA issues a Code Signing Certificate along with a public key. Moreover, the certificate bundle is also sent to the receiver via email communication.
From your email, you can download the certificate file with a .p12 extension. In case you don’t receive the code signing certificate via email, you can get in touch with the CA or visit their official website for clarification.
Step 2- Install the Code Signing Certificate on Your Device
Many CAs often include an installation tool in the bundle or provide it via a link in the email they send. Click on the link and log in. After this, the window prompt will ask for a confirmation about the installation of the certificate on your device through a link in the mail.
Also, when you import your certificate via the installation link of the CA, it will ask you to choose between a current user store or a local machine store.
There is another way of installing the software signing certificate into the Windows MMC locally. On your Windows Search, type ‘MMC.’ It will launch the MS Management Console program on your system. Expand the ‘certificates’ and click on personal. Then, right-click on the ‘certificate’ option and click on ‘all tasks.’ The next step is to choose import and scroll for files with *.p7b and *.spc extensions. After doing this, place all the files of the code signing certificate in the local device storage and choose Finish for importing. In case you want to install on other devices, you have to export the PFX file.
Step-3 Create a PFX File
Combining the private key that was generated during the generation of CSR with the code signing certificate will create the PFX file. Similarly, you can also combine the CA Bundle, private key and Code Signing Certificate with the help of a third-party tool.
Now, again on your Windows machine, open the MMC app. After opening it right click on the certificate option and choose export. The prompt will now ask your permission to export the private key. After approval, click on the ‘Personal Information Exchange’ option and select the sub-option, ‘Include all certificates in the certification path if possible.’
Now look for ‘Enter the password and click on the storage location or folder on your local device for storing the combined file. Now choose Finish for exporting the PFX file. It is now kept locally on your device and is good to go for use.
Step-4 Sign the Windows Code
While you have found a Code Signing certificate, it is only a part of the process. You now need a signing tool for Code Signing on another device with the PFX file. In the case of Windows code, Microsoft provides a SignTool.
Install the SignTool. You can do that by downloading and installing the MS Windows SDK. Then, launch the command prompt and sign your PFX file with the following Code:
SignTool sign /f path to your PFX file /p your PFX file password /tr http://tsa.mysite.com /td SHA256 path to the Code being signed
Your file code is now signed and ready to be downloaded by the users!
Final Thoughts
The increased application of the Internet and the boost in smartphone popularity have become a growing issue for many businesses and organizations. It is because end-users use software and applications from various devices and sometimes even over less secure networks, which makes the software or application susceptible to cyberattacks.

Cheap Code Signing Certificates
Prevent Code Tampering and Authenticate Code Integrity by Digitally Sign your Code with Trusted Code Signing Certificates.
Starting at Just $215.99/Year
