
How to Install EV Code Signing Certificate [A Step-by-Step Guide]
Extended Validation Code Signing certificates have got all the standard digitally signed code advantages along with the improved authentication process and hardware security requirement. All these benefits give users a sense of assurance and confidence when they download your software or applications.
When compared to a standard Code Signing Certificate, the installation process of an EV Code Signing Certificate is quite different, thanks to the improved and stringent security rules being followed today.
Be that as it may, we will help you go through the entire process to install the EV Code Signing Certificate, and you can soon get on your way with signing your software. However, before beginning, let us give you a background overview of the enrollment process.
Enrollment Process of EV Code Signing Certificate
After successfully finishing the enrollment process of your extended validation code signing, the respective certificate authority will start the authentication process.
Upon finishing the validation of the vetting process, the certificate authority will send the certificate and the private key to you over mail
According to the CA/B forum guidelines, the EV Code Signing Certificate is supposed to be physically mailed to the code publisher via carriers like UPS or FedEx.
It is due to all the security needs that demand all the EV Code Signing private keys to be stored off the device. This ensures maximum security.
Now that we know what happens in the enrollment process let us see the steps.
Steps for Installing EV Code Signing Certificate
There are a series of steps that need to be followed. We have listed down the steps for better understanding. Based on the Certificate Authority you choose, your package will vary. However, a package must contain the following:
- USB token – it should possess your certificate with its private key
- Letter from the Certificate Authority
Let us first start with SafeNet Authentication Client, the software needed to install the EV Code Signing Certificate.
Installation of SafeNet Authentication Client
Refer to the letter you have received from the Certificate Authority to complete this step of the installation process. It includes a URL that helps you access and install the software SafeNet Authentication Client.
All you need to do is download and open the suitable installer for the machine you will be using while signing the software or applications.
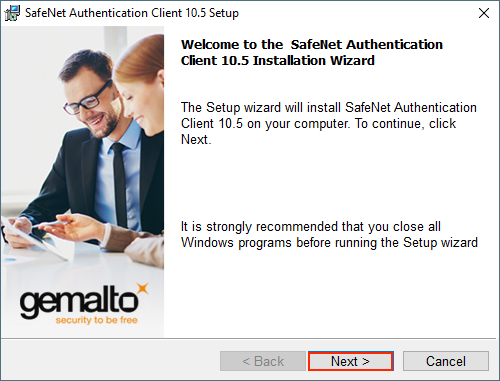
Step 1: In SafeNet Authentication Client Setup, the Welcome to SafeNet Authentication Client Installation Wizard page will look something like this. You have to click on ‘Next.’
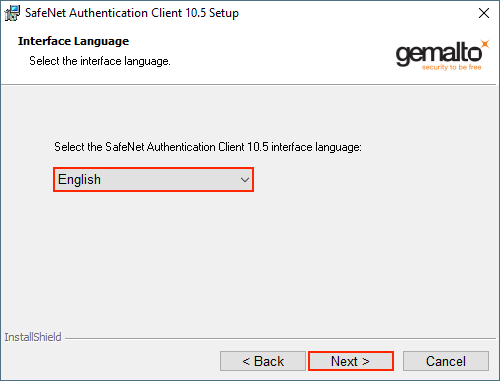
Step 2: On the Interface Language page, you will find the drop-down list. From there, pick the language you want for the interface and click ‘Next.’
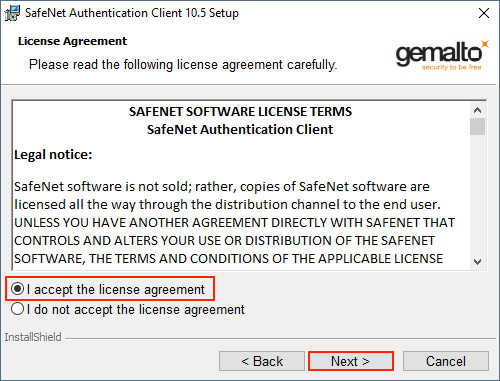
Step 3: Read the license agreement on the License Agreement page. After reading, select “I accept the license agreement” and then ‘Next.’
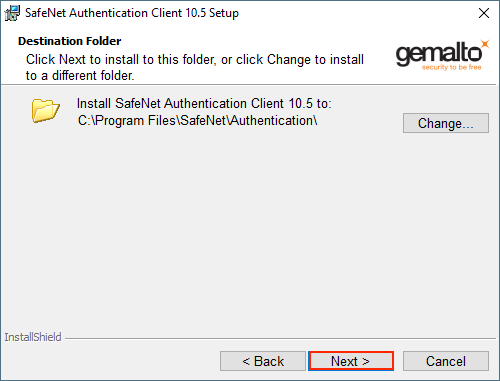
Step 4: Select the location you want to install the SafeNet Authentication Client Software from the Destination Folder page and then click ‘Next.’
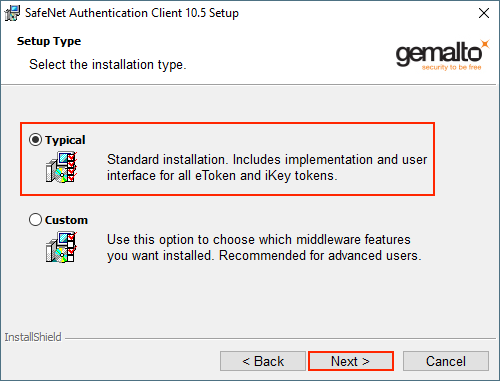
Step 5: The Setup Type page will look something like this. On this page, select ‘Typical’ for the installation type and then click ‘Next.’
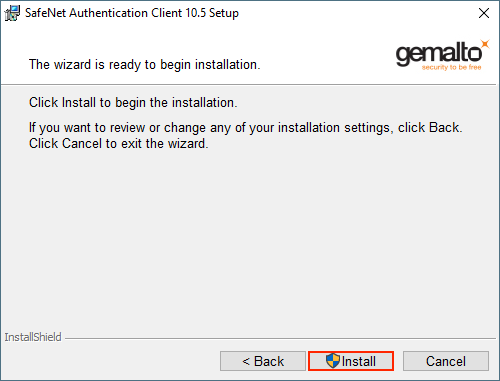
Step 6: ‘The wizard is ready to begin installation’ page will appear where you have to click Install. It might take several minutes to process the installation process.
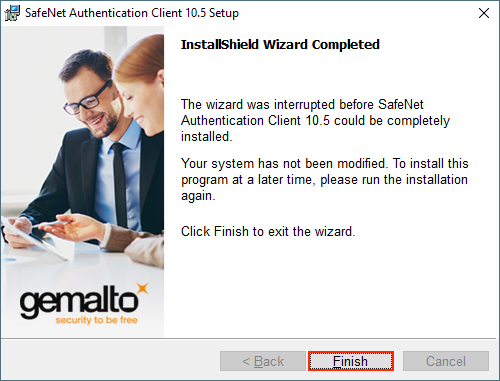
Step 7: Click on ‘Finish‘ on the SafeNet Authentication Client to exit SafeNet Authentication Client Setup. Voila! You have now successfully installed the SafeNet Client Software.
After the successful installation of the software, let us now move on to setting up the EV Code Signing Certificate.
Setting up EV Code Signing Certificate
Get your initialization token from your Code Signing provider and then begin the installation process:
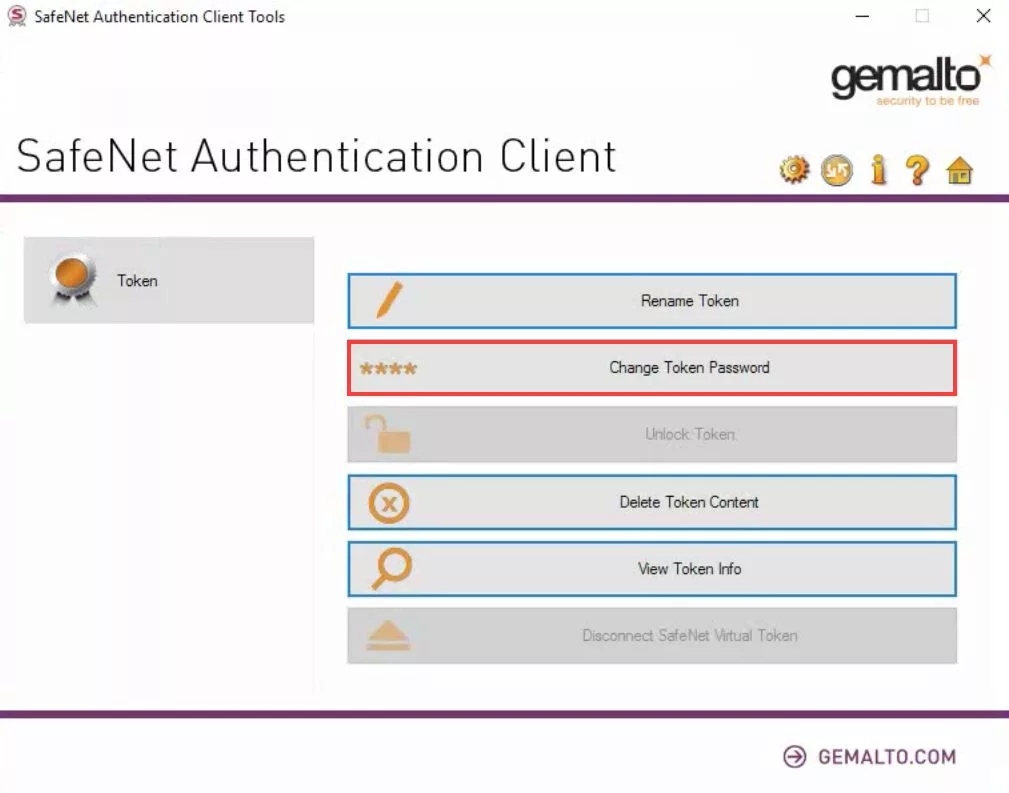
Step 1: To activate your EV Code Signing Cert, plug in your EV Code Signing USB and run the SafeNet Authentication Client Software.
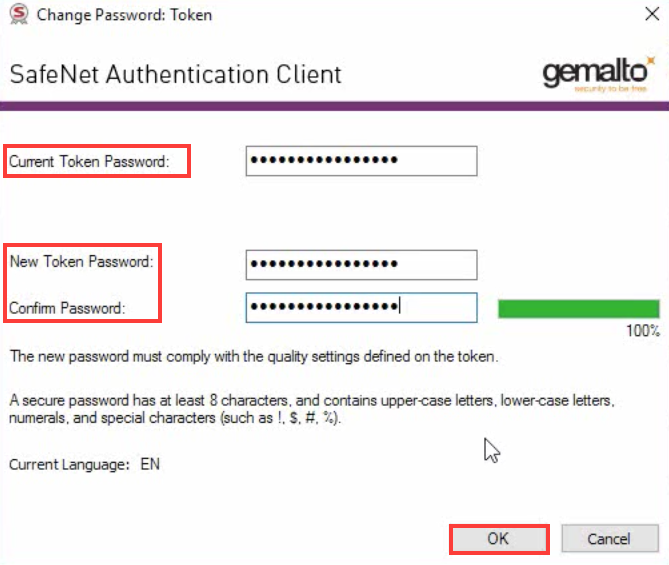
Step 2: In the SafeNet Authentication Client Tools window, click on ‘Change Token Password.‘ While this step isn’t mandatory, we recommend you ‘Change Token Password.’ It will open the interface for changing the password for the token. Input a distinct password
Step 3: You will see New Token Password and Confirm Password boxes. You can create and confirm your new token password that meets the security needs of SafeNet with the help of the password in the email format that you have received from the Certificate Authority. Now, click OK.
These are the basic steps needed to install an EV Code Signing Certificate.
Final Words
The EV Code Signing certificate differs from a standard code signing certificate. Likewise, we have discussed some steps you must follow to use your received EV Code Signing certificate to digitally sign software, executable files, drivers, and applications.

Cheap Code Signing Certificates
Prevent Code Tampering and Authenticate Code Integrity by Digitally Sign your Code with Trusted Code Signing Certificates.
Starting at Just $215.99/Year
