
How to Set Up Your DigiCert-Provided eToken?
This article will help you set up your Code Signing hardware token provided by CA DigiCert. These eTokens are cutting-edge tools designed to fortify your digital assets and ensure integrity.
Safeguard your digital codes with DigiCert eToken. Read on to learn how to set it up using the simple steps below.
Requirements to Set Up Your DigiCert-Provided eToken
To ensure a smooth setup process, please ensure that you have the following prerequisites in place:
- Hardware Token Provided by DigiCert: You will need one of the following hardware tokens provided by DigiCert: SafeNet 5110 CC, SafeNet 5110 FIPS, or SafeNet 5110+ FIPS.
- Your Computer’s Administrator Permission: Before proceeding, ensure that you have administrator permissions on your computer. It will enable you to perform the necessary actions to set up your eToken.
- Verification of eToken Status: Determine whether your eToken is blank or if it comes with the certificate preinstalled. To check this, navigate to your CertCentral account and go to the Order details page of your certificate. In the Certificate Actions dropdown menu, observe the available options.
By adhering to these prerequisites, you will be well-prepared to set up your DigiCert-provided eToken and enjoy the enhanced security it brings.
Let’s proceed to the next steps based on whether your eToken is blank or comes with the certificate preinstalled.
Installing Code Signing Certificate on Token
To get your code signing certificate on your eToken, follow these step-by-step instructions:
Step 1: To Install the certificate, follow the link shared by DigiCert via email. You need to download and install the DigiCert Hardware Certificate Installer.
Note: You must install the SafeNet Authentication Client on any system you plug the eToken in to sign code.
Step 2: Download DigiCert Hardware Certificate Installer:
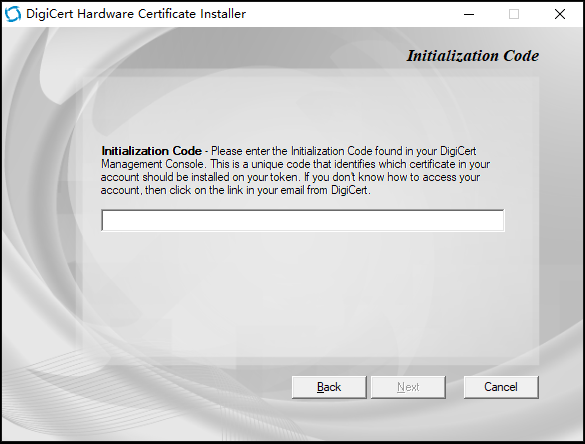
Step 3: Enter Initialization Code: Copy the initialization code specific to your order provided via email and paste to Initialization Code page. Click “Next” to proceed.
Step 4: Connect eToken: Plug your eToken into the appropriate port of your system.
Step 5: Certificate Details Page Will be Open. Just Review the Details.
Step 6: On the Token Detection page, check the option “Re-initialize my token, permanently delete any existing certificates,” and click “Next.”
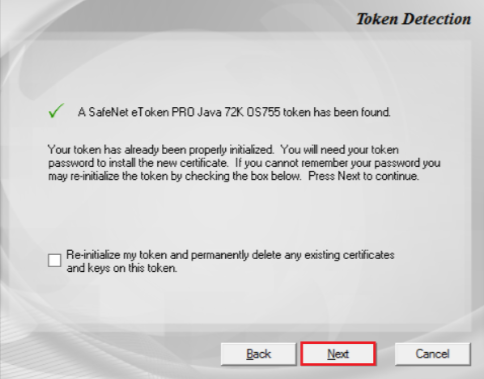
QUICK NOTE: If you must keep your current certificate intact on the eToken when installing an alternate chain or essential type, leave the “Re-initialize” option unchecked.
Key Information:
- Select the appropriate essential type based on your requirements on the Key Information page.
- For RSA, choose “RSA” as the Key Type and “4096” as the Key Size/Curve Name.
- For ECC Key Types, select “ECC” as the Key Type and either “p-256” or “p-384” as the Key Size/Curve Name.
- Click “Next” to continue.
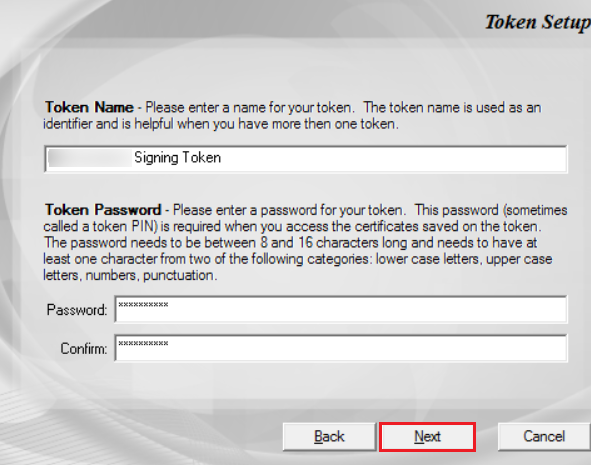
Step 7: Provide a name for your eToken in the “Token Name” field on the Token Setup page. This name will help identify the eToken, especially if you have multiple tokens. Create a secure Token Password (or token PIN) to access the eToken certificates.
Step 8: Administrator Password: On the Administrator Password page, choose the appropriate action:
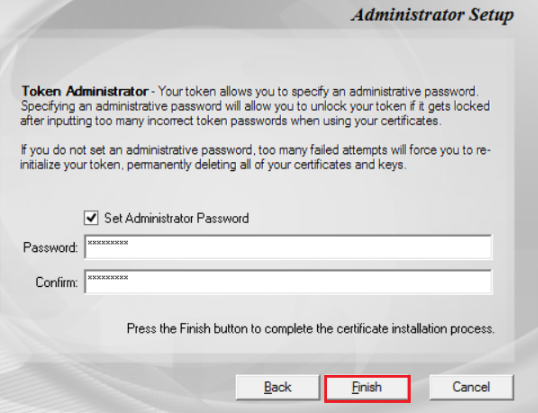
- If you have not changed the Administrator Password since receiving your eToken, leave the “Use factory default Administrator password” option checked and select “Finish.”
- If you have set a new Administrator Password previously (outside of DigiCert Support using the SafeNet client), uncheck “Use Factory default Administrator password,” enter the current Administrator Password, and select “Finish.”
Step 9: Certificate Installation: Please be patient on the page and wait for the process to complete. Some steps may take several minutes, especially when generating an RSA 4096-bit key. Avoid removing the eToken until the entire process finishes.
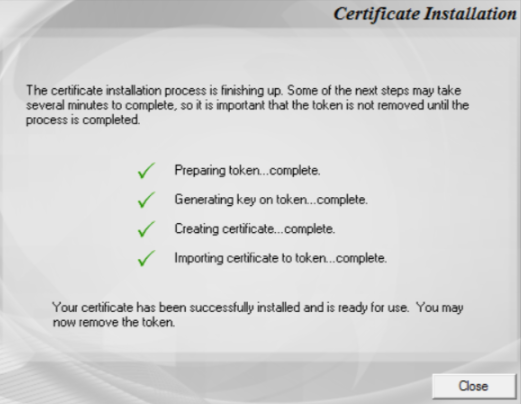
Step 10: When the installation process finishes, select “Close.”
Congratulations! You can now utilize the code signing certificate on your eToken to sign your code securely.
By following these instructions diligently, you will successfully install your code signing certificate on your eToken, enabling you to leverage enhanced security for your digital signing endeavors.
Initializing Process for your eToken
To initialize your eToken, follow these steps:
QUICK NOTE: Before proceeding, ensure you have your DigiCert-provided hardware token. This token is required to complete the initialization process. Additionally, pay attention to the displayed information, as some details are shown only once.
Step 1: Change eToken Password:
- Open the SafeNet Authentication Client and connect the eToken to your computer.
- In the SafeNet Authentication Client, right-click the cog icon (Configuration button) at the top of the page. Right Click on E-token name and click on Initiate Token.

- You should now see the eToken listed in the tree menu on the left side of the page.
- Right-click on the eToken name and select “Change Password.”
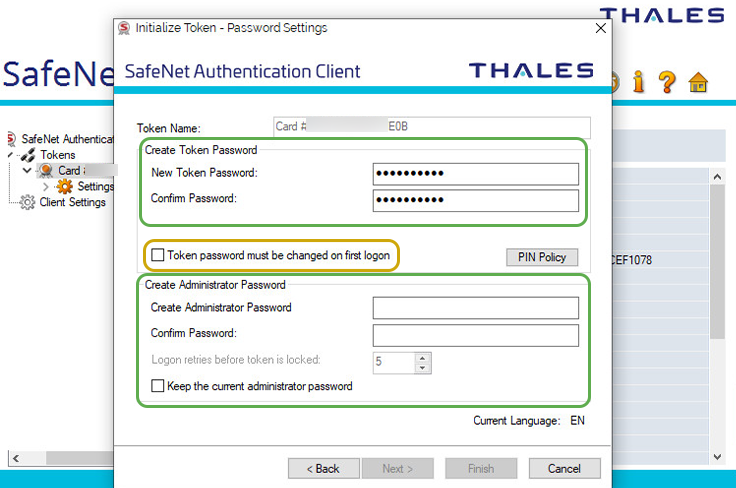
- Create a new password following the provided requirements.
- Save the New Token Password securely in your password manager or another safe location.
- When ready, select “OK” to confirm the password change.
Step 2: Utilize Your eToken for Code Signing: That’s it! Your eToken is now initialized and ready to be used for digital signing purposes. You can utilize the certificate on your eToken to sign the code securely.
Following these instructions, you have successfully initialized your eToken and taken the necessary steps to ensure secure code signing using your DigiCert-provided hardware token.
Password Management and Troubleshooting for SafeNet eToken
Password security is crucial when using SafeNet eToken for authentication. Follow these guidelines and troubleshooting steps to ensure the smooth operation of your eToken:
About Password 101:
!!WARNING!! Multiple passwords are involved in the authentication process of the SafeNet eToken. If the Administrator Password is entered incorrectly five times, the eToken will be permanently locked.
The SafeNet eToken utilizes the following passwords:
- Administrator Password:
The default Administrator Password, set by the manufacturer, consists of the digit “0” repeated 48 times. It is essential to remember this password, as DigiCert does not have access to it. Losing this password will result in a permanent lockout from the eToken, requiring the purchase of a new one.
- Token Password:
The Token Password is used to access the eToken certificate store. If you forget this password, you can reset the eToken and reinstall the certificate.
- Personal Unlocking Key (PUK):
DigiCert does not utilize the PUK in our process. The default PUK for the SafeNet eToken is 000000.
Troubleshooting Methods:
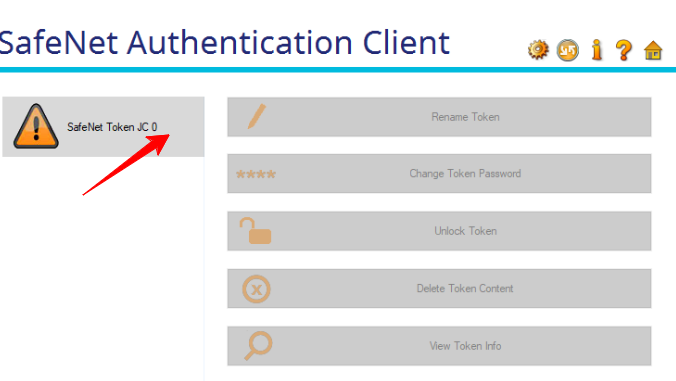
Your token appears as “SafeNet Token JC 0”:
If your eToken displays this message, it indicates that the device has been permanently disabled due to multiple incorrect password attempts. Please contact DigiCert Support to order a new eToken.
Losing your Administrator password:
Unfortunately, the Administrator password is required to reset the eToken and is unrecoverable. To resolve this issue, please contact DigiCert Support to order a new eToken.
Lost Token password:
If you lost your Token Password, reset the eToken password using the Administrator Password.
Re-initialize your eToken:
After DigiCert reissues your certificate, install it on your eToken. It will reinitialize the eToken and ensure its functionality with the newly issued certificate.
By adhering to these password management guidelines and following the troubleshooting steps, you can maintain the security and proper functioning of your SafeNet eToken.

Cheap Code Signing Certificates
Prevent Code Tampering and Authenticate Code Integrity by Digitally Sign your Code with Trusted Code Signing Certificates.
Starting at Just $215.99/Year
