Guide to Install SafeNet Client Software, Initiate and Reset eToken
This tutorial will help you in setting up the software and initialize your eToken for secure access. Learn how to safeguard your digital environment and use the SafeNet Client Software.
Let’s start Installing SafeNet Client Software, Initialize a SafeNet eToken 5110CC, and reset a SafeNet 5110FIPS USB Token Device password.
Steps to Install the SafeNet Client Software:
Step 1: Step 1: You need to download and install the DigiCert Hardware Certificate Installer. [Link to download the installer: https://www.digicert.com/StaticFiles/DigiCertHardwareCertificateInstaller.zip]
Step 2: Before running the SafeNet Authentication Client, ensure your token is unplugged from the USB port on your computer.
Step 3: Run the SafeNet Authentication Client program that you have downloaded.
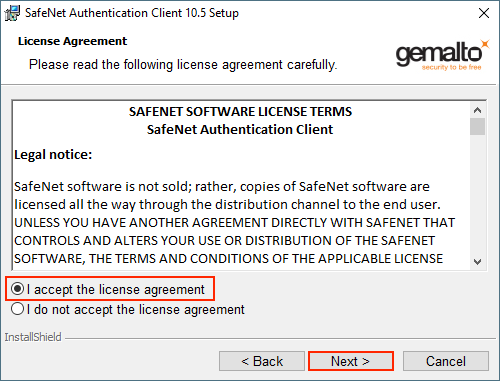
Step 4: You will soon encounter the Welcome page in the SafeNet Authentication Client Setup. Click on “Next” to begin the software installation process.
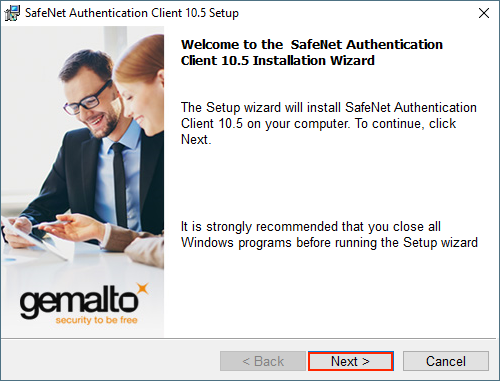
Step 5: Pick the language you prefer from the drop-down list on the Interface Language page, and then click “Next.”
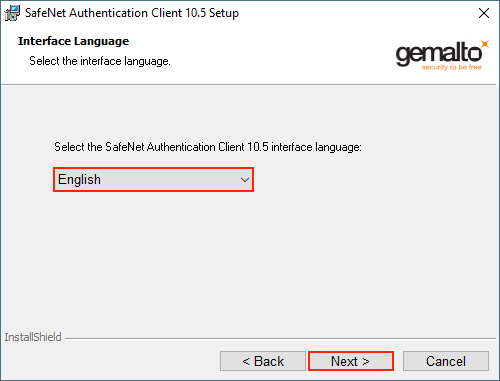
Step 6: Accept the License Agreement.
Step 7: Select the Folder to Install SafeNet Authentication Client and Click Next.
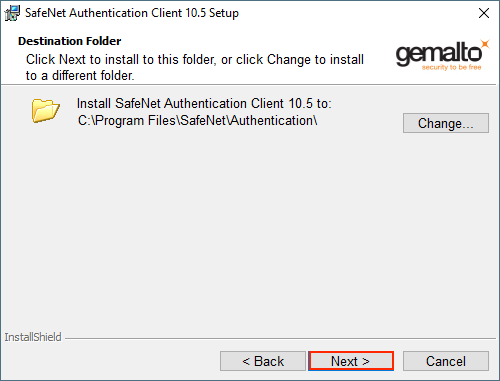
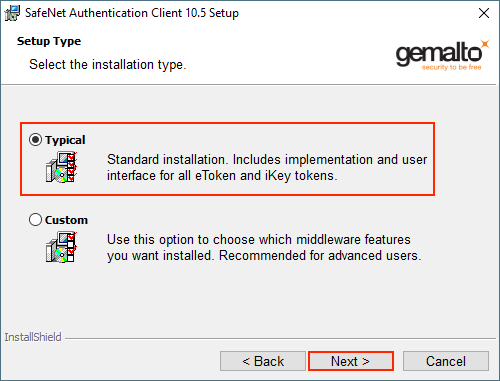
Step 8: On the Setup Type page, select “Typical” as the installation type, then click “Next.”
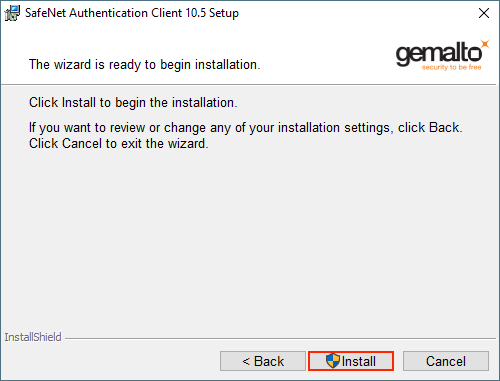
Step 9: On the “The wizard is ready to begin installation” page, click “Install” to start the installation process.
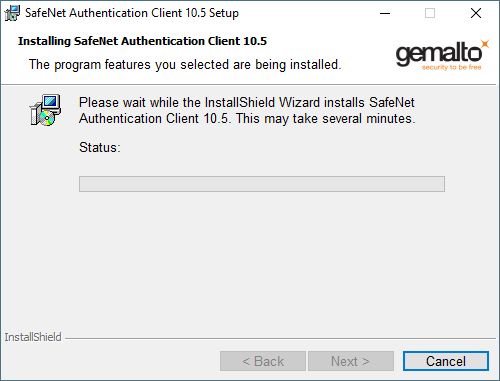
Step 10: Wait a few minutes while the software is installed on your system.
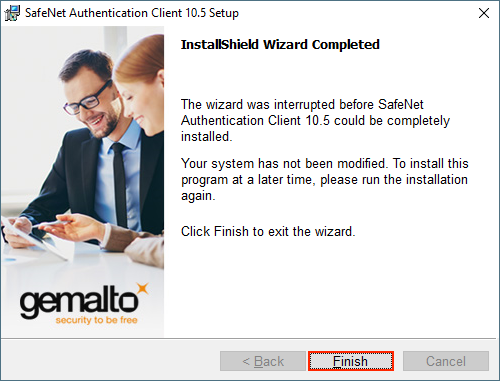
Step 11: Once the installation is complete, you will see the “SafeNet Authentication Client has been successfully installed” page. Click “Finish” to exit the SafeNet Authentication Client Setup.
That’s it! You have successfully installed the SafeNet Client Software on your computer.
After Installation of SafeNet Client, Follow the below steps as per the option:
Option 1: Install certificate
This option means your eToken is blank, and you need to follow installation process on your eToken.
Option 2: Initialize token (Skip Installation Step and Move to Token Initialization Step)
You need to choose this option, if you have CA provided token. The Code Signing Certificate comes preinstalled on your eToken. You just need to unlock/initiate the eToken to access your code signing certificate.
Steps to Setup/Install DigiCert-CA Provided eToken:
Step 1: You need to download and install the DigiCert Hardware Certificate Installer.
Note: You must install the SafeNet Authentication Client on any system you plug the eToken in to sign code.
Step 2: Copy the initialization code specific to your order provided via email and paste to Initialization Code page. Click “Next” to proceed.
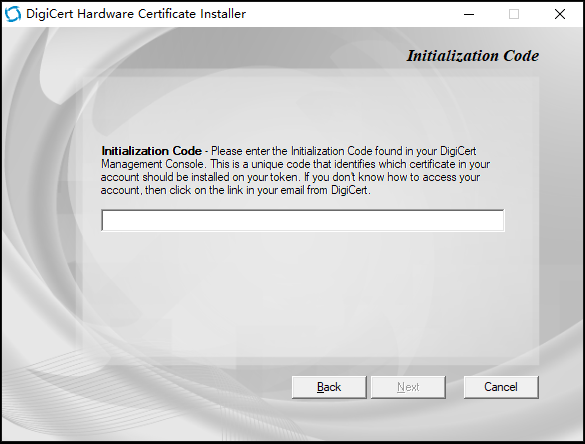
Step 3: Plug your eToken into the appropriate port of your system.
Step 4: On the Token Detection page, check the option “Re-initialize my token, permanently delete any existing certificates,” and click “Next.”
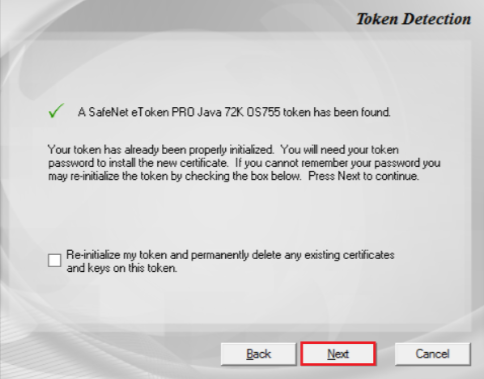
QUICK NOTE: If you must keep your current certificate intact on the eToken when installing an alternate chain or essential type, leave the “Re-initialize” option unchecked.
Key Information:
-
- Select the appropriate essential type based on your requirements on the Key Information page.
-
- For RSA, choose “RSA” as the Key Type and “4096” as the Key Size/Curve Name.
-
- For ECC Key Types, select “ECC” as the Key Type and either “p-256” or “p-384” as the Key Size/Curve Name.
-
- Click “Next” to continue.
Step 5: Provide a name for your eToken in the “Token Name” field on the Token Setup page. Create a secure Token Password (or token PIN) to access the eToken certificates.
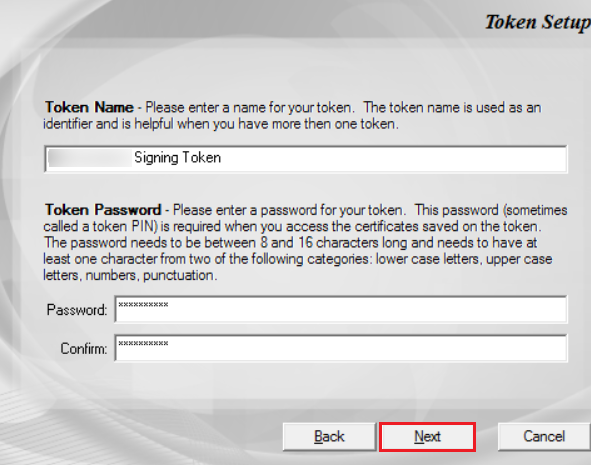
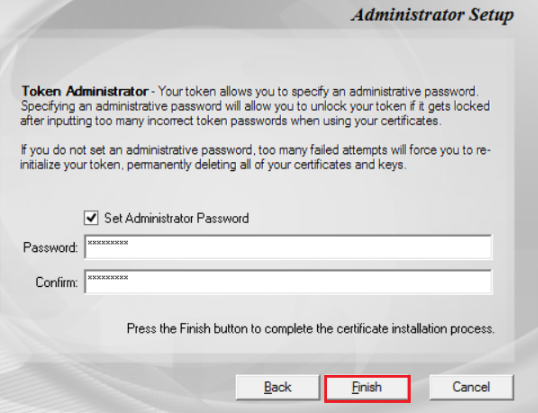
Step 6: On the Administrator Password page, choose the appropriate action:
-
- If you have not changed the Administrator Password since receiving your eToken, leave the “Use factory default Administrator password” option checked and select “Finish.”
-
- If you have set a new Administrator Password previously (outside of DigiCert Support using the SafeNet client), uncheck “Use Factory default Administrator password,” enter the current Administrator Password, and select “Finish.”
Step 7: Some steps may take several minutes, especially when generating an RSA 4096-bit key. Avoid removing the eToken until the entire process finishes.
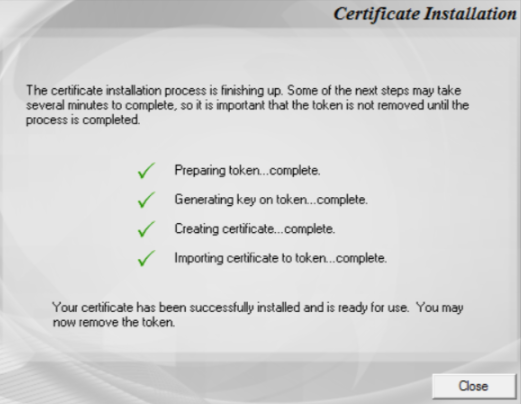
Step 8: When the installation process finishes, select “Close.”
Congratulations! You can now utilize the code signing certificate on your eToken to sign your code securely.
Initialize a SafeNet eToken 5110CC in no Time!
Before you start the initialization process, ensure that you have the following prerequisites in place:
-
- Obtain your DigiCert provided 5110CC eToken.
-
- Install the SafeNet Authentication Drivers on your computer.
-
- Retrieve a copy of your eToken’s Administrator Password provided by CA.
-
- Use a secure password manager to store and manage your passwords throughout this process. Keeping track of your passwords is crucial to prevent permanent lockouts or to lose of access to your eToken.
Understanding Passwords:
The 5110-CC eToken utilizes different passwords for various purposes:
-
- Administrator Password: This password is used to manage eToken. If this password is lost, you will be permanently locked out of the eToken, necessitating the purchase of a new one. By default, this password consists of 48 “0”s (000000000000000000000000000000000000000000000000).
-
- Token Password: This password grants access to the eToken certificate store. You can reset it and install a new certificate if it’s lost. The default Token password is provided in the CertCentral portal, and it is recommended to change it. If the token has been re-initialized with an empty keystore, the default password is 1234567890.
-
- Personal Unlocking Key (PUK): DigiCert does not utilize this key. The default PUK is 000000.
QUICK NOTE: The eToken has a stringent password policy. Incorrectly entering the Administrator Password or PUK five times will permanently lock the eToken.
Initialization Procedure:
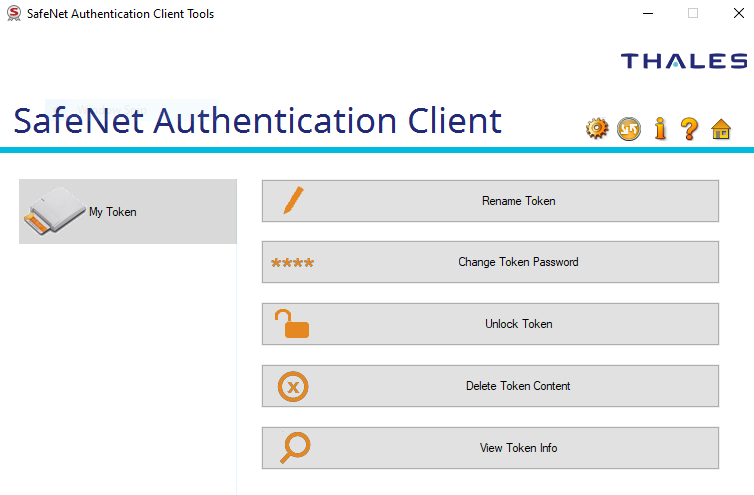
Step 1: Open the SafeNet Authentication Client and connect your eToken to your computer. Confirm that the client recognizes the eToken. You will see the eToken listed on the left side of the client interface.
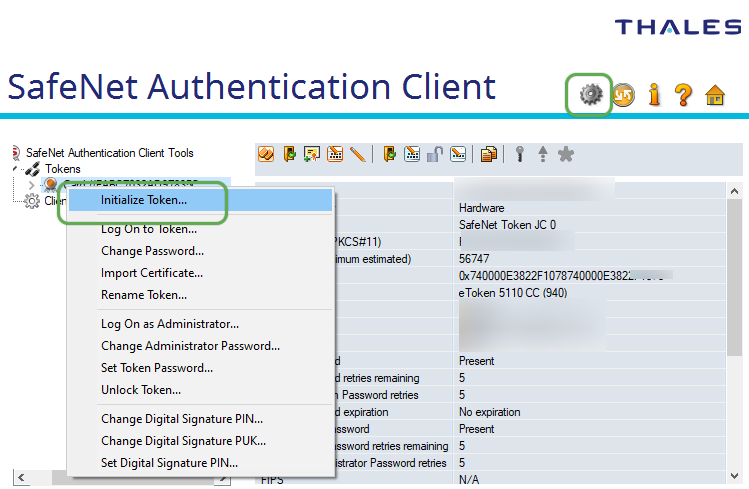
Step 2: Right-click on the eToken name and select “Initialize Token.”
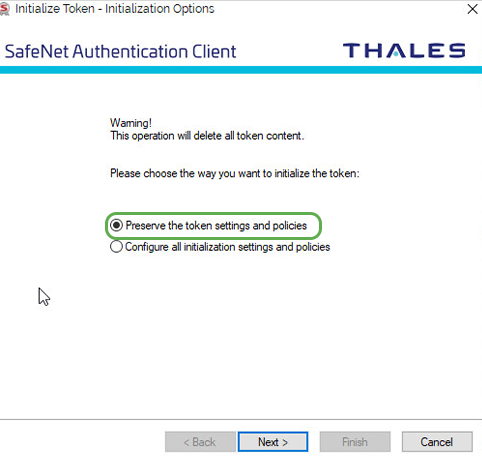
Step 3: In the “Initialize Token” section, you have to select the “Initializing Options” window. Then, choose “Preserve the token settings and policies” and click “Next.”
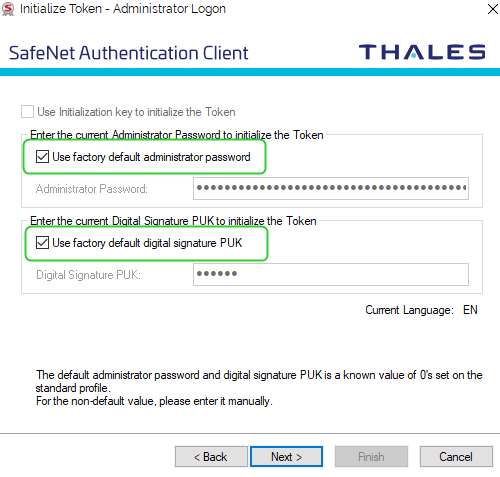
Step 4: In the “Initialize Token” section, pick the “Administrator Logon” window. Enter the current Administrator Password.
QUICK NOTE: As mentioned above, the Default Administrator password is “0,” typed 48 times. This password remains unchanged by DigiCert.
Step 5: Check the option “Use factory default digital signature PUK” and enter 000000 as the PUK. Click “Next.”
QUICK NOTE: The default PUK is 000000.
Step 6: In the “Initialize Token – Password Settings” window, create new passwords:
Step 7: Create a Token Password:
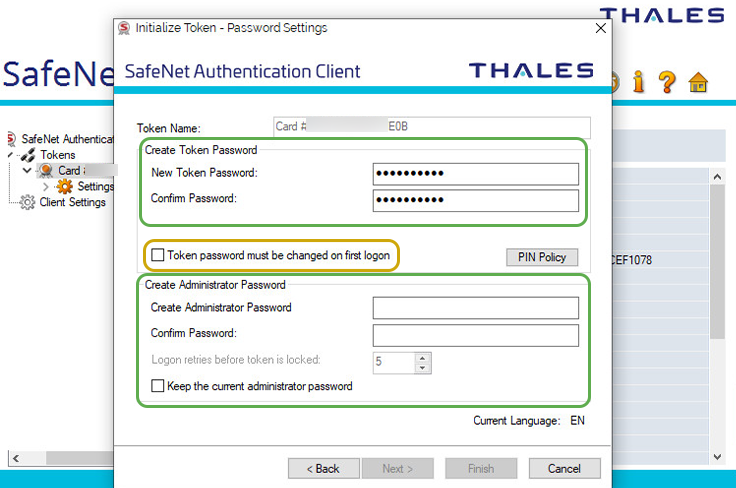
Step 8: Enter and confirm a new Token Password, which grants access to the token certificate store.
Step 9: If you lose this password, you can reset the token and install a new certificate using the Administrator Password.
Step 10: Uncheck the option “Token password must be changed on the first logon.”
Step 11: Create an Administrator Password. Create and confirm a new Administrator Password used to manage the eToken.
-
- It is recommended to use the default password.
-
- This password does not grant access to the certificate store.
-
- Losing this password may prevent the import of new certificates, requiring the purchase of a new token.
-
- Click “Next.”
Step 12: Safely store your passwords in a secure place, such as a password manager.
Step 13: In the “Initialize Token – IDPrime Common Criteria Settings” window, create a new PIN and PUK for your token.
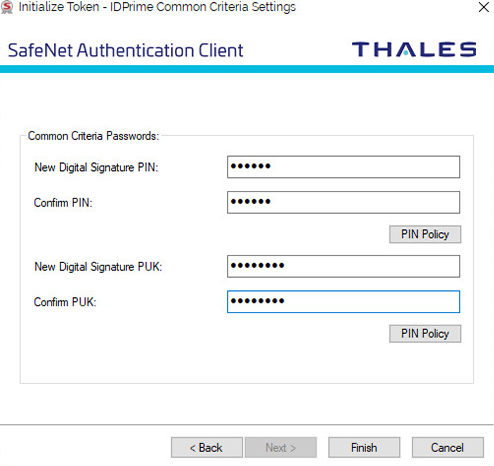
They are not commonly used but can replace the Token and Administrator passwords.
!!Warning!! Entering an incorrect PUK five times will render the token unusable, requiring the purchase of a new one.
Click “Next.”. Ensure you save your PIN and PUK in a secure location, such as a password manager.
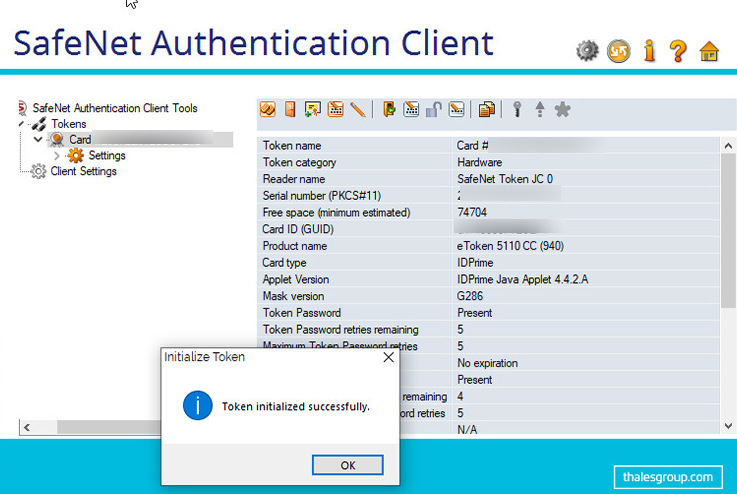
Your eToken is initialized. You can install your code signing certificate onto the eToken using the DigiCert Hardware Certificate Installer. Additionally, you have the flexibility to import certificates.
Quick Troubleshooting Solutions:
Issue 1: Lost your Administrator password?
Resolution: The administrator password is essential for resetting the devi. If you need help remembering your password, please contact our support team. They will guide you through the process of ordering a new eToken. The default Administrator password can be found in the information provided above.
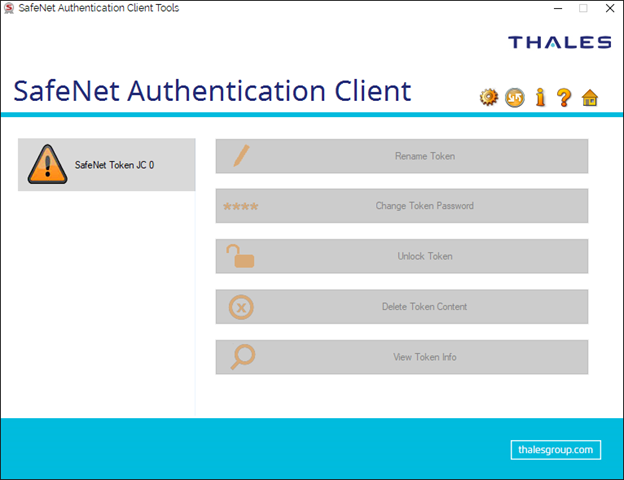
Issue 2: Token appears as “SafeNet Token JC 0”
Resolution: This indicates that the token has been permanently disabled due to multiple incorrect password attempts. To resolve this issue, please reach out to our support team. They will assist you in ordering a new eToken to replace the disabled one.
Issue: Lost your Token password?
Resolution: The Token password is used to access the eToken certificate store. You can reset the eToken using the Administrator password if you have lost this password. To do so, follow the guidelines and then utilize the DigiCert Certificate Hardware Installer to set up a new Token password. If you require any assistance during this process, please don’t hesitate to contact our support team.
Resetting/ Initializing a SafeNet 5110FIPS USB Token Device Password Instructions
Please follow the stages below to initialize or reset the password for your SafeNet 5110FIPS USB Token Device:
QUICK NOTE: Keep in mind that by following these steps, any previously installed certificate will be removed, as this process involves deleting the contents of the SafeNet USB Token Device.
Step 1: Insert the SafeNet USB Token Device into your computer.
Step 2: Locate and run the SafeNet Authentication Client Tools program from the start menu.
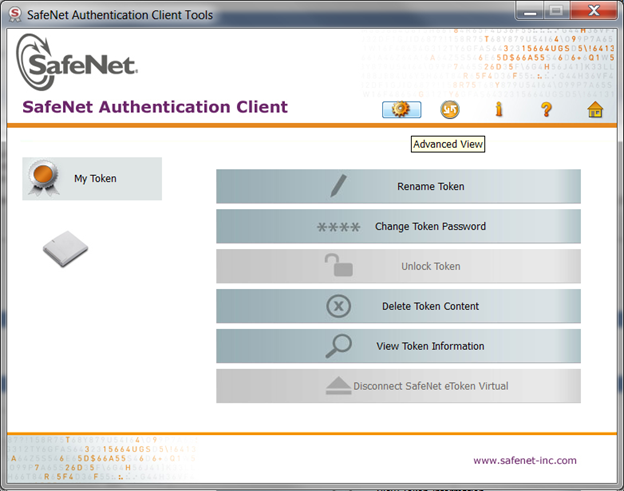
Step 3: Look for the Gear icon in the program interface representing the advanced view. Click on it to access the advanced settings.
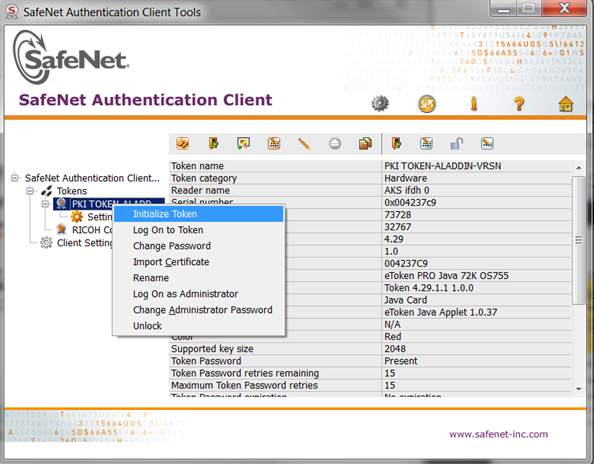
Step 4: On the left-hand side of the screen, locate the PKI Token-ALADDIN-VRSN option. Right-click on it and select “Initialize Token.”
Step 5: In the “Create Token Password” section, enter your desired new Token Password. Once entered, click on the “Start” button.
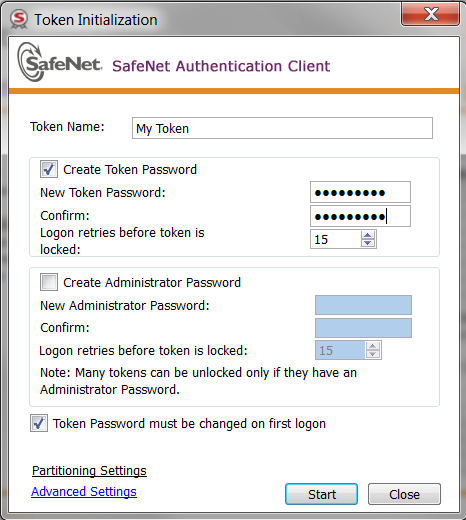
Step 6: A confirmation prompt will appear. Select “OK” to proceed with resetting all the token parameters.

Step 7: Once the SafeNet USB Token Device has been reset, you can install new certificates onto the token using your new password.
Follow these steps to ensure that your SafeNet 5110FIPS USB Token Device is ready with updated credentials. The best part is that it will allow you to install new certificates and continue securing your digital environment.

