
Windows Kernel Driver Code Signing: For Windows 8 and Lower Versions

Releasing a Kernel Driver requires the publisher to focus entirely on the process, as a single discrepancy can lead to heavy loss. Microsoft updates its Kernel Driver signing policies and standards frequently so Windows doesn’t face cyber-attacks.
To solidify its protection, it has dedicated procedures to sign Kernel drivers and allow publishers to release them then only.
Nowadays, some organizations and end-users still use Windows 8 and lower versions. Therefore, you can utilize the cross-certificate signing method to sign drivers for all such OS versions. Here, you will find all the necessary details and step-by-step guidance on code signing your Kernel Drivers.
Why Code Sign Windows Kernel Driver?
The kernel is the core of the Windows Operating System, as it directly interacts with the hardware and application software. It helps maintain smooth communication between multiple system components and efficiently executes all processes.
Kernel Drivers are programs made to support specific hardware or extend its functionality. As such drivers directly communicate with the operating system’s core, Microsoft ensures that only authentic drivers get installed.
If the Windows OS doesn’t have such a policy, hackers can install a malicious driver on your system and perform privilege escalation, unauthorized access, and malware attacks.
In addition, code signing a Kernel Driver also aligns you with industry standards, leading to releasing such drivers for public release.
The Difference Between Signing Drivers For Windows 10 and Other Lower Versions
According to the latest updates by Microsoft, if any publisher wants to sign a Kernel driver, it can follow one of the following methods.
- Submitting the EV-signed Kernel Driver package to the Microsoft Partner Center Account. It’s specifically for Windows 10 and higher versions.
- By signing the Kernel Driver using your EV Code Signing Certificate and Cross-Certificate. This method is for Windows Vista and above, until Windows 8.
The Prerequisites To Complete Before Signing Kernel Drivers
Before you directly start with the SignTool utility on the Windows operating system to sign Kernel Driver, you need to fulfill some requirements as below:
- Avail of a Code Signing Certificate from a reputed Certificate Authority. A Software Publisher Certificate embeds your digital signature with the driver package.
- You must consider only an EV Code Signing Certificate to ensure a smooth driver installation. Moreover, to be more precise, purchase an EV Windows Authenticode Code Signing Certificate for accurate signing.
- Further, you will need a Cross-Certificate. Such certificates are utilized with WDK (Windows Driver Kit). It helps Microsoft to sign your signed driver package to align it with system standards. It’s an essential requirement to fulfill, as your users will get disabled from installing the driver if it doesn’t have Microsoft’s digital signature.
- Once you have both digital certificates, install the Software Publisher Certificate details in the Personal Certificate Store. Then, you can sign and release your Windows Kernel Driver.
Complete the Procedure For Signing The Windows Kernel Drivers
You can follow the procedure to sign kernel drivers for Windows Vista and above versions, except Windows 10 and above.
Step 1: Obtain an EV Code Signing Certificate
The most efficient way of availing of an EV Code Signing Certificate is to purchase it from a reliable provider, such as SignMyCode. The validation procedure remains only once you fill out the registration form, generate CSR, and make payment.
Under the validation procedure, Certificate Authority verifies your business legitimacy. To participate in the process, being an active and valid organization for three years is essential.
Make sure to download all the certificates to the local machine on which you will be performing the Kernel Driver signing.
Step 2: Avail a Compatible Cross-Certificate
Cross-certificate gets issued by Microsoft in the X.509 format. It helps the system utilize a single Root Certificate Authority as Microsoft but extends the Chain of Trust’s scope to the original root CA.
It entirely depends upon the publisher to distribute cross-certificates. However, it’s always recommended not to distribute with the released version of Kernel Driver.
In addition, you don’t need to perform any extra processes to add cross-certificate, as signing tools automatically add it to the software.
To select the perfect Cross-Certificate for your Windows Kernel Driver, you must follow the below procedure:
Step 1: Access the Microsoft Management Console on your Windows machine by clicking on the startup menu button and typing “mmc” in the search box.
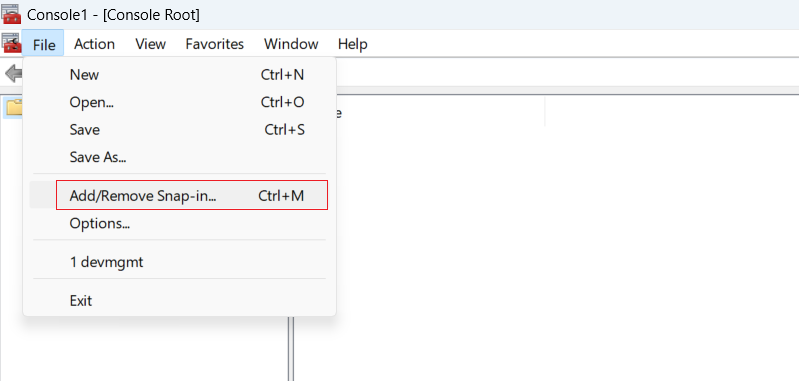
Step 2: After it opens, go to the File menu and click on Add/Remove Snap-in option.
Step 3: Click on Certificate snap-in and then on Add.
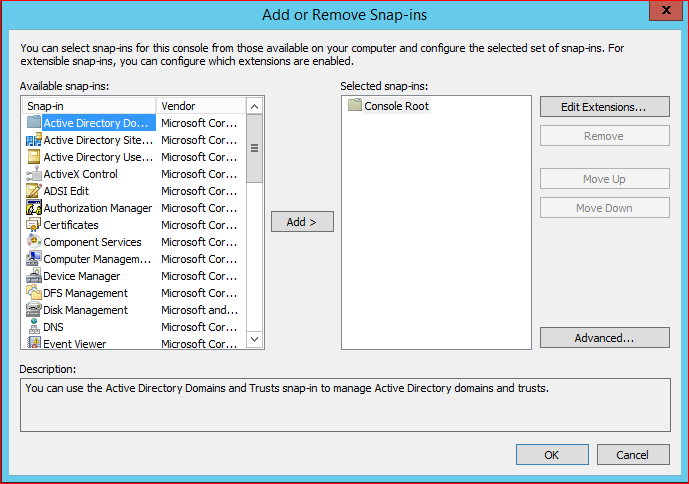
Step 4: Choose the My User account and click on Finish.
Step 5: Repeat step 3 and select Computer Account >> Local computer >> Finish.

Step 6: Discover the location of your Code Signing Certificate in the certificate store. It must be under the Current User, Local Computer, or Personal option.
Step 7: After finding the Software Publisher Certificate, double-click on it and view the Certification Path. From there, choose the very first certificate, as it would be the root CA certificate.
Step 8: Now select the root CA certificate and view its details. Under the Details tab, you will find its issuer and thumbprint details. Utilize the information to find and download the associated cross-certificate.
Step 9: Download the cross-certificate to the driver directory and provide the full path in the command to sign the Kernel Driver.
Step 3: Installation of Code Signing Certificate in Personal Certificate Store
Note: Due to the New CA/B Guideline, the Code Signing Certificate is now not exported; private keys must be marked as non-exportable!
To install the Code Signing Certificate in the Personal Certificate Store, it must be in the .pfx format. Nowadays, every Certificate authority issues a certificate in the required format only, streamlining the task.
However, make sure that you have to add all the details to the Personal Certificate Store of the local machine on which you will execute the signing process.
Further, to complete the installation task effortlessly, use the Certificate Import Wizard. You must undergo all the following steps:
Step 1: Open the search box and type “Manage Computer Certificates.”
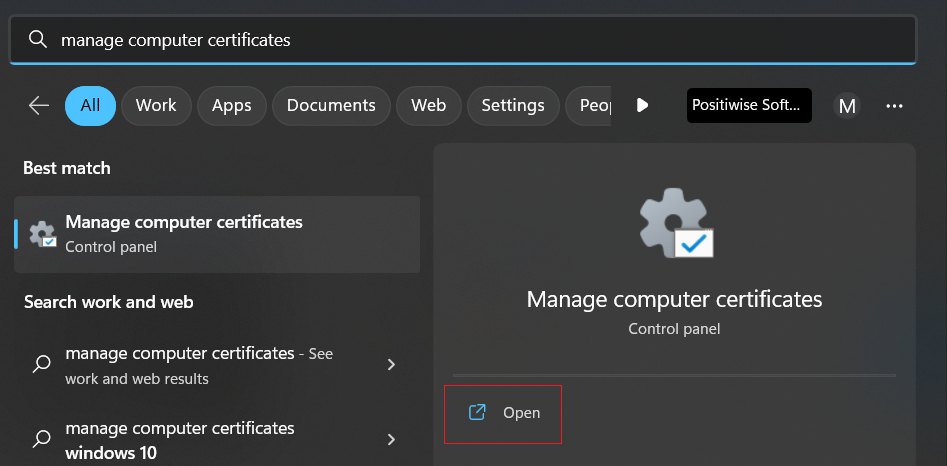
Step 2: It will display the certificate management utility application. Click on it to open.
Step 3: Once it opens, you will see different certificate folders under the local computer.
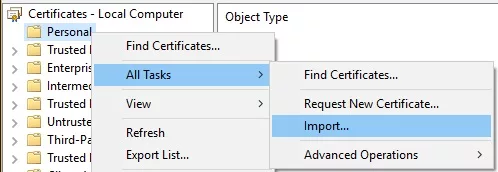
Step 4: Right-click on Personal to open the menu. Click on Tasks >> Import.
Step 5: The Certificate Import Wizard will get opened.
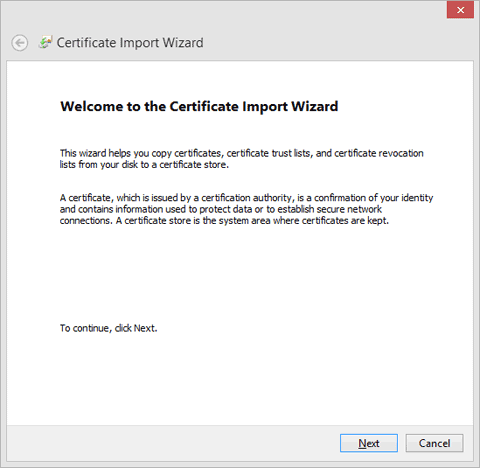
Step 6: Click on the Next button to select the .pfx file and follow the process according to the Wizard.
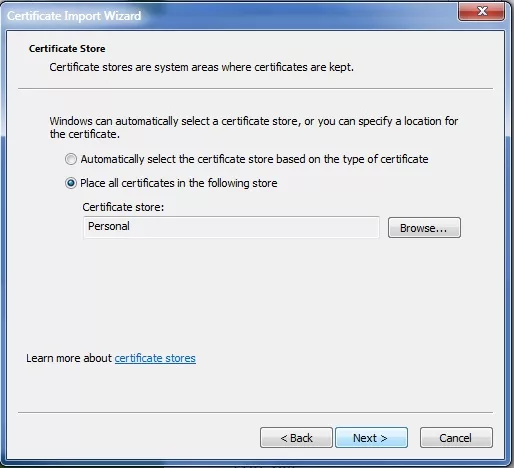
Step 7: Remember, while placing the certificates, select the “Place all certificates in the following store” option and browse the location as Personal.
Step 8: After completing all the tasks, click on Finish, and it will install your certificate in the Personal Certificate Store.
Step 4: Signing the Windows Kernel Driver
Before you open the command prompt to sign the kernel driver, you need to know the subject name of the Code Signing Certificate. To know it:
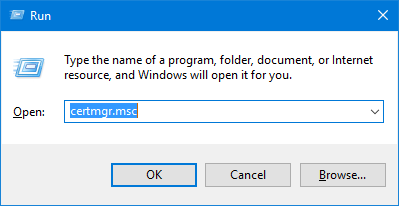
Step 1: Open the certmgr.msc.
Step 2: Click on the Personal Certificates folder, and it will display the list of all certificates under it.
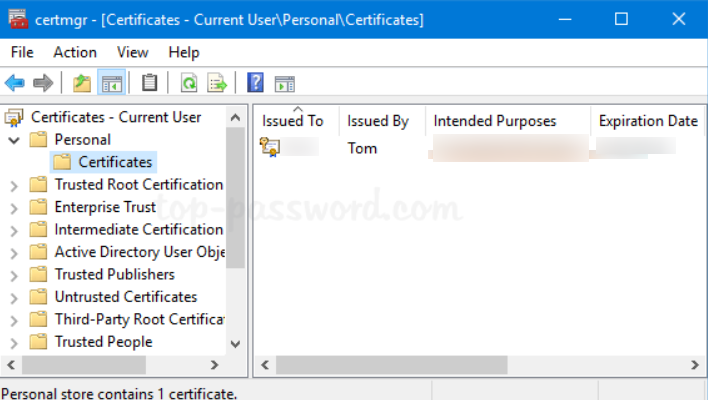
Step 3: Double-click on your Software Publisher Certificate and go to its Details tab.
Step 4: Note the Subject Name and close the dialogue box and certificate management console.
Now, its time to sign the Windows Kernel Driver in two easy steps:
Step 1: Open the command prompt.
Step 2: Run the following command.
signtool sign /v /ac YourCrossCertificate.cer /s My /n “YourSubjectName“ /t LinkOfTimestampServer toaster.catReplace the highlighted keywords with the Cross-certificate file name, Subject Name of the Code Signing Certificate, and Link to CA’s timestamp server. And the command will sign your Windows Kernel Driver.
Also, “My” in the command refers to Personal Certificate Store, navigating the system to fetch the correct Software Publisher Certificate.
Wrapping Up
Signing Windows Kernel Driver is a critical task, requiring complete focus and accurate selection of code signing certificates. To sign such a driver, you must always Purchase EV Code Signing Certificate of an authentic Certificate Authority, such as Comodo and Sectigo.
However, only you can get the right cross-certificate to sign and release your Kernel Driver.
Moreover, it’s essential to install the Software Publisher Certificate into the relevant folder and never share its password with anyone. And once you undergo the mentioned procedure, your Kernel Driver will get signed and ready to release for compatible Windows OS versions.

Cheap Code Signing Certificates
Prevent Code Tampering and Authenticate Code Integrity by Digitally Sign your Code with Trusted Code Signing Certificates.
Starting at Just $215.99/Year
