
Code Sign With Azure DevOps Using a Code Signing Certificate Stored Within Azure Key Vault

Quick Guide to Sign Your Software Using Code Signing Certificate Stored Within Azure Key Vault
Microsoft Azure DevOps helps collaborate culture and many processes that bring developers, project managers, and contributors to develop software.
Similarly, it offers Azure Code Signing as a service that enables software developers and IT Professionals to minimize the friction while code signing the software.
Hence, developers often like to use this fully managed end-to-end service, Microsoft Azure DevOps, for code signing their software.
Get DigiCert EV Code Signing at Just $559.99/yr
Sign and Store your Private Key and Code Signing Cert Securely to Cloud HSM such as Azure Key Vault!
Nonetheless, if you need to learn how to code sign with Azure DevOps using a code signing certificate stored within Azure Key Vault, go through this guide, which explains the complete process.
Steps to Code Sign Your Software With Azure DevOps
Before you start the process, ensure you’ve:
- An active Microsoft Azure Account
- Azure DevOps Project
- A Key Vault
- A Code Signing certificate from a known certificate authority installed within your Key Vault
Let’s get into the details.
Register Your Azure Application
Before you start, you’ll need to register a new Azure application to connect with the Azure Key Vault for code signing.
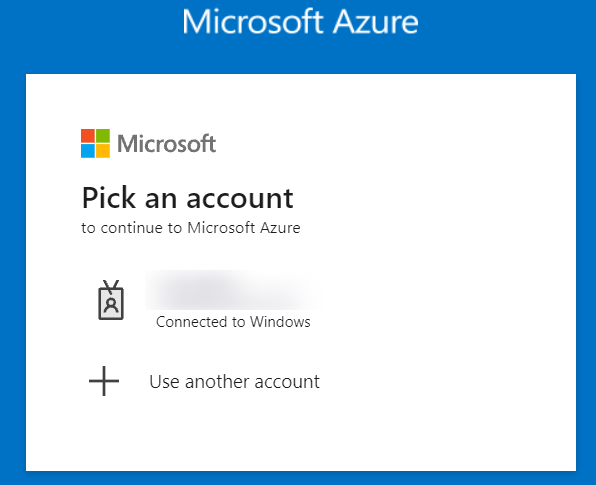
Step 1: Sign in into your Microsoft Azure portal
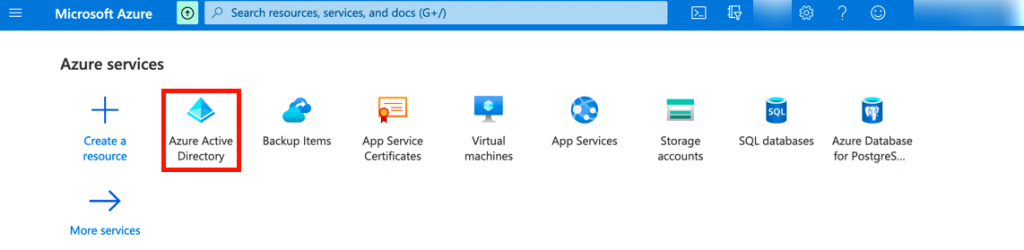
Step 2: Go to the Azure Active Directory. If you need help finding it or it isn’t visible, click on More Services.
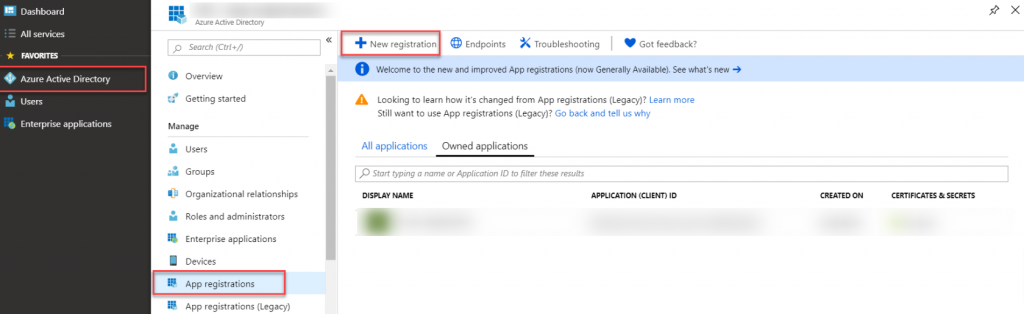
Step 3: Click on the App Registrations from the left side column:
Step 4: Click the New Registrations
Step 5: In the Name section, give the name of your application and click the below button called Register. Similarly, keep other settings unchanged with their default values.
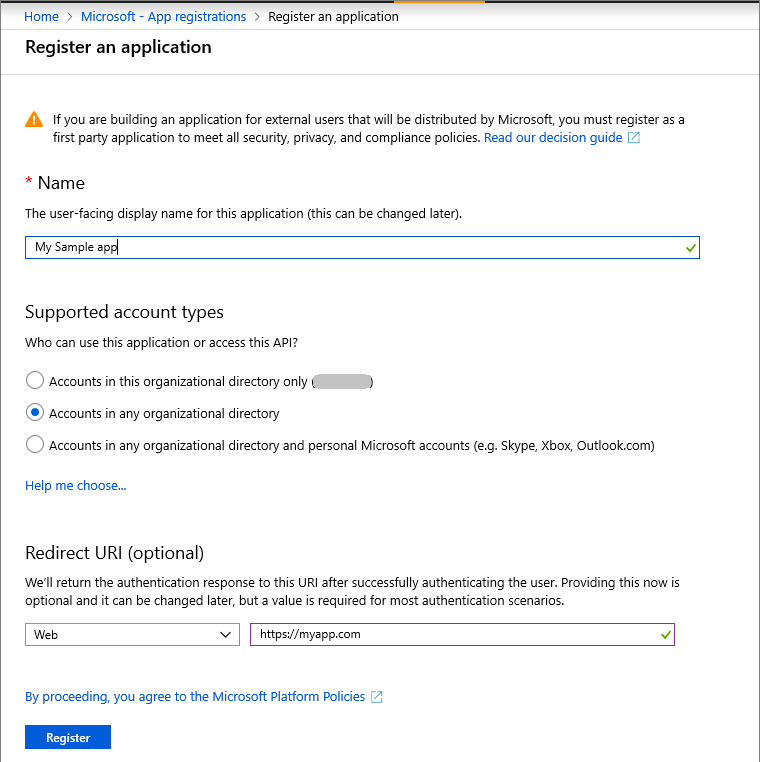
Step 6: Once the application you want to code sign is registered, copy & save the values shown for Application (client) ID, as you’ll require later on.

Generate a Client Secret
Now, you’ll need to generate a client secret that serves as a credential at the time of code signing. To generate a client secret, follow the below steps:
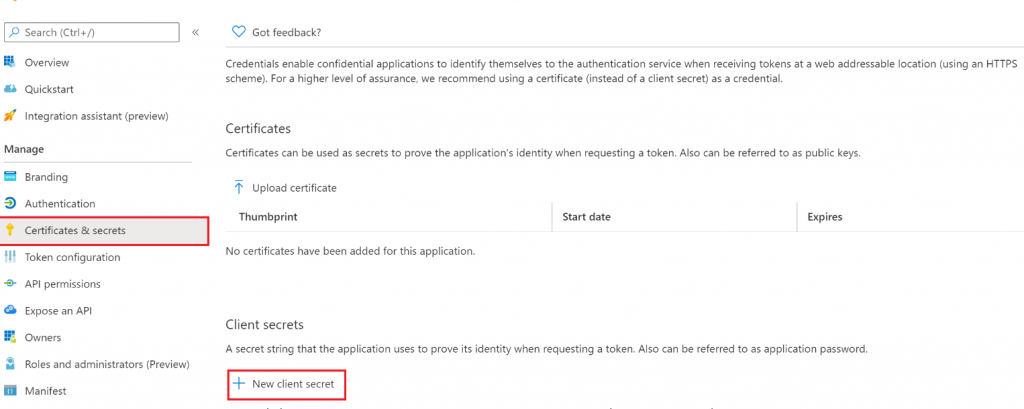
Step 1: From the left side menu, click Certificates & Secrets
Step 2: Click on the New Client Secret
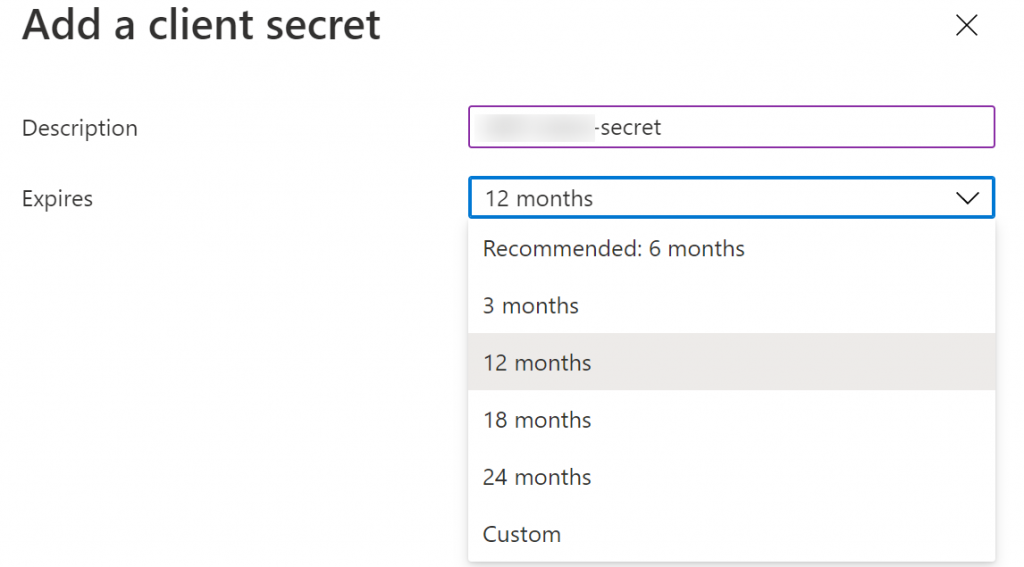
Step 3: Set the client secret’s Description and expiry date and click the Add button.
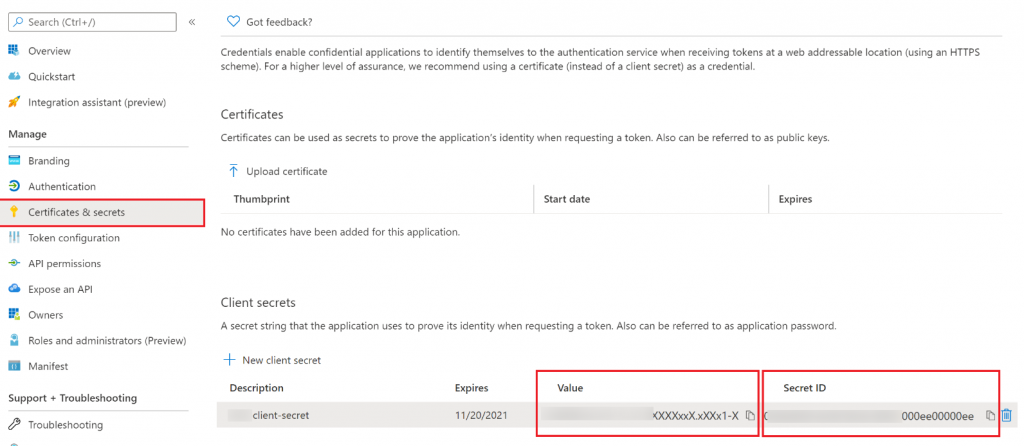
Step 4: Copy the Value of the new client secret and save it safely. Once the page is refreshed, this value will be masked and not retrievable.
Make Key Vault Accessible
Now, you’ll be required to provide access to an application in Azure Key Vault:
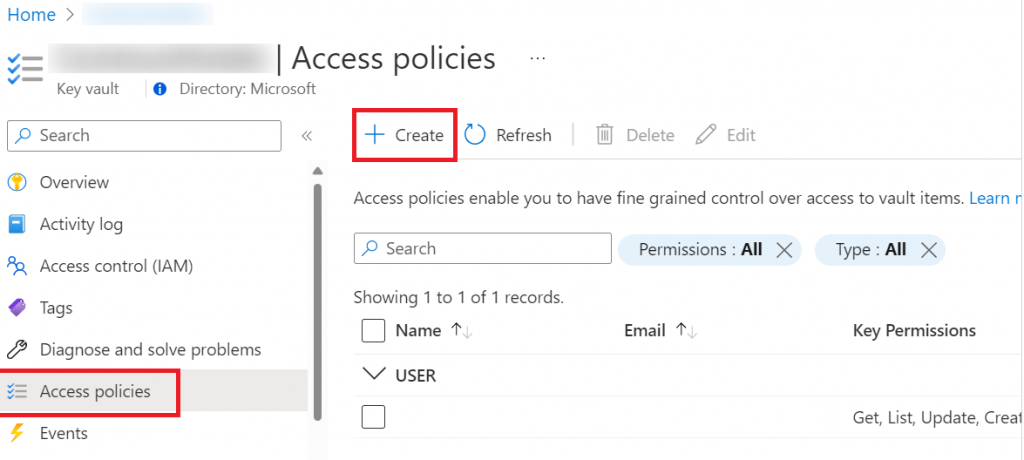
Step 1: Go to the Key Vault containing the code signing certificate you want to use and click on the Access policies link.
Step 2: Click on the option Add Access Policy
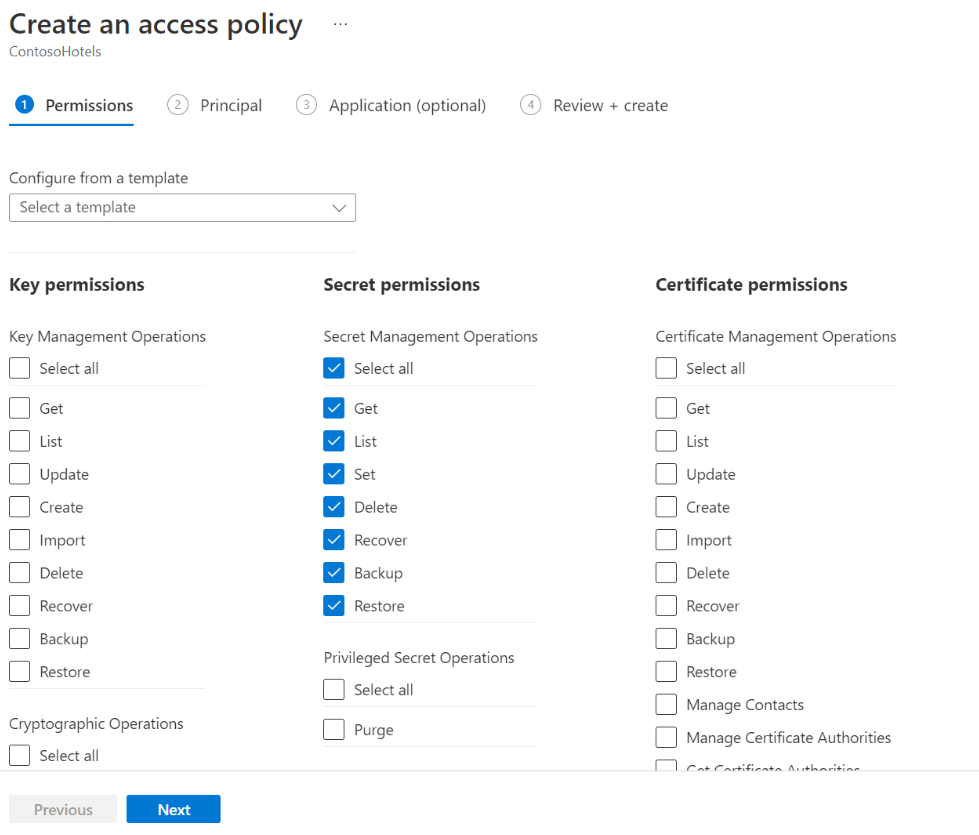
Step 3: Go under Key Permissions and enable Verify, Sign, Get & List.
Step 4: Further, under Secret Permissions, enable Get & List
Step 5: Under Certificate permissions, you’ll also need to enable Get & List.
Step 6: Under Select Principal, click the None selected link and then search to find and select the application you built in the earlier section.
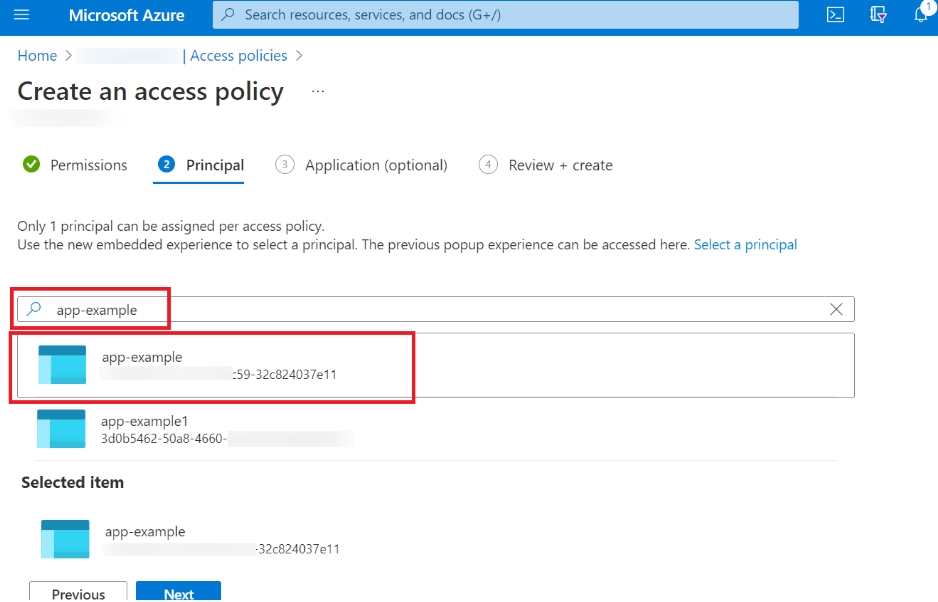
Step 7: Once the application is located, click on the Select button from the bottom left side.
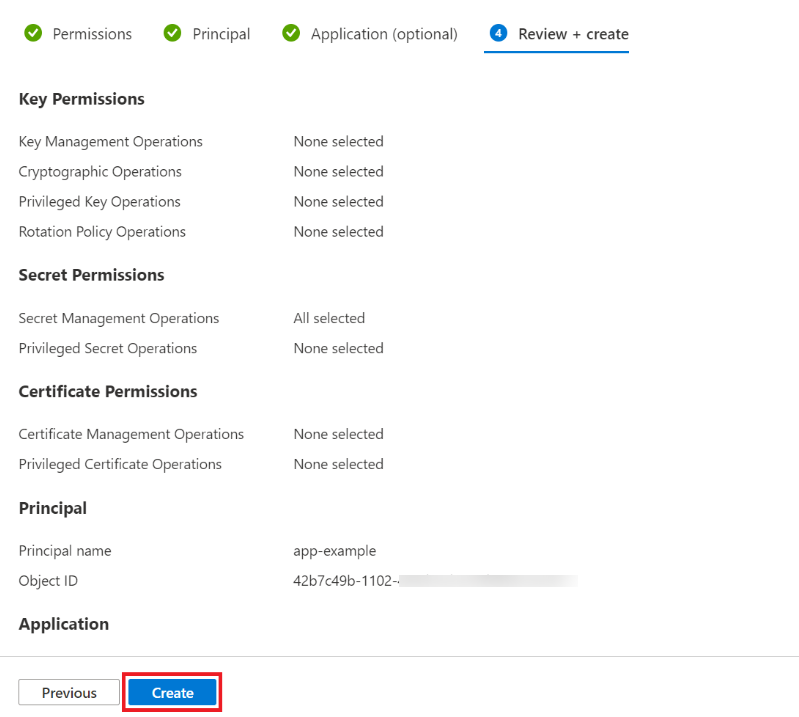
Step 8: Once you complete the abovementioned steps, your access policy will be set.
Configure Your DevOps Build
Now, you’ll need to configure your build. To do so, open your project in Azure DevOps.
Store Application Credentials Like Variables
You can store the application ID and client secret in the YAML pipeline file. But it’s recommended and more secure if you store them like variables within DevOps.
For storing them as variables, follow the below steps:
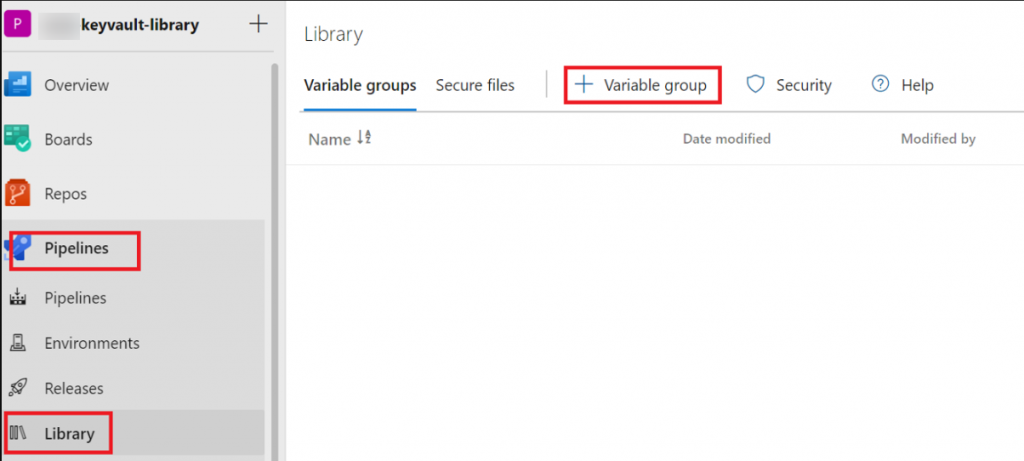
Step 1: Click on the Pipelines
Step 2: Click on the Library
Step 3: Click on the option +Variable group
Step 4: Give a name to the variable group
Step 5: At the bottom, click the +Add
Step 6: Submit the variable name for your application ID and then paste the value. Now, click the lock to encrypt the variable once you have finished.
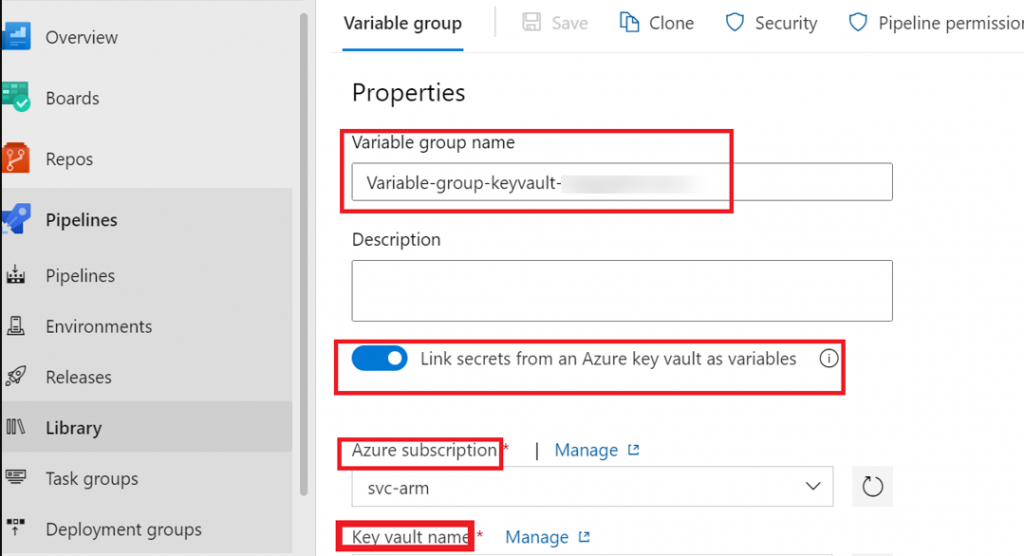
Step 7: Once again, repeat the process and add a variable for your client’s secret.
Step 8: Click on the Save.
Step 9: Now, link the variable group within your pipeline.
Note: Replace VARIABLE-GROUP with your actual variable group name.

Adding Pipeline Step for Installing Azure Sign Tool
Azure Sign Tool is one of the open-source utilities that gives you the functionality of SignTool for certificates and keys that are stored within Azure Key Vault.
- task: DotNetCoreCLI@2
  inputs:
    command: 'custom'
    custom: 'tool'
    arguments: 'install --global azuresigntool'
  displayName: Install AzureSignTool
Add the below step within your pipeline for installing Azure Sign Tool:
Adding Azure Sign Tool Command in Pipeline
Add a task for signing your code to the pipeline. For that, you’ll require the following:
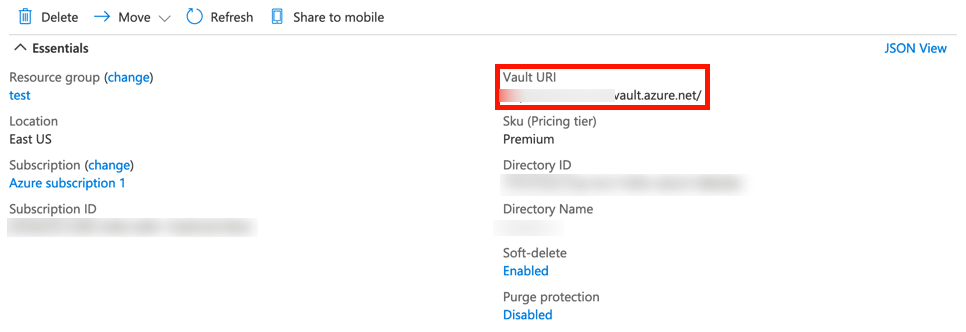
Step 1: Key Vault URI (It’s available within Azure Portal)
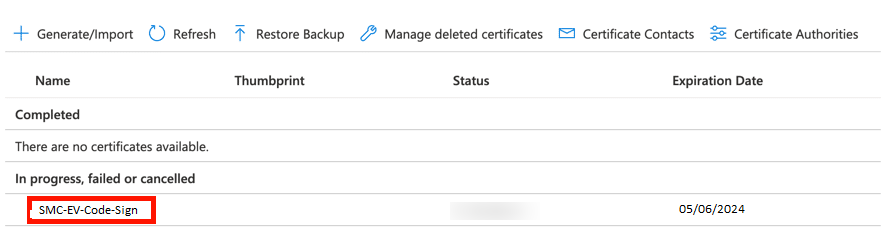
Step 2: Add name of your certificate in Key Vault:
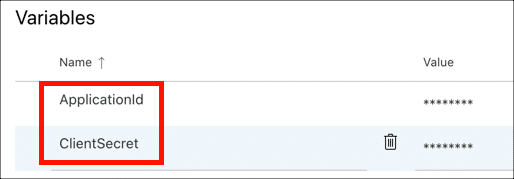
Step 3: Application ID & Client Secret variable names:
Step 4: Now add the Azure SignTool call within the pipeline. And replace the shown value within ALL-CAPS with the actual values:
Now, you should be able to see the output like below if it’s signed correctly:
info: AzureSignTool.Program[0]
      => File: D:\a\1\s\x64\Debug\Hello.exe
      Signing file D:\a\1\s\x64\Debug\Hello.exe
info: AzureSignTool.Program[0]
      => File: D:\a\1\s\x64\Debug\Hello.exe
      Signing completed successfully for file D:\a\1\s\x64\Debug\Hello.exe.
Code Signing with Azure Key Vault
Leverage the Cloud Based Software Security by Securely Store your Private Key and Code Signing Certificate to Microsoft Azure Key Vault.
Get Azure Key Vault Code Signing Certificate
