
How to Sign Visual Studio App Packages Using Azure Key Vault?

Introduction
An essential feature with Visual Studio app packages signing using an Azure Key Vault is how to keep the code signing certificate safe and to automate the signing process in the CI/CD Pipeline (Continuous Integration and Continuous Deployment).
Azure Key Vault is a cloud service that encrypts sensitive data, such as keys, secrets, and certificates, in a secure cloud environment. In this manner, the company presents a way for secure storage both in our databases as well as on the cloud.
Azure SignTool is an app validator that is logically connected to Key Vault with the respective credentials that have been provided. The benefit of the solution is the fact that with it, we can appear logical when publishing Windows desktop apps on MSIX.
Therefore, it has the capacity to quicken the packaging transaction by just signing in the pipeline, and it is tough security to prevent somebody from publishing the private certificate publicly.
With Azure Key Vault and Azure SignTool becoming the best toolset with the final objective, all secret data will be signed without exposing important information during the CI/CD process.
Steps to Sign Visual Studio App Packages using Azure Key Vault
To sign Visual Studio app packages using Azure Key Vault, follow these steps:
Step 1: Create Azure Key Vault
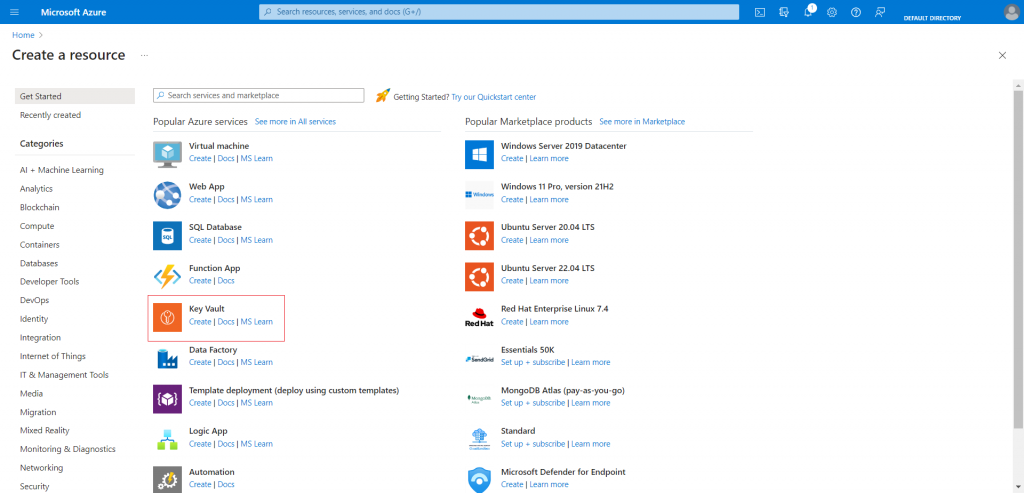
- Log in to Azure Portal: Pass through the Azure Portal using the assigned credentials.
- Navigate to Key Vaults: Choose the blue “Create a resource” button, enter “Key Vault” into search and click on it.
- Fill in Key Vault Details:
- Subscription: Mention the type and choose the subscription with which to associate the Key Vault.
- Resource Group: Create a “new” resource group or select an “existing” resource group.
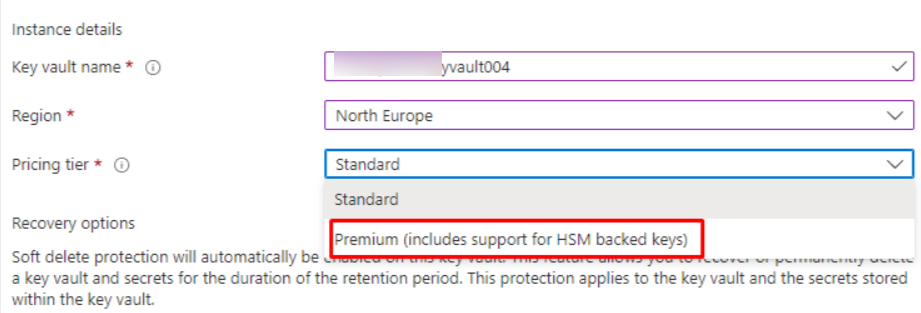
- Key Vault Name: Please enter the Name of your Vault.
- Region: The first step is to decide the location of the Key Vault.
- Pricing Tier: It’s up to you to decide which tier will suit your needs.
- Configure Access Policies: Implement access policies to enable only authorized operations and a limited set of users.
- Create the Key Vault: Analyze and finish the Key Vault.
Step 2: Import a Certificate to Your Key Vault
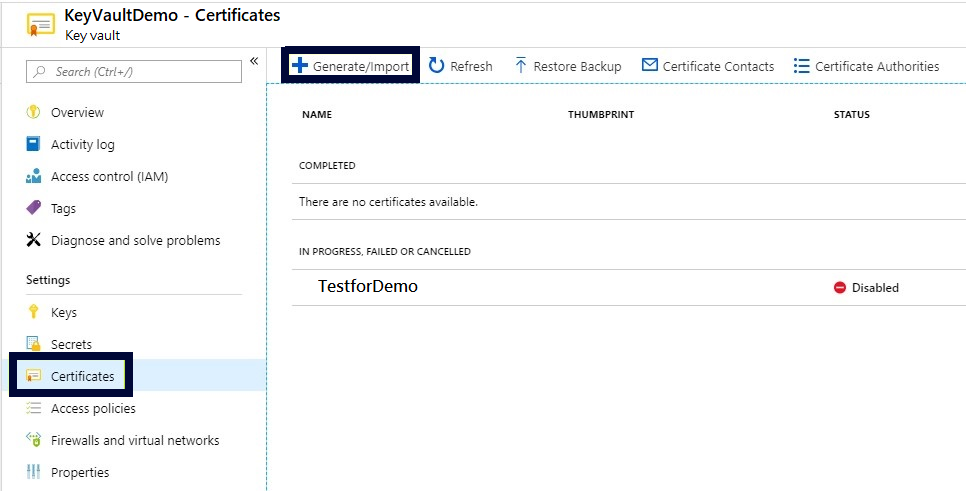
- Access Key Vault: Browse to the key vault that has already been created.
- Import Certificate:
- Click on a tab named “Certificates” and then either “Generate” or “Import.”
- Take a decision to import a certificate, supply the name and upload the certificate file (e.g., MySigningCert.pem) to the computer, and then create the self-signing certificate.
Recommended: How to Create Key Vault, CSR, and Import Code Signing Certificate in Azure KeyVault?
Step 3: Configure Access Policies for Your Key Vault
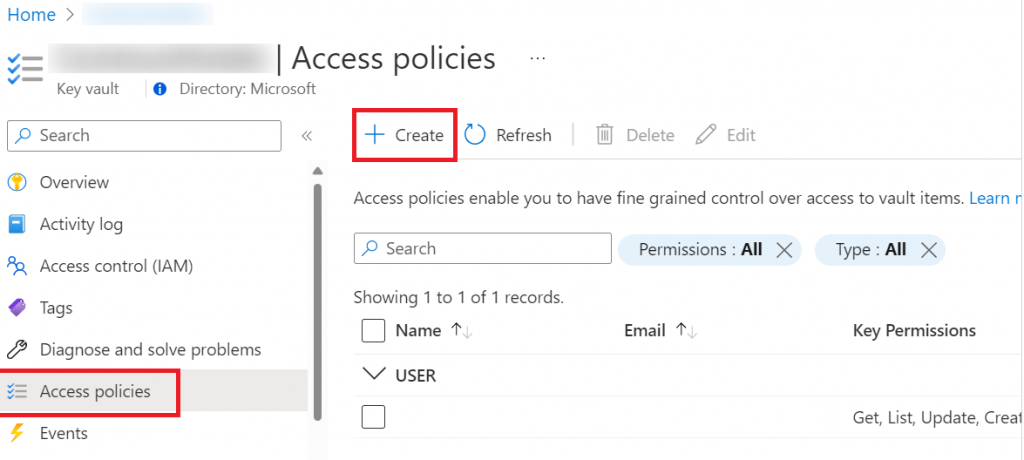
- Manage Access Policies:
- Go into the Key Vault settings, and tap “Access policies.”
- Now where you need to add an access policy for the user or Azure AD group.
- Distinguish between the permission that is necessary for certificate management operations and secrecy management operations.
Step 4: Select a Certificate from Your Key Vault in Visual Studio
- Configure Visual Studio
- Either start a new Visual Studio or make a UWP project first.
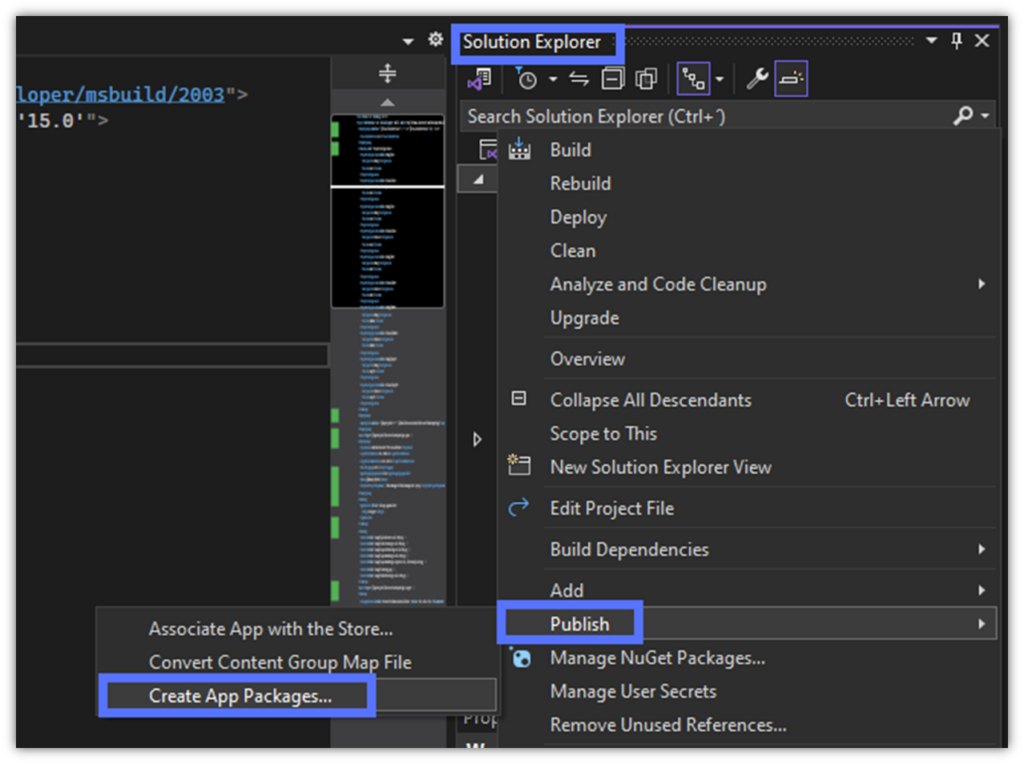
- Go to Publish -> Package a -> Create package apps.
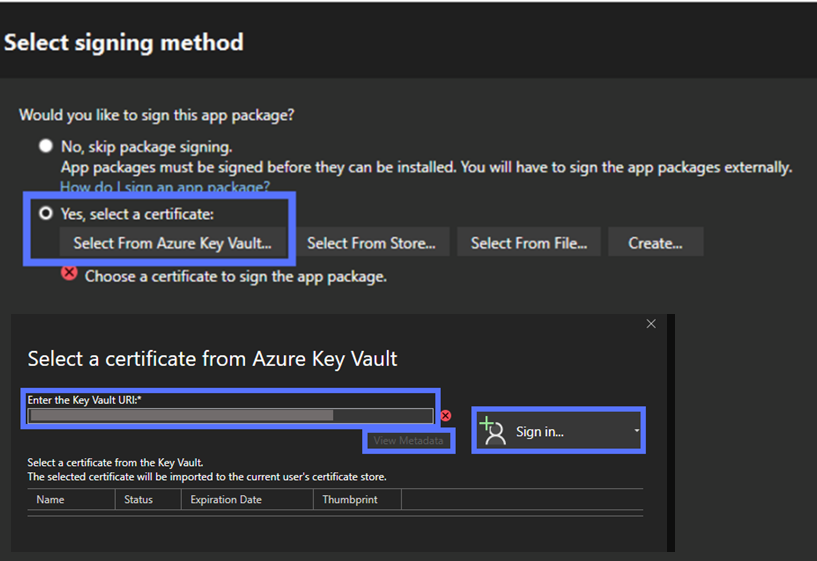
- Pick the option Select from Azure Key Vault, which would enable completing the task of selecting the signing certificate from the Azure Key Vault.
- Go to the address space of the Key vault, enter the key vault URL, and double check if you have the appropriate permissions for using your account.
Step 5: Use Azure Sign Tool
- Signing with Azure Sign Tool: This tool is Azure Sign Tool provided by a utility that signs your app package with a certificate which is in Azure Key Vault.
AzureSignTool sign -kvu $(AzureKeyVaultUrl) -kvi $(ClientId) -kvs $(ClientPassword) -kvc $(AzureKeyVaultName)-tr http://timestamp.digicert.com -v "$(System.DefaultWorkingDirectory)\_ContosoExpenses-Basic\CD\ContosoExpenses.Package_$(Build.BuildNumber).0_Test\ContosoExpenses.Package_$(Build.BuildNumber).0_x86.msixbundle"- Through this operation, it sent the clinical data digest to Azure Key Vault for signing. This way, the private key will never be exposed from the vault.
- Find details on signing the app package in the Azure Sign Tools’ documentation.
Get to your goals by each of the described steps, you can sign the Visual Studio App Packages using Azure Key Vault, and Also you will be able to ensure a properly executed, code signing process.
Conclusion
This guide will walk you through a step-by-step process to help you achieve continuous integration and continuous deployment that can store sensitive information encrypted using Azure Key Vault.
Purchase the Azure Key Vault Code Signing Certificate to sign your VS AppPackages with ease and ensure they are fully secured. Start now, and you ensure that the strength and genuineness of your applications accompany every launch.
Code Signing with Azure Key Vault
Leverage the Cloud Based Software Security by Securely Store your Private Key and Code Signing Certificate to Microsoft Azure Key Vault.
Get Azure Key Vault Code Signing Certificate
