
How to Sign an Executable in Visual Studio 2022?

Visual Studio 2022 is currently in the most favorite IDE list of developers, as it comes with numerous built-in tools. And one of its most useful features is the built-in SignTool utility, which let sign executable files through a GUI-based interface. It helps to prevent complexities and efficiently make software tamper-proof.
Digitally Sign and Secure your Visual Studio Based Executable File Quickly with Visual Studio Code Signing Certificate!
Utilizing the Visual Studio’s signing feature is a task that takes only a few minutes. But before you start with it, there are some prerequisites you need to fulfill. So, let’s get started by completing them for moving forward to the signing process.
Prerequisites To Complete Before Signing
Before you start with the digital signing procedure, you must tick off the tasks mentioned below:
- Verify that you have the latest 2022 version of Visual Studio.
- Check that the correct Code Signing Certificate is installed on your system. To do so, you can execute the following steps:
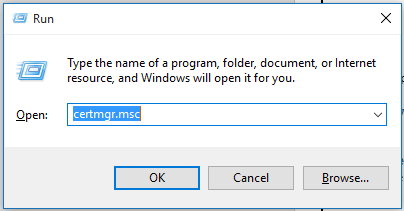
Step 1: Access the certmgr console through the run utility as shown below. It will open a new window.
Step 2: Go to the Personal folder to verify, whether the certificate is listed or not.
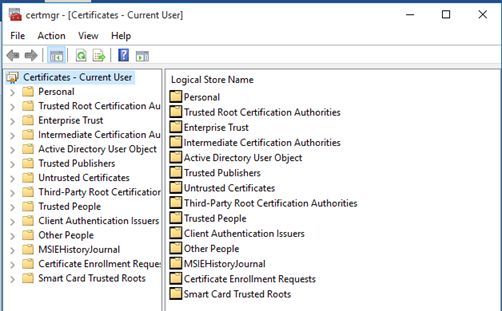
If the certificate is available then you are good to go further. If not, then you must install it; otherwise, you can face an error with the message: “No Certificates Were Found That Met All the Given Criteria”. To Resolve this error, Checkout this
The Correct Procedure To Sign an Executable in Visual Studio 2022
After the certificate installation, continue with the following procedure:
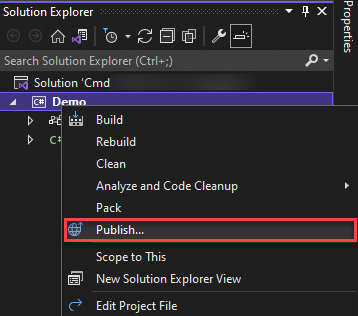
Step 1: Access Visual Studio 2022 and open the executable file, that you want to sign.
Step 2: Under the Build option in the ribbon tab, select Publish option.
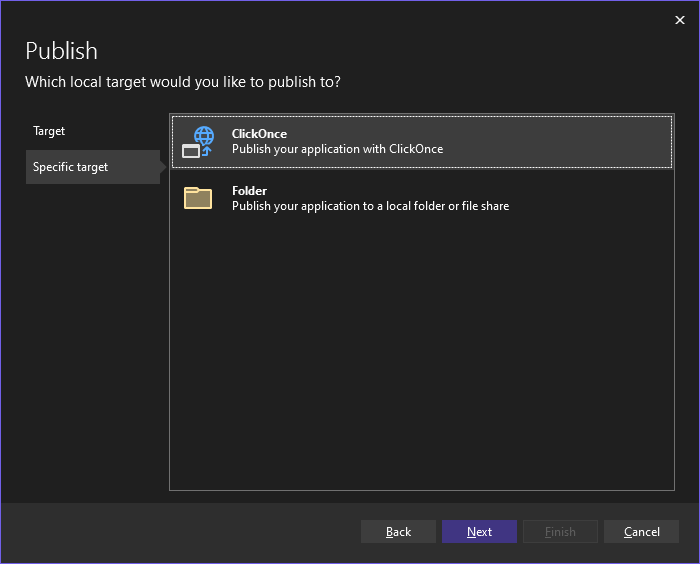
Step 3: A new window will open and you have to select ClickOnce from provided options. Then, click on Next.
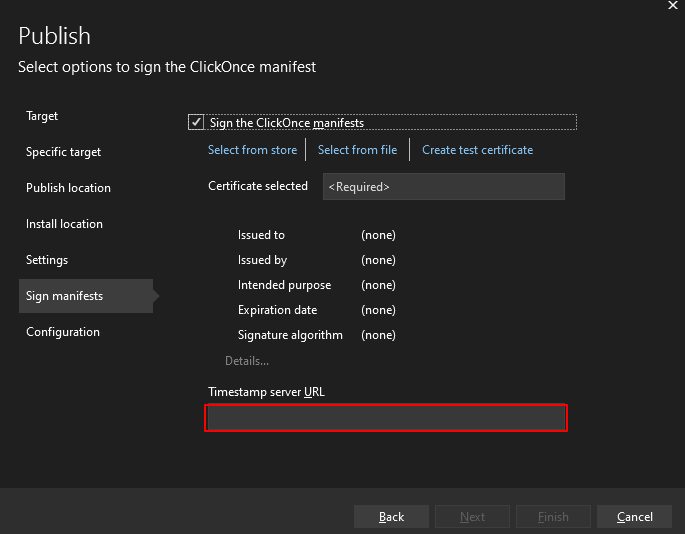
Step 4: Further, select the Sign manifests from the left panel. And select the checkbox “Sign the ClickOnce manifest”.
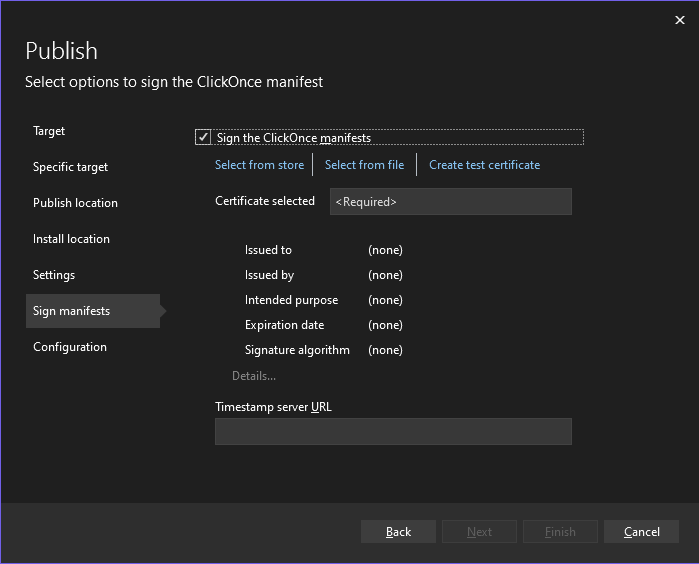
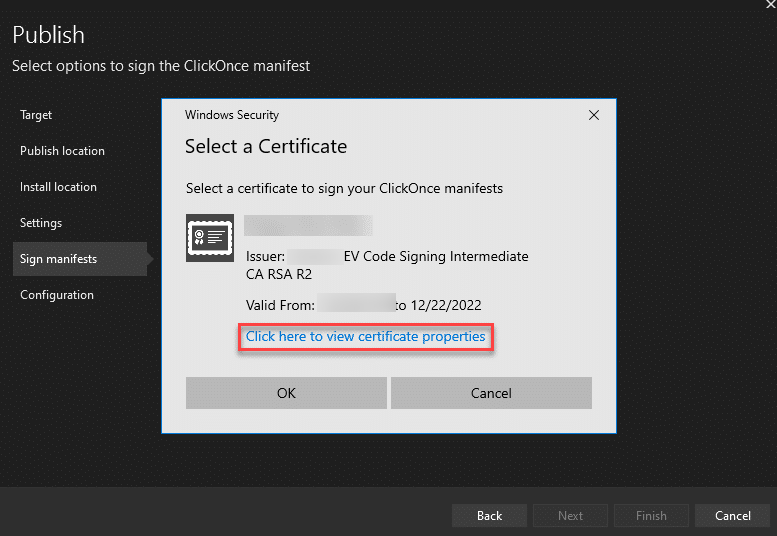
Step 5: Click on Select from Store and choose the certificate that you want to use. Make sure that the certificate is available on the same system.
Step 6 (Optional): Add the timestamp URL in the given space. It will help you retain software validity after certificate expiration.
Step 7: Click Next to have the signed executable file. Now, you can release it for end-users and eliminate the Unknown Publisher Warning.
Besides it, if you want to use the command line interface, then follow the below procedure:
Step 1: Open the project in Visual Studio 2022.
Step 2: Go to Tools in the ribbon tab, Command Line, Developer Command Prompt.
Step 3: Navigate to the location, where SignTool is on your machine.
Step 4: Execute the following command:
signtool sign /fd SHA256 software.exeThe Best Visual Studio Code Signing Certificate
To sign an executable file using Visual Studio, you must select a reliable certificate that aligns with its standards and policies. Otherwise, it can encounter errors and create complexities.
As a result, your software will become tamper-proof, and end-users will not face warnings during installation.
Recommended: How to Sign Visual Studio App Packages Using Azure Key Vault?
To sign an executable file using Visual Studio, you need to open that file and sign it as ClickOnce. But before it, you must verify that Code Signing Certificate is installed. The process is quite simple and you can choose any method – GUI-based or CLI-based. Both methods will sign and timestamp your executable file perfectly.

Cheap Code Signing Certificates
Prevent Code Tampering and Authenticate Code Integrity by Digitally Sign your Code with Trusted Code Signing Certificates.
Starting at Just $215.99/Year
