
Resolving SignTool Error: “No Certificates Were Found That Met All the Given Criteria”

According to a StackOverflow survey, 50% of the developers prefer Visual Studio to write and sign their code. It helps them to centralize all their work, integrate other tools and deploy the application. However, sometimes developers get interrupted while signing due to an unexpected error displaying “No Certificates Were Found That Met All the Given Criteria”.
Such errors can occur due to multiple reasons and can waste your time in finding their solutions. But, you can manage and resolve it in minimal time by learning the procedure provided further here. So, let’s resolve the issue and seamlessly sign executable files.
The Root Cause Behind The Error’s Occurrence
The error “No Certificates Were Found That Met All the Given Criteria” clearly defines that something is missing. Whether it’s the certificate or a component associated with the Code Signing Certificate is not aligned with Visual Studio policies.
As Visual Studio comes with an in-built signtool utility, that helps the publishers to digitally sign executable files. It makes the possibility obvious to encounter a such error.
Primarily, there can be only three reasons as listed, causing Visual Studio to display the error:
- The Code Signing Certificate is not installed on the system or the original PFX file is not available on the machine’s hard disk.
- The certificate is not valid or you are trying to access the wrong certificate.
- Wrong permissions are configured for the private key, due to which the certificate is not able to access it.
You need to focus on all three mentioned aspects while resolving the such error.

Ways To Resolve The Error and Continue Software Signing
Once you know the possible root cause, it’s time to start resolving the error and continue seamless software signing. Similar to several root causes, the resolving methods are also three. After understanding them, you will have a clear insight into, which approach has to be selected and when.
#1: Checking and Adding The Certificate Correctly
The very first method to resolve the error is to add the correct Code Signing Certificate in Visual Studio. To do so, follow the further steps:
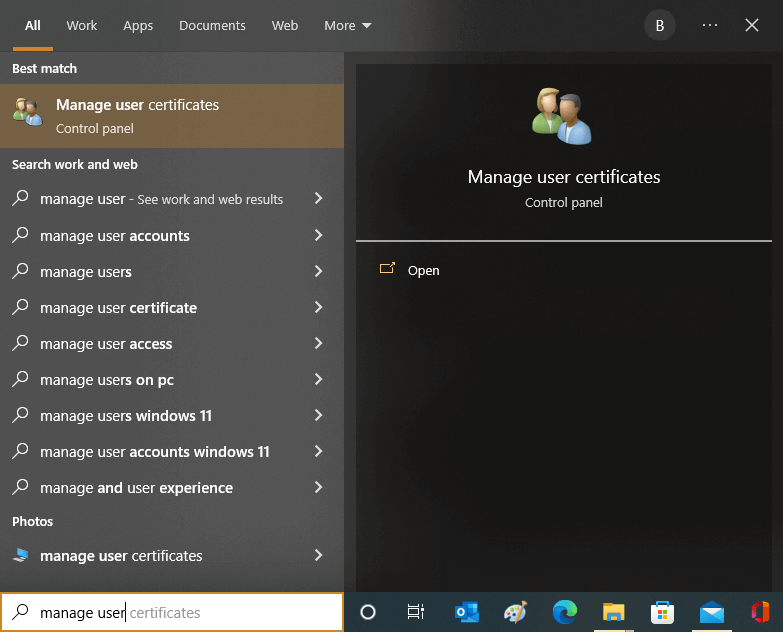
Step 1: Open the startup menu and type “Manage User Certificates” to locate and open it.
Step 2: Once the certificate management console opens, go to the folder under which you saved the certificate. Mostly, a Code Signing Certificate is in the Certificates folder, under Personal.
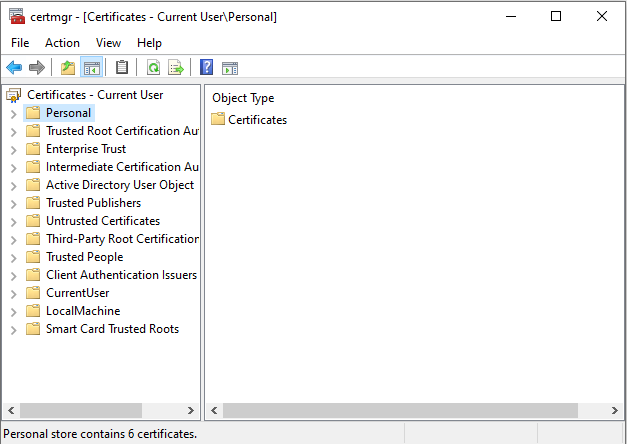
Step 3: Check for the following factors:
- Whether the certificate is present or not.
- Validity of the Code Signing Certificate.
- Cross-verify the PFX file sent by the CA with the one available on the system
- Validate that you have installed the Code Signing Certificate, instead of SSL or document signing certificate.
If you found any of these aspects true, then purchase a new Code Signing Certificate and install it on your system. Moreover, you can also renew the certificate, if it has expired.
And once the certificate installation gets completed, you must follow the below procedure:
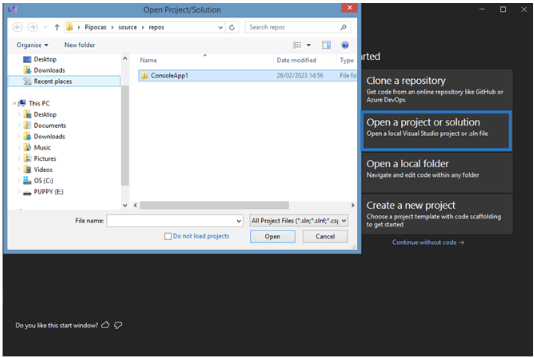
Step 1: Open the Visual Studio and select the Open a project or solution option. It will open a new window, asking you to select and open the software file.

Step 2: Select the software file and click on the Open button.
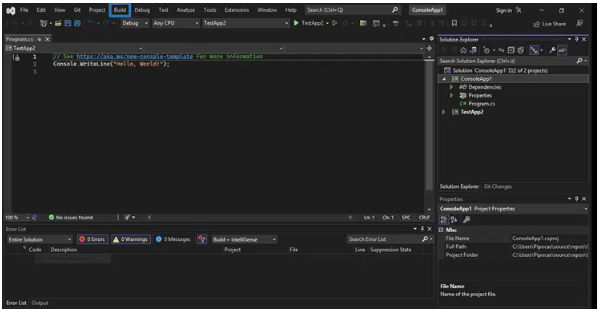
Step 3: After it gets opened, go to Build in the ribbon bar and click on Publish selection under it.
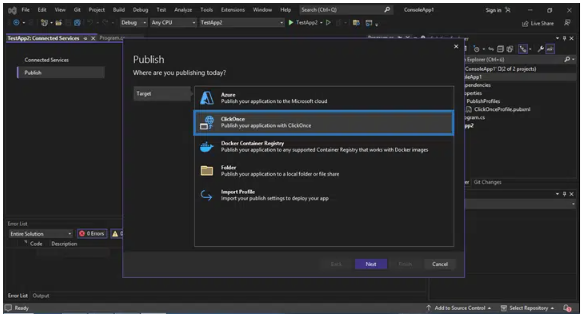
Step 4: A new window will appear with numerous options. Among them, select ClickOne and click on the Next button.
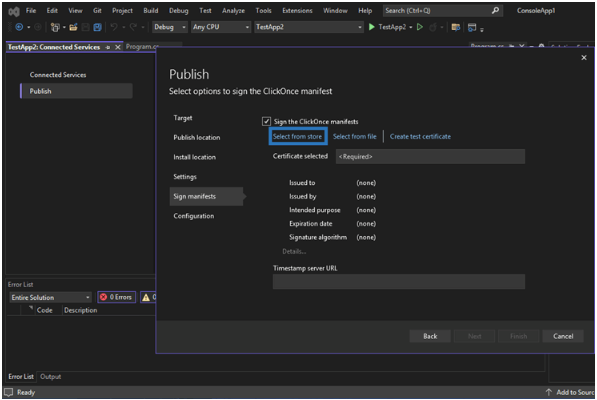
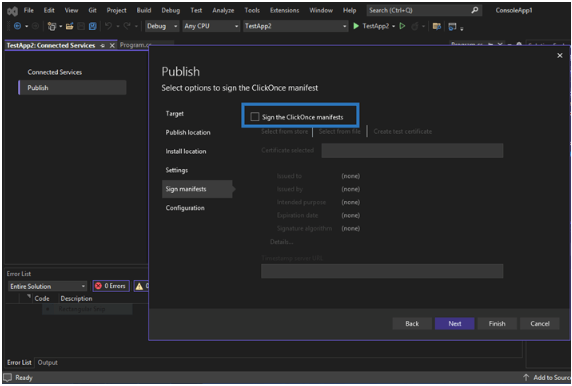
Step 5: Further, go to Sign manifests and check the Sign the ClickOne manifests.

Step 6: Choose Select from the store from the sign manifest options and select your Code Signing Certificate. However, if you haven’t installed the certificate, then you can do it by clicking on the Select from file option.
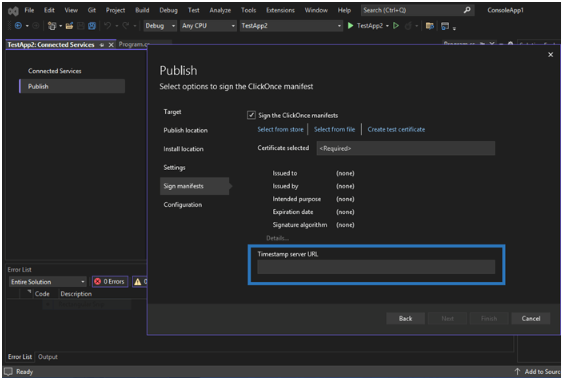
In addition, you can also enter the timestamp URL of the CA, if you want the software to remain valid after certificate expiration.
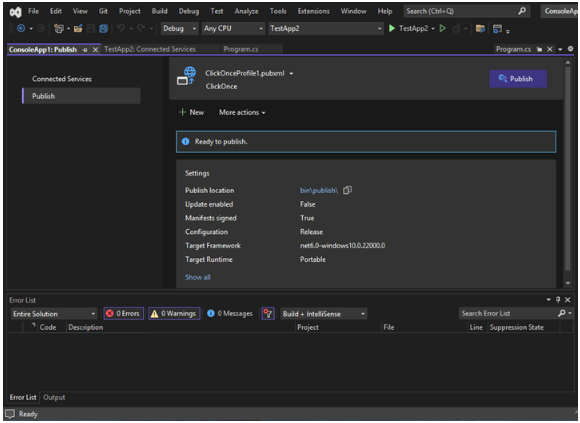
Step 7: Click on Finish and your software will get signed. Now, you can release the application and prevent unauthorized modifications to it.
#2: Configuration of a Sperate Certificate For Testing Case
In case, you encounter the error while you need to sign software only for testing purposes. Then, you don’t need to buy a new certificate, even if your previous certificate is expired. Just follow the below steps and your application will get signed for testing.
Step 1: Execute the exact steps from 1 to 5 as mentioned in the prior section “Checking and Adding The Certificate Correctly”.
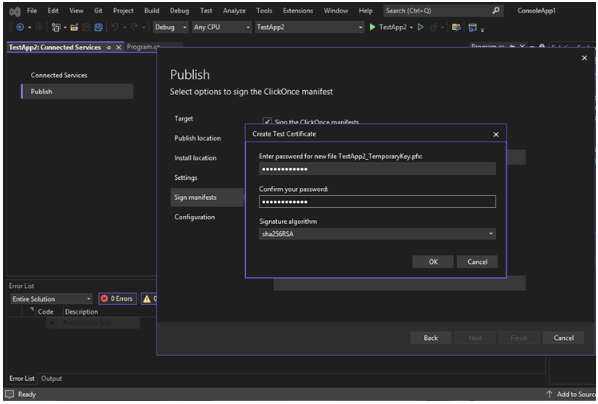
Step 2: Select the Sign the ClickOne manifests checkbox. And click on the Create test certificate.
Step 3: Generate a password for your testing purpose certificate and select the signature algorithm.
Once you complete all the steps, Visual Studio will sign the software with a testing certificate. Although, you must consider such certificates only for testing environments, as these are self-signed certificates.
If you release the software with it, end-users will face an Unknown Publisher Warning. Also, you would get disabled from revoking it in case of breach or key theft.
#3: Private Key Settings Modification
The next resolution for the error is to check and configure the correct private key settings. It will allow the certificate to fetch the private key and perform encryption on digested source code.
Step 1: Open the certmgr console, by searching for Manage user certificates in the startup menu.
Step 2: Locate the certificate under the Personal or any other folder, in which you installed it.
Step 3: Right-click on the certificate and click on Manage Private Key.
Step 4: Under security, you can set Full control, read, and special permissions for all the users.
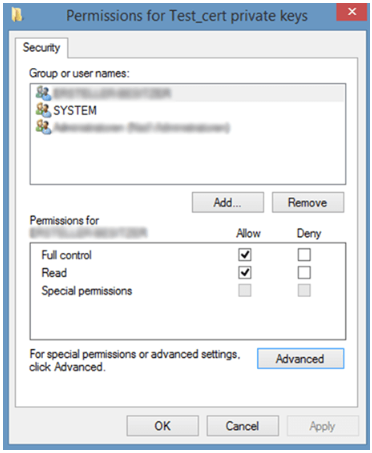
Step 5: Configure the permission as per your need and click on Apply button.
Concluding Up
Visual Studio is a top-notch IDE, that comes with a built-in signtool utility tool. It aids the developers to create and sign software in one place. However, in some cases, it shows the error that certificate doesn’t meet the criteria. You can resolve such errors by following the above-mentioned procedures.
But, before you undergo any of the methods, kindly check the validity and installation of the PFX file. It will help you understand the root cause and execute the appropriate procedure.
Additionally, you must use the original and testing certificate for their specific purposes only to maintain data integrity.
Digitally Sign your Visual Studio Application or Executable File without any hassle using authentic Visual Studio Code Signing Certificate

Cheap Code Signing Certificates
Prevent Code Tampering and Authenticate Code Integrity by Digitally Sign your Code with Trusted Code Signing Certificates.
Starting at Just $215.99/Year
