
How to Fix “Unable to Build a Valid Certificate Chain for the Signer” Error?
Are you using a third-party CA code signing certificate to sign your Adobe Air application and getting the “Unable to Build a Valid Certificate Chain for the Signer” error?
Adobe Air signing certificates typically display this issue if an Intermediate CA Certificate is missing from the chain.
This article will examine how to fix the “Unable to Build a Valid Certificate Chain for the Signer” error. But first, let us understand what an intermediate CA certificate is.
What Is an Intermediate CA Certificate?
Certificate Authorities (CAs) generate an intermediate certificate, from which certificates are signed and issued, to increase the root certificate’s security.
Users like you and me utilize code signing certificates provided by trustworthy third-party certificate authorities, and an Intermediate CA certificate is the subordinate certificate that these authorities issue.
All major browsers and systems will trust the certificate with the aid of these intermediate certificates. Now that we understand the intermediate CA certificate, let’s dive into the steps that will help us solve this error.
Steps to Solve Code Signing Error: “Unable to Build a Valid Certificate Chain for the Signer”
Here are the steps you need to do to create a valid certificate chain for the signer certificate. We have given these steps for the Mozilla Firefox browser.
Step 1: Certificate Chain Generation for the Signer Certificate
- First, get the Cross Root Intermediate CA and Code Signing Intermediate CA certificates.
- Once you’ve downloaded both files, save them as separate Notepad documents and append the “.cer” extension to each.
- Now, access the certificate store using the Tools menu in the browser you used to install the certificate and select “Options.”
- Pick Privacy & Security from the left menu, locate the Certificates section, and select “View Certificates.“
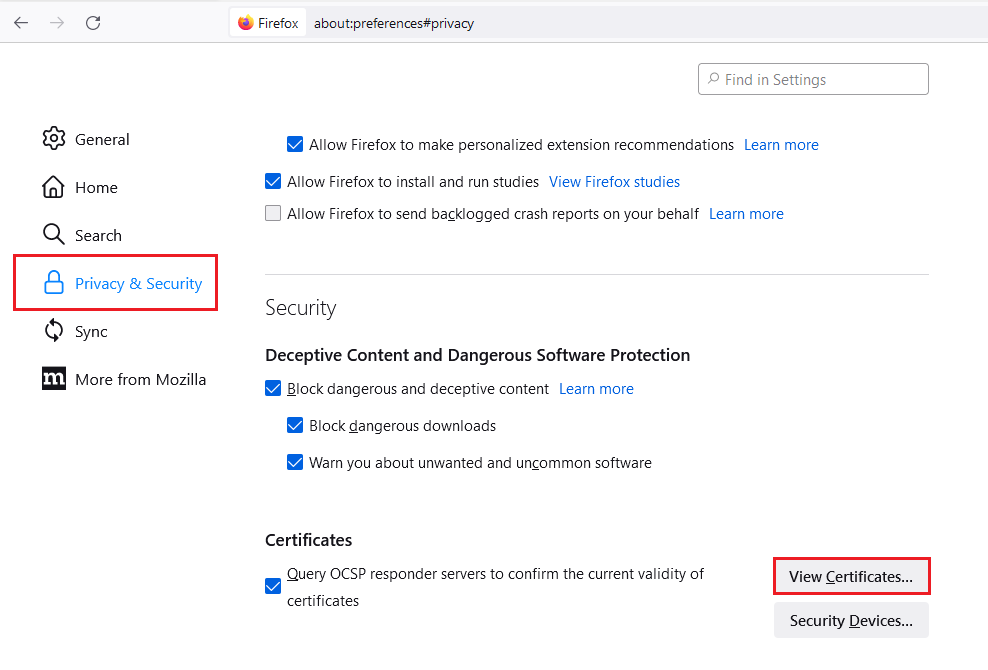
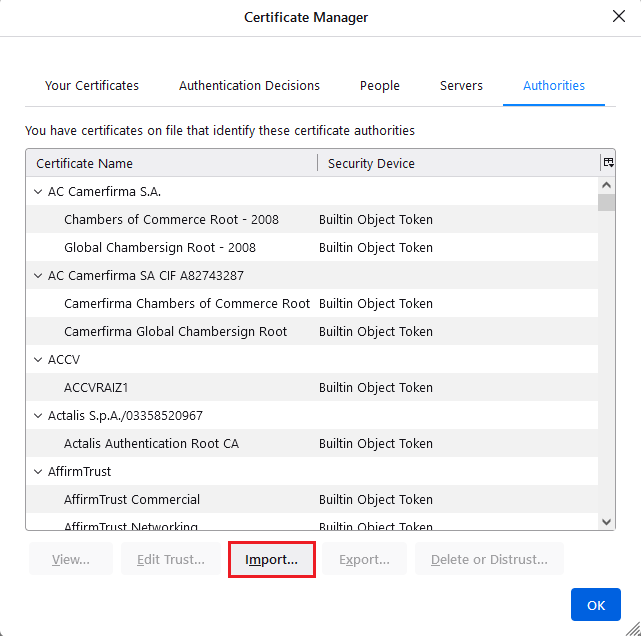
- Click on the Authorities button in the Certificate Manager’s main window.
- Locate the Import button and click it. Open the intermediate CA certificate that crosses root domains.
- Import an Intermediate CA Certificate in the same way.
Step 2: Ensuring that the Certificate Chain for the Signer Is Built
- Launch the Certificate Manager using the same version of Mozilla Firefox you used in the previous step. This time, though, instead of the Authorities tab, go to the Your Certificates tab.
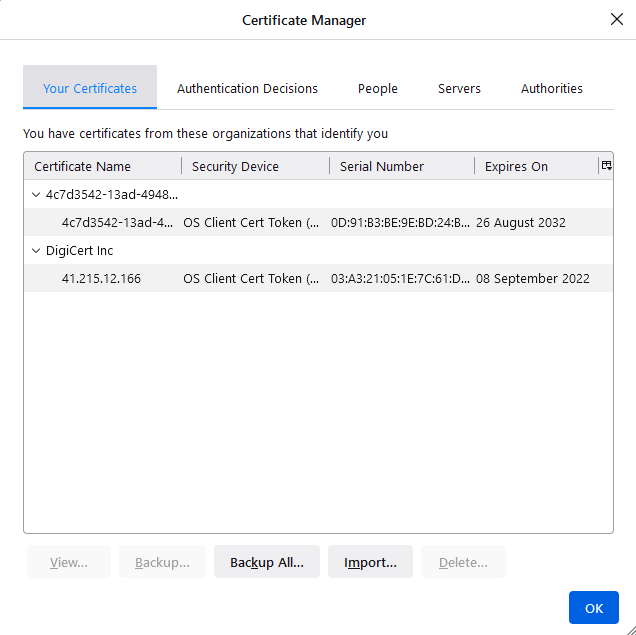
- The certificate you imported should appear on the list if everything went smoothly. It’s time to check the Certificate menu.
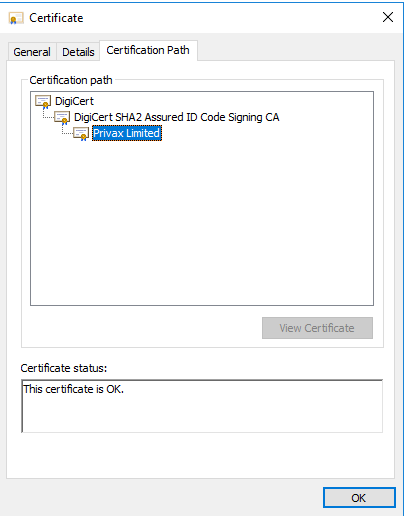
- Click the View button when you’ve located the necessary certificate. There will be a window that says “Certificate Viewer” open up. To check if the Certificate Hierarchy is displaying the correct information, click the Details tab.
Step 3: Exporting Certificate for the Signing Process
- After finishing the procedures, you may return to the Mozilla Firefox browser’s Certificate Manager (certificate store) and click on the Your Certificates tab.
- If you want to save the certificate to your computer, after selecting it, you may click the Backup option, give the file a name, and then store it wherever you choose.
- Sign your Adobe Air program once you’ve finished backing up your data.
Now Let’s See How to do the same process Using Internet Options:
- You should get a copy of its root certificate to verify the CA’s legitimacy.
- Locate the “.cer” file supplied by that CA after downloading the root certificate.
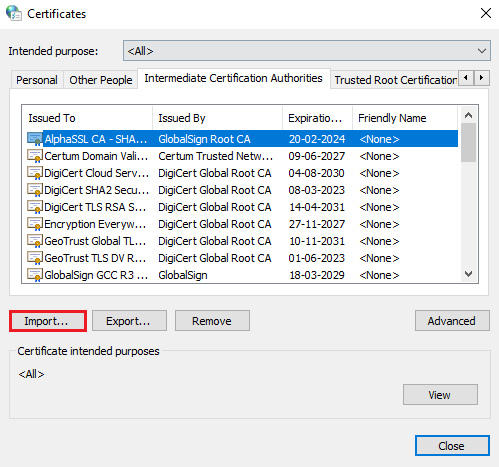
- Click the Certificate option in the Content tab of Internet Options in the Control Panel. Pick an Intermediate Certification Authority tab there.
- Import the “.cer” file you downloaded by clicking the Import button.
- Import your Cer certificate file by clicking Next on the Certificate Import Wizard. (Please use your password here.)
- Select the following now: Select the No, Do Not Export Private Key Option check box to make this key non-exportable.
- After this is done, you may go on to the next step, signing your Adobe Air application.
Wrapping Up
In conclusion, software writers frequently have the mistaken belief that the cause of this problem is a tainted or improperly generated digital certificate. However, this is not the case, and the majority of the time, it occurs because an intermediate certificate issued by the CAs is missing from the certificate chain.
Take note: If you do not carry out the procedures outlined above when logged in as an administrator, there is a chance that they will not be successful.

Cheap Code Signing Certificates
Prevent Code Tampering and Authenticate Code Integrity by Digitally Sign your Code with Trusted Code Signing Certificates.
Starting at Just $215.99/Year
