
How to Create Key Vault, CSR, and Import Code Signing Certificate in Azure KeyVault HSM?
This guide will use secure key management using Microsoft Azure KeyVault. In today’s digital landscape, where data security is paramount, protecting your private keys, generating certificates, and managing secure connections is crucial.
Microsoft Azure KeyVault offers a robust and reliable solution for handling these critical security aspects.
Reputed Certificate Authority Like DigiCert’s Code Signing support Azure Vault Standard and Premium tier! You can Purchase DigiCert EV Code Signing Certificate from us!
We will walk you through creating private keys, generating Certificate Signing Requests (CSRs), and importing certificates on Microsoft Azure KeyVault.
With a focus on cloud Hardware Security Modules (HSM), we will explore how you can leverage the power of KeyVault to ensure the utmost security and integrity of your sensitive information.
So, let’s dive into the world of secure key management on Microsoft Azure KeyVault and discover how to safeguard your assets, strengthen your security posture, and achieve peace of mind in an ever-evolving digital landscape.
How to Generate Certificate Signing Request (CSR) in Microsoft Azure Cloud HSM?
To generate a Certificate Signing Request (CSR) within Microsoft Azure KeyVault, follow these steps:
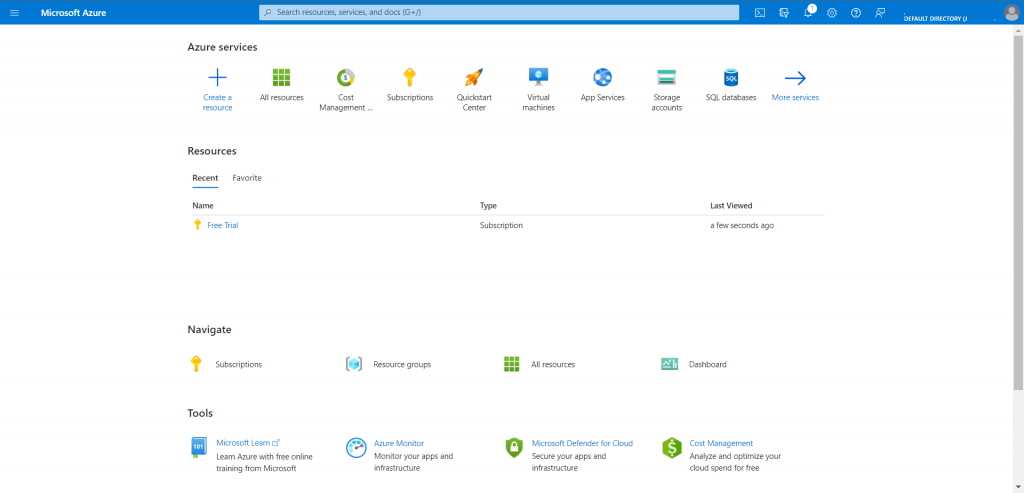
Step 1: To set up the Azure Key Vault please log in to your Azure Portal and click on the “Create a resource” button.
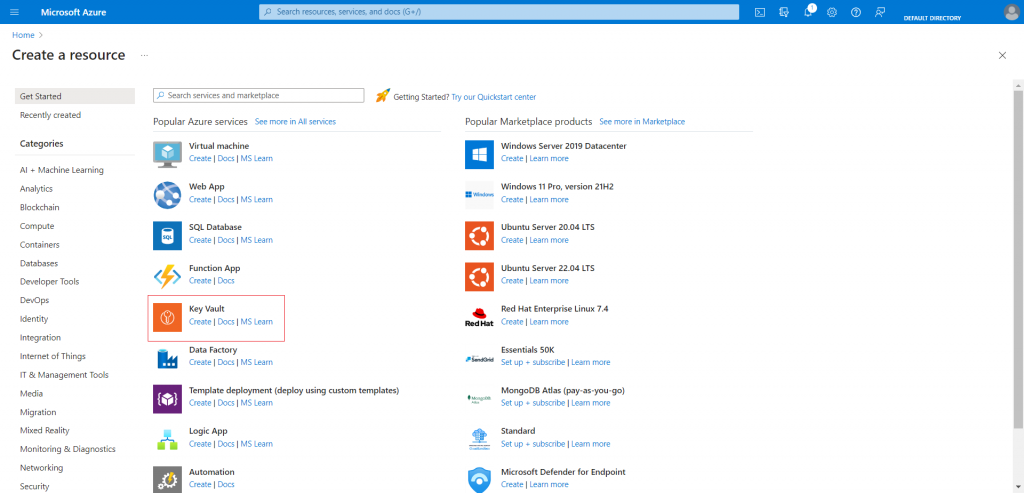
Step 2: Search for “Key Vault” and press create to get your vault up and running!
Step 3: Please select the settings that fit your use case and create your Key Vault.
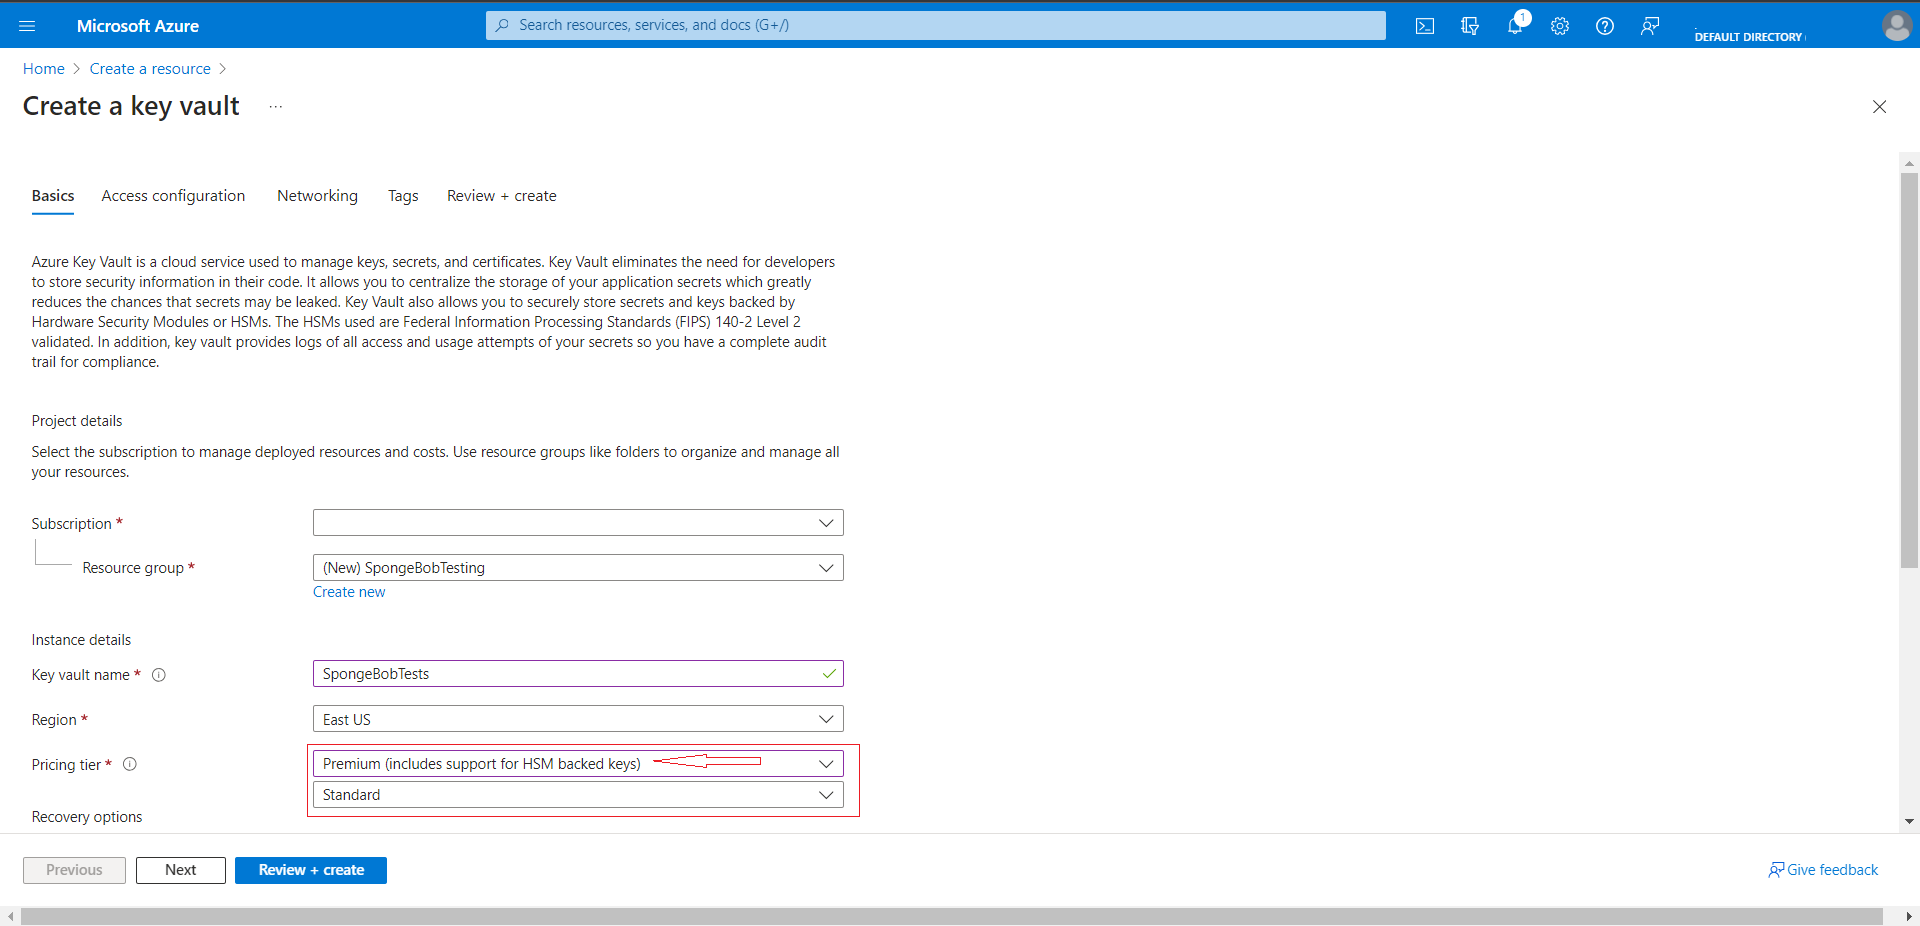
Note: In order to be compliant with the FIPS 140-2 standard, you should select the “Premium” pricing tier. If you do not choose “Premium”, there’s a risk that your certificate will be revoked.
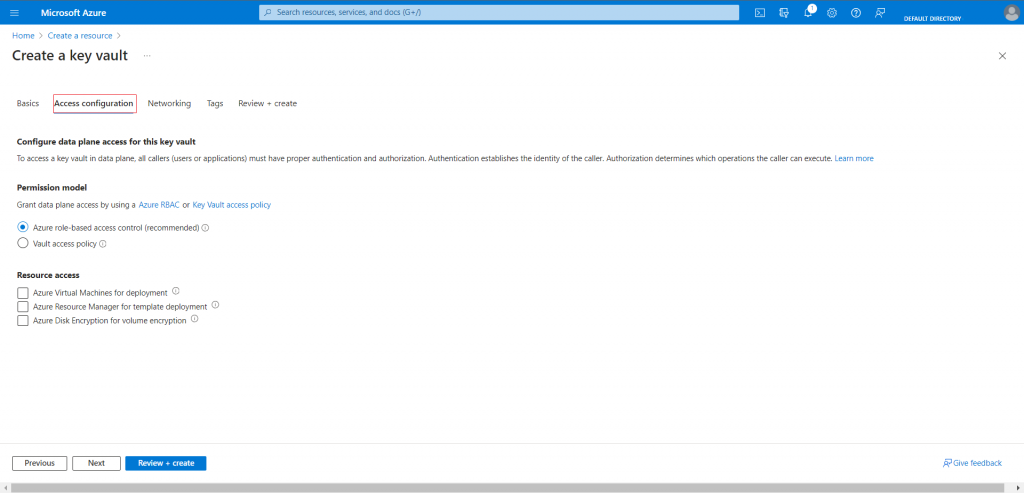
Access Configuration Settings:
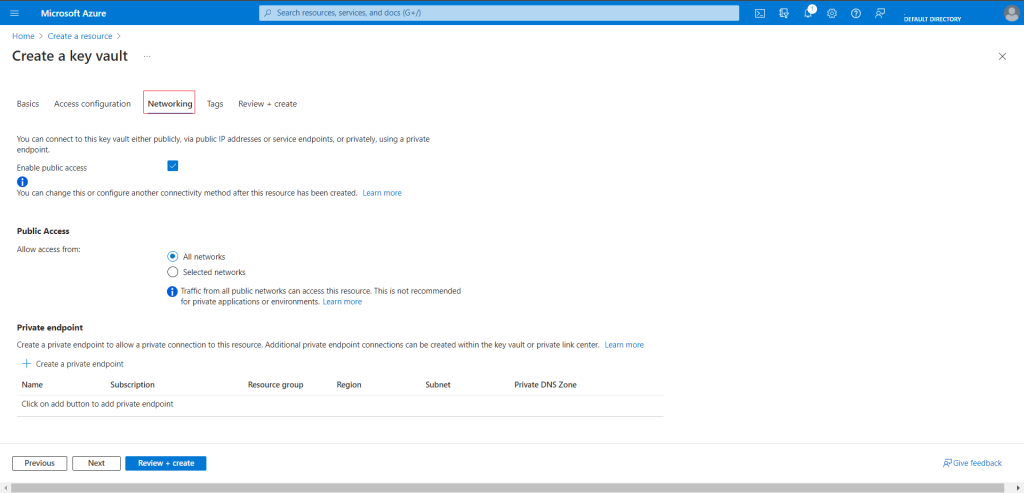
Networking Settings:
Review and Create New Vault:

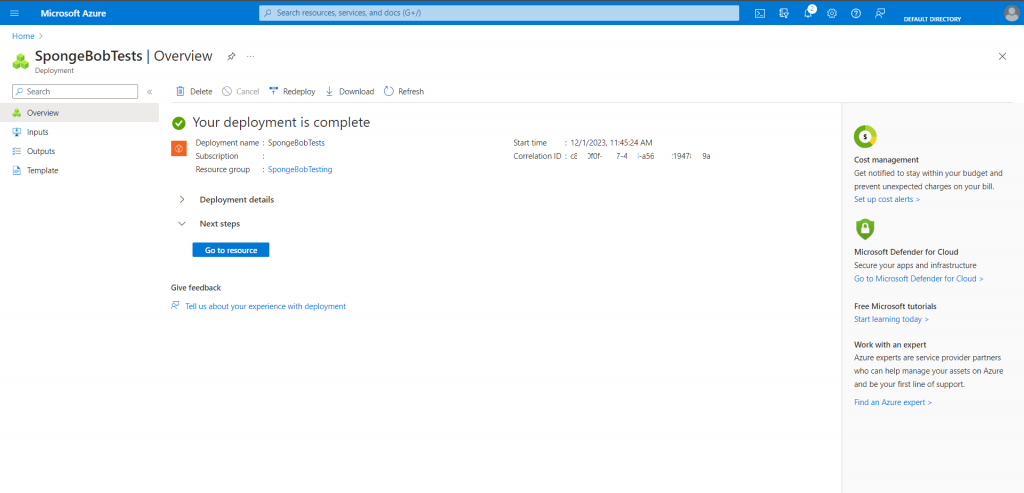
Step 4: Your vault has been created now.
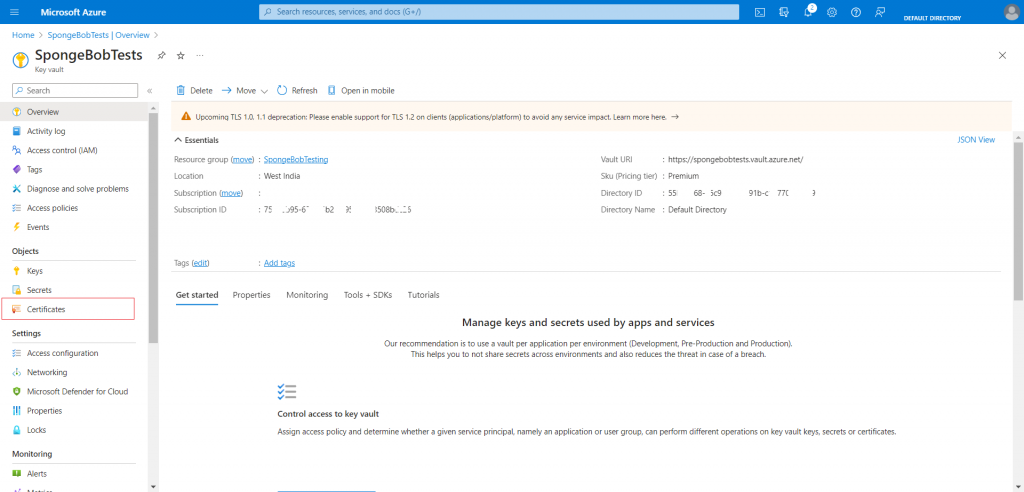
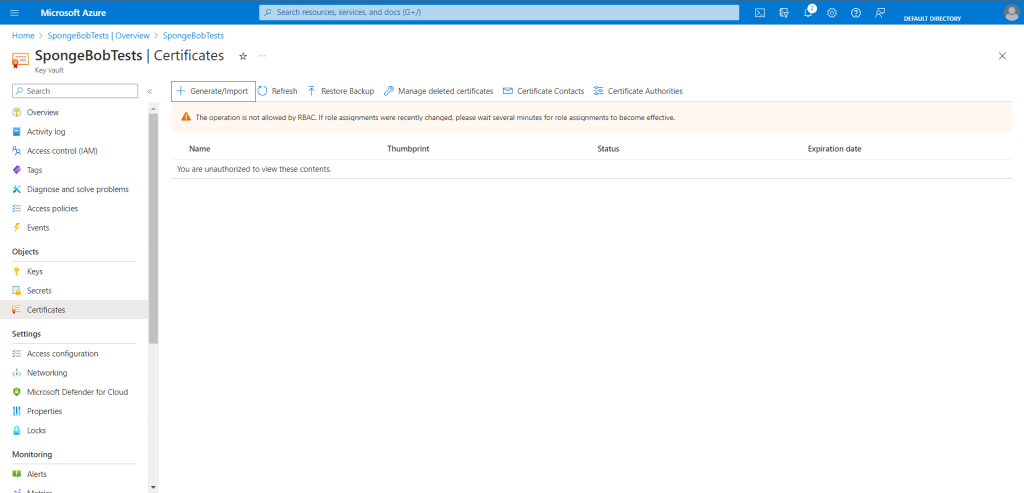
Step 5: When your vault has been created, please select “Certificates” in the action bar to the left.
Step 6: Then click “Generate/Import” to start creating your Code Signing CSR:
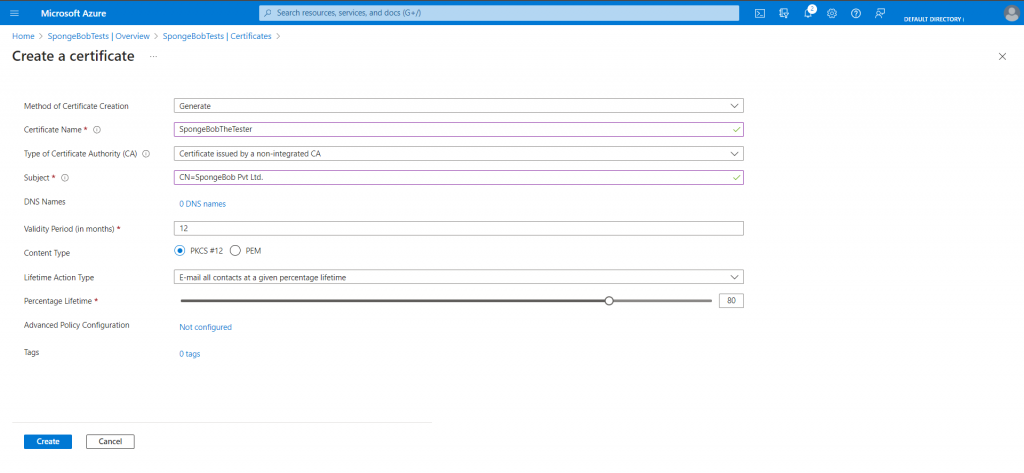
Step 7: Fill out your certificate name and subject name. The subject name should be your company name. Make sure to define the subject name with CN= . Now, set the Type of certificate authority, to non-integrated CA. Proceed to configure the Advanced Policy.
Step 8: In the Advanced Policy Configuration:
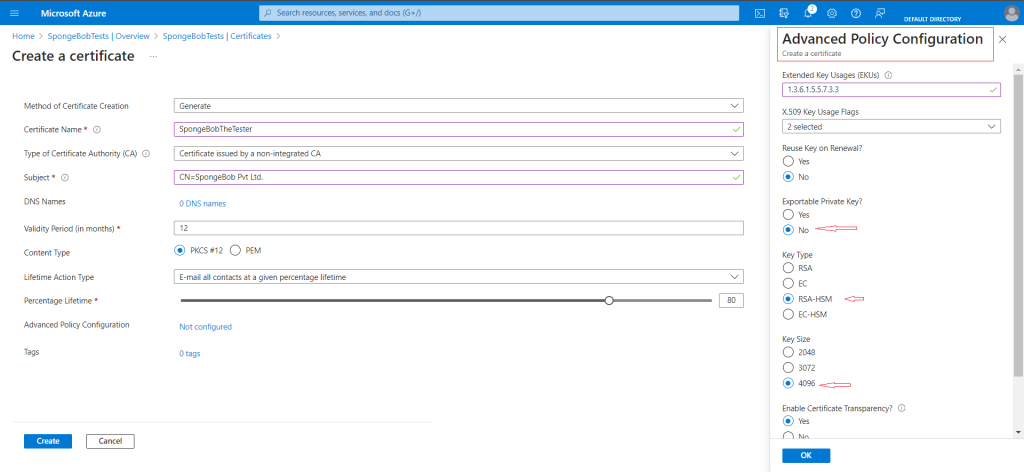
- In the Extended Key Usages (EKUs) field please add the following: 1.3.6.1.5.5.7.3.3. This EKU identifies the certificate as a Code Signing certificate.
- You should also set “Exportable Private Key” as No and the “Key Type” to RSA-HSM.
Note: All code Signing certificates from DigiCert are required to be issued with a minimum, 4096-bit key size.
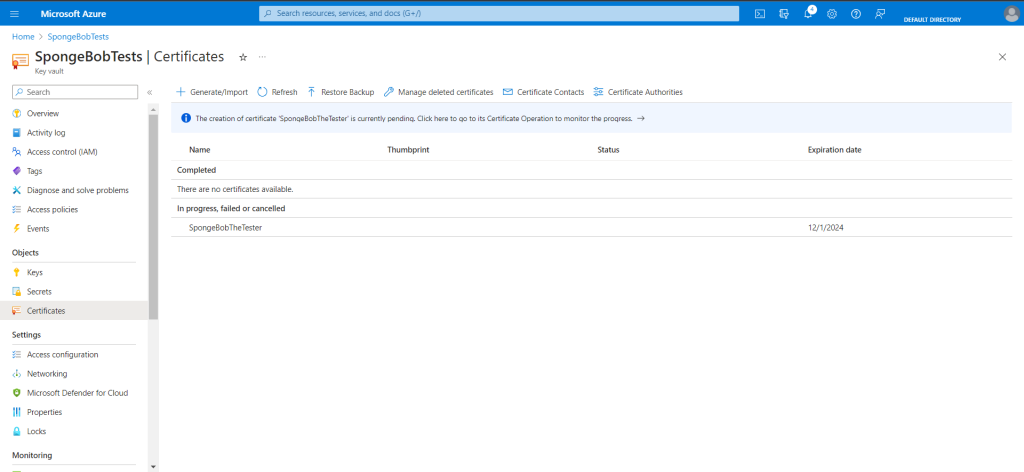
Step 9: When you have configured the policy, click “Okay” and then “Create”. Now, click on the certificate that you just created. The certificate will then appear as an “In progress” certificate under the Certificates tab.
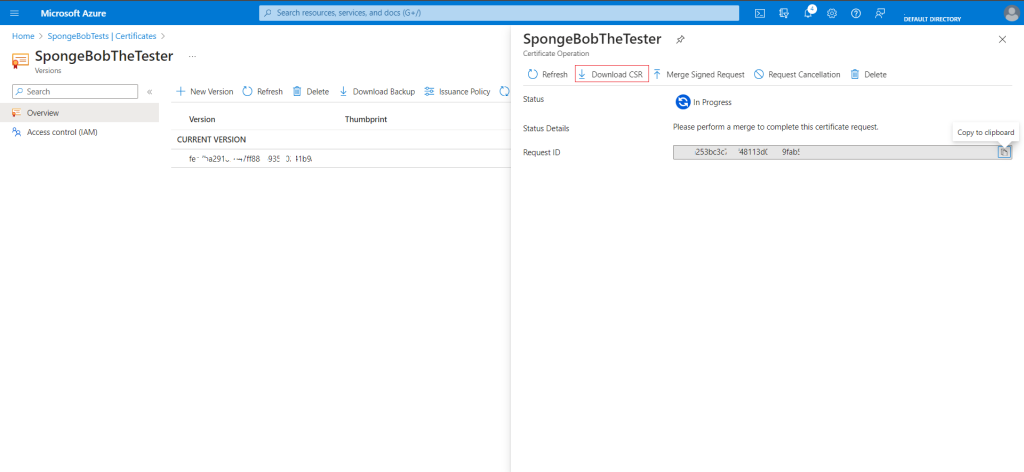
Step 10: Click on your certificate in progress. Choose “Certificate Operation”.
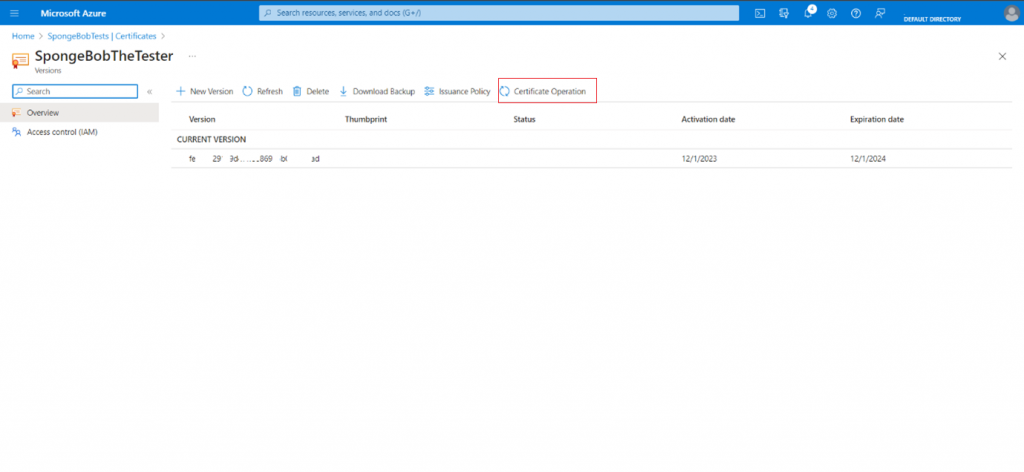
Step 11: You will see the status as ‘In Progress’. Download the Certificate Signing Request (CSR) from here and Save the CSR file in a safe location of your choosing.
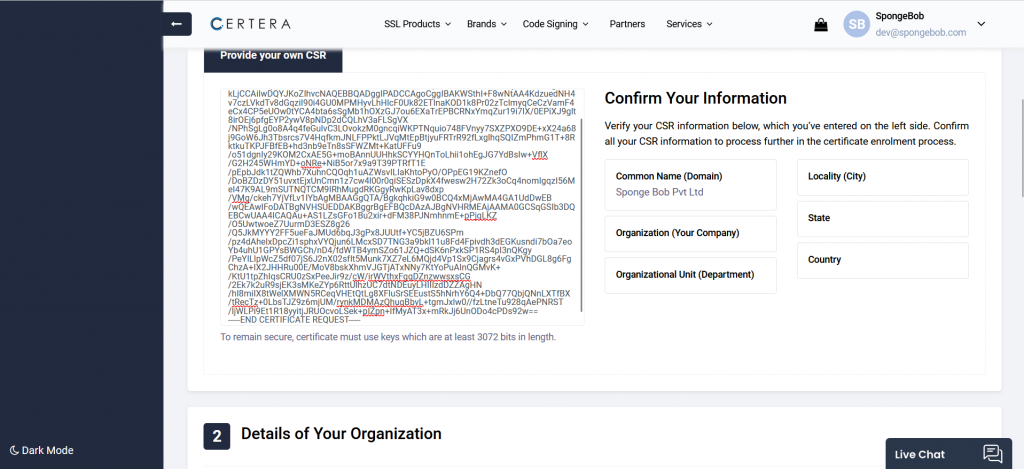
Step 12: Go to the order enrolment page and Navigate to Input CSR.
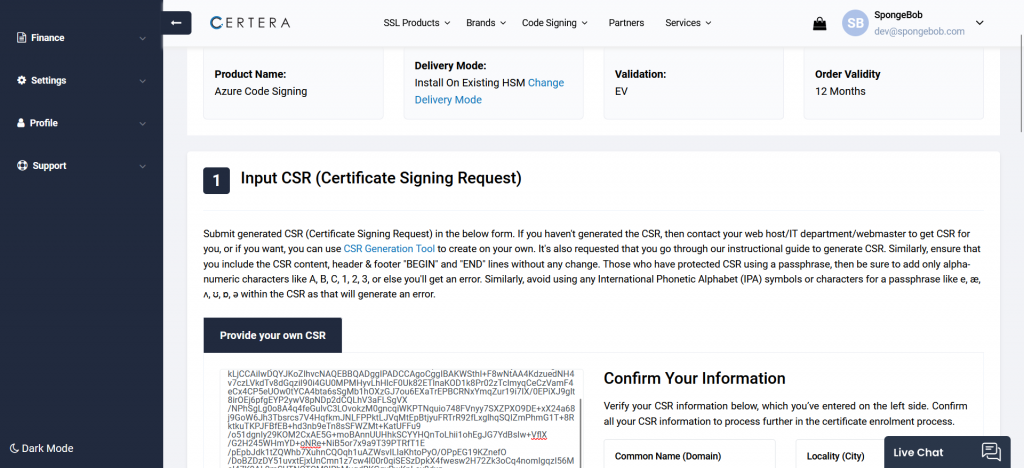
Step 13: Paste your CSR here and, enter the other required details, and submit the order.
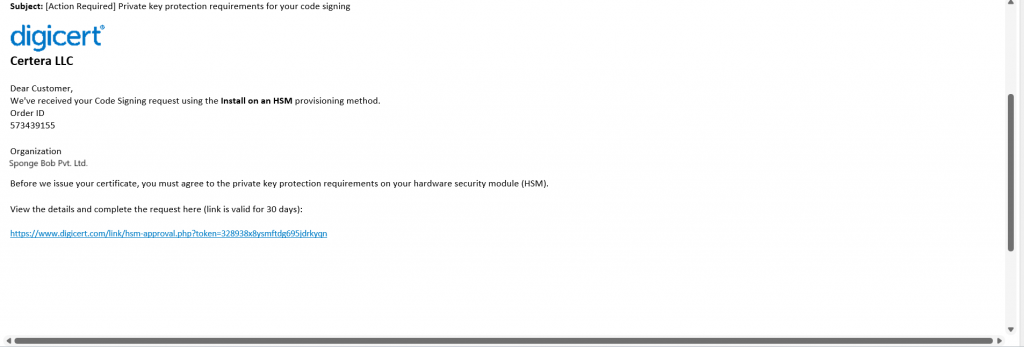
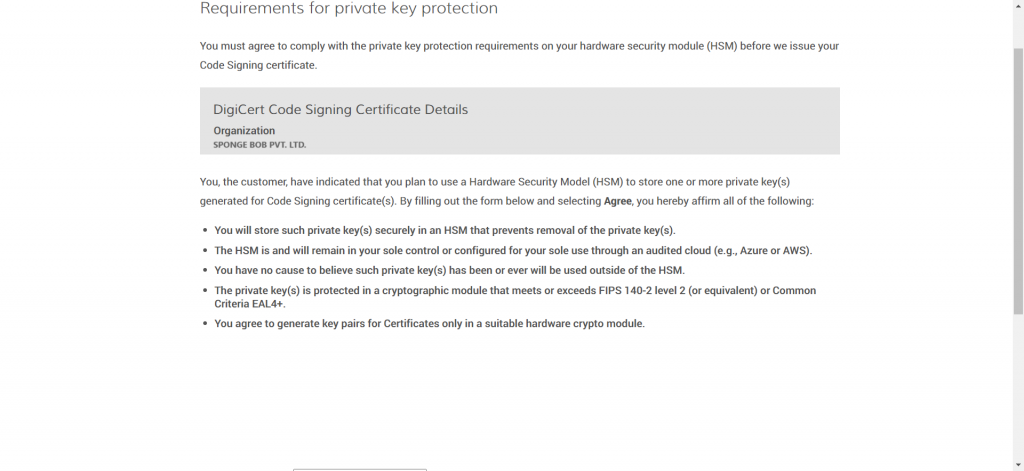
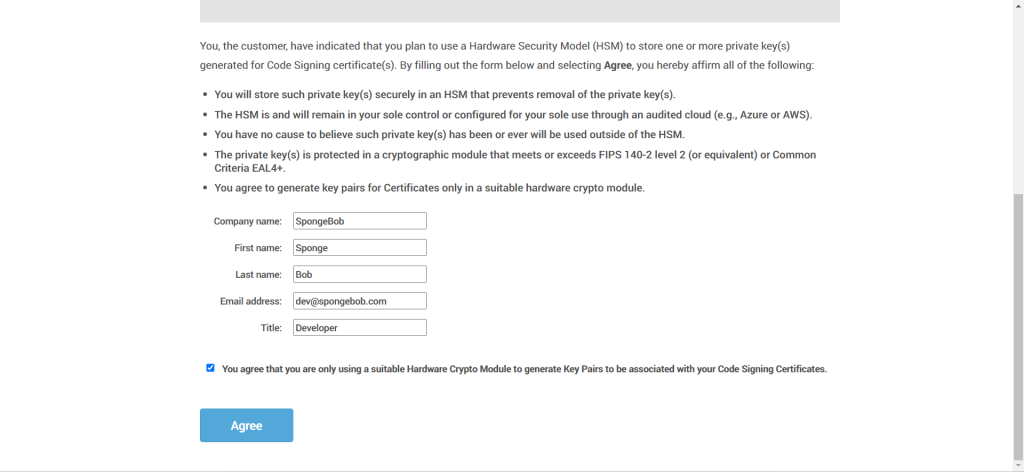
Step 14: Once the validation is completed, you will receive an email from Digicert, about Private Key Protection Agreement. Review your organization details and agree to the Private key protection agreement to complete the validation.
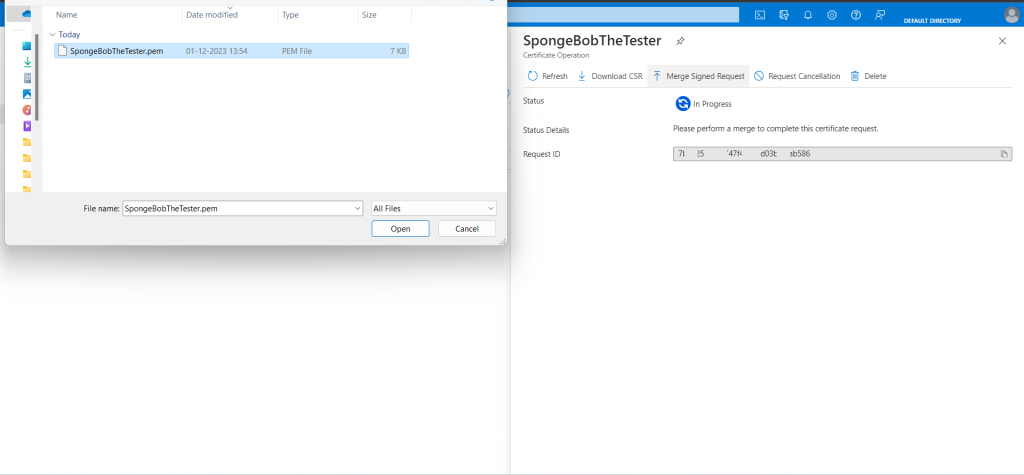
Step 15: After the order is issued, contact our support team to get the .PEM file. Now, return to your certificate operation and click, Merge Signed Request.
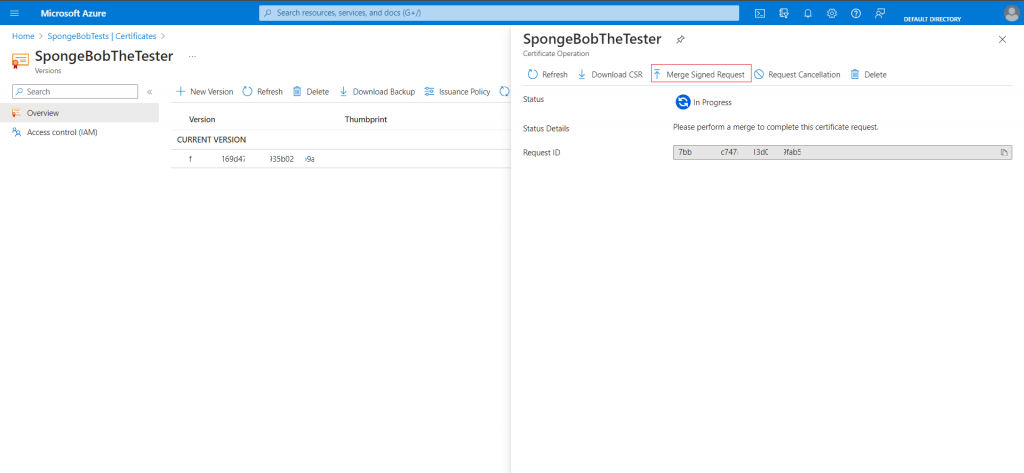
Step 16: Insert the .PEM file. Now the status will change to completed. Your EV Code Signing certificate is now available in Azure Key Vault and can be used in Azure Pipeline or with the Azure Sign Tool.

Your private key is now securely stored in Microsoft Azure KeyVault Cloud HSM, providing enhanced security and peace of mind.
You can refer to the above steps as an individual developer or a large-scale enterprise. We hope this guide equipped you with the knowledge and skills to manage your keys and certificates on Microsoft Azure KeyVault.
You can Also check out Our Video Guide for the Same!
Code Signing with Azure Key Vault
Leverage the Cloud Based Software Security by Securely Store your Private Key and Code Signing Certificate to Microsoft Azure Key Vault.
Get Azure Key Vault Code Signing Certificate
