
How to Configure EV Code Signing Certificate on Google Cloud HSM?
Organizations highly use Google Cloud HSM, as it helps to streamline key management and compliance with FIPS standards. But if you want to sign a driver, then an EV Code Signing Certificate is also necessary.
To configure the EV Code Signing Certificate on Google Cloud HSM, you can follow the procedure defined here. It will help you prevent errors and sign the executables within minimal time.
Google Cloud HSM: A Brief Overview
Google Cloud HSM refers to the hardware security module offered as a service. It’s like any other cloud infrastructure: HSM is at Google’s data center, and you can manage it from the cloud platform interface.
The Google Cloud HSM aligns with FIPS 140-2 Level 3 standard and frees you from managing, patching, and scaling the cluster or the HSM.
Procedure to Configure EV Code Signing Certificate on Google HSM
To configure the EV Code Signing Certificate on Google Cloud HSM, you can follow the procedure provided below.
Step 1: Setup the Google Cloud HSM Account
Firstly, you should create an account on the Google Cloud HSM platform and enable the billing option. Otherwise, the functionalities required to use cloud-HSM will not work. The platform will ask for basic payment details, and it would be an advantage if you have a credit card.
Step 2: Open the Key Management Interface
Open your Google Cloud account and navigate to Security and Click on Key Management under the Google Cloud Console.
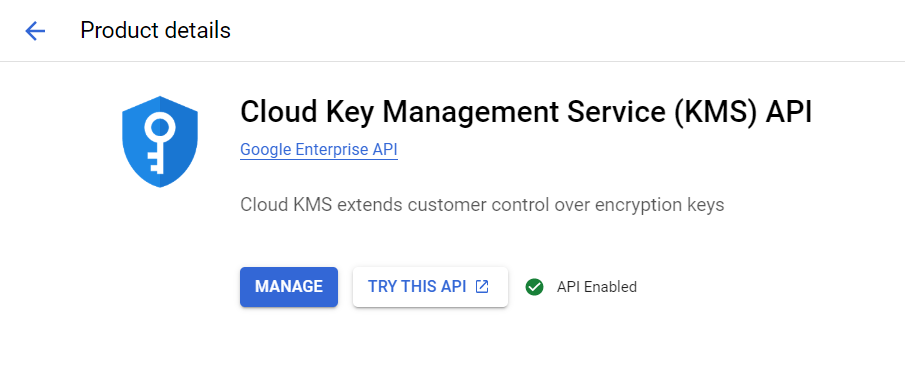
When you click on Key Management, the platform will redirect you to “Google Cloud Marketplace“, asking you to enable the KMS API. You must enable it and again undergo the same path, i.e., Security >> Key Management.
In addition, if any error occurs, wait for some time to let the platform implement changes and then try again.
Step 3: Generate a Key Ring and the HSM Key
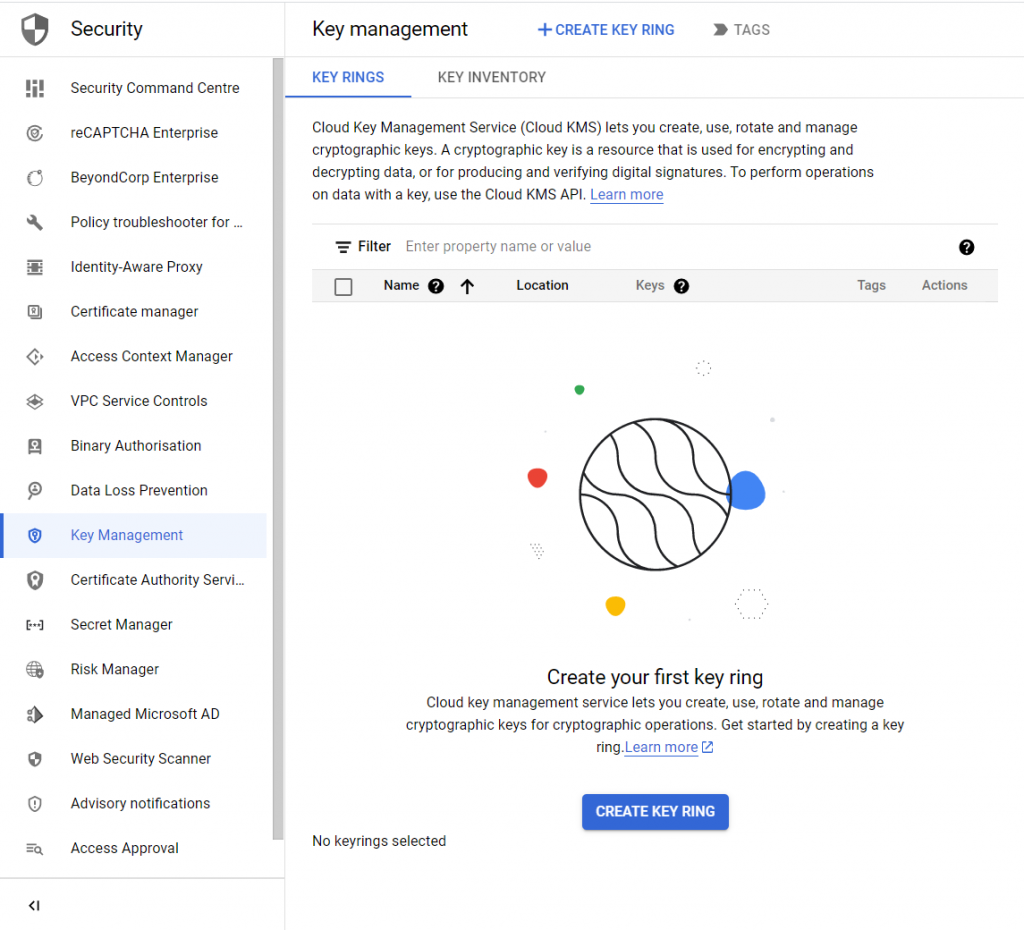
On the Key Management interface, click on the “CREATE KEY RING” option. Following it, you will be asked to set up the key ring settings, such as defining the name, location type, and region.
After setting up all the details, click on “CREATE“.
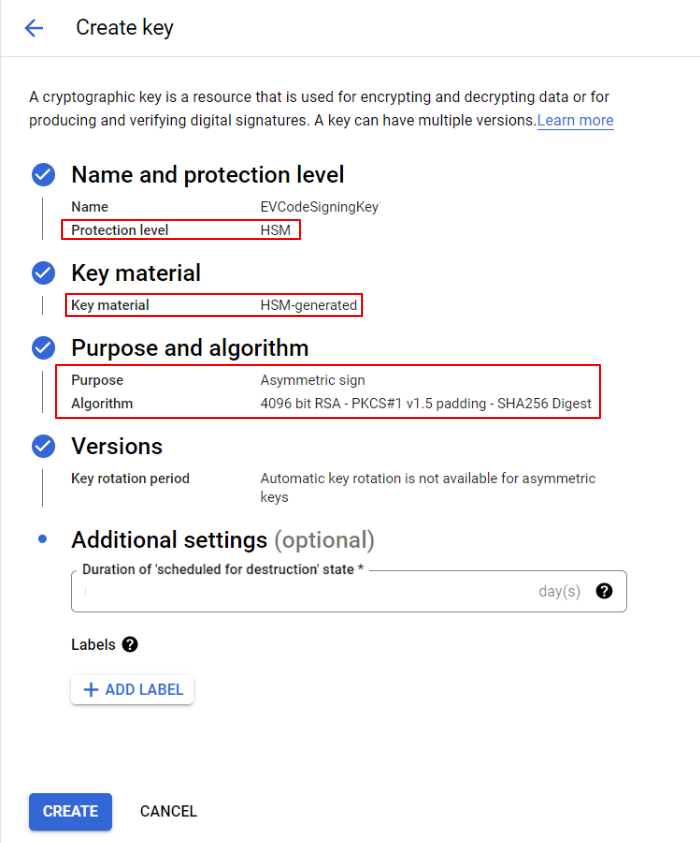
Furthermore, navigate to the new key ring and click on the “CREATE KEY” button. Configure the settings as defined below:
| Parameter | What To Choose? |
| Protection Level | HSM |
| Key Material | HSM-generated key |
| Key Purpose | Asymmetric sign |
| Algorithm | 4096 bit RSA – PKCS#1 v1.5 padding – SHA256 Digest |
In addition, other settings can be set to their default value.
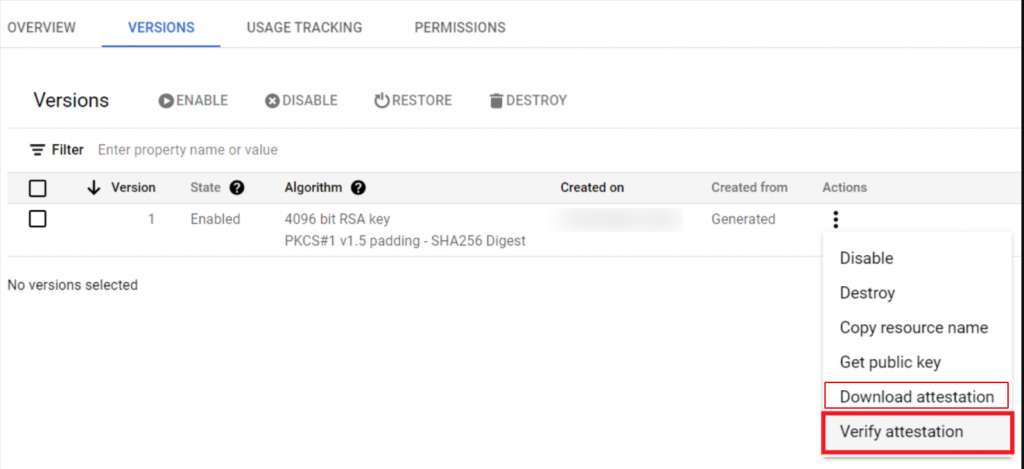
Step 4: Avail the Attestation Proof
External auditors and certificate authorities sometimes require an attestation file, so you should always download it from the Google Cloud HSM platform. Firstly, you should verify the attestation and then only download it.
Steps To Verify the Attestation:
New Key Ring >>> Version tab >>> Actions (three dots icon) >>> Verify Attestation
Step To Download the Attestation:
New Key Ring >>> Version tab >>> Actions (three dots icon) >>> Download Attestation
As a result, a ZIP file will get downloaded to your machine, containing details about key pair generation and exportability.
Step 5: Generate the Code Signing Request (CSR)
It’s time to generate the CSR, as it’s a significant necessity to avail of the EV code signing certificate. When you submit this CSR to the certificate authority or provider, they will issue you a digital certificate to sign apps, drivers, and firmware.
You can use the “openssl” to generate the CSR. Use below command to generate CSR.
openssl req -new -subj '/E={yourEmail}/CN={companyName}/O={companyName}/' -sha256 -engine pkcs11
-keyform engine -key pkcs11:object={keyName}
Note: Please replace above necessary values with your own. As your private key is stored in cloud HSM, you should use the Google Cloud API to allow openssl to access the key.
Step 6: Purchase the EV Code Signing Certificate
Once the CSR is generated, purchase an EV Code Signing Certificate from a reputed and registered vendor. Professionals recommend the use of a DigiCert EV Code Signing Certificate due to its compliance with the latest standards and usage of robust encryption and hashing algorithms.
In addition, while completing the purchase and validation method, choose the HSM implementation method as Key Storage on HSM or similar. Once the validation process is completed, you will receive your DigiCert EV Code Signing Certificate.
Step 7: Sign the Executable
Now, you have your EV Code Signing Certificate and private key in Google Cloud HSM. Download the signing tool, such as Jsign, and make your code tamper-proof. However, after signing, always check the signature for verification.
Recommended: How to Use Jsign to Sign Windows Executable Wrappers and Installers?
Concluding Up
To use an EV Code Signing Certificate on Google HSM, you need to create a key ring and configure the key settings, such as protection level and digest.
Further, you must create a CSR, complete validation, and receive a certificate from the authorized CA. Lastly, you can use the issued EV certificate and key in Google HSM to sign the executable files.

Cloud Code Signing
Seamless Automated Code Signing Tasks without Need of Physical HSM or Token using Cloud Code Signing Certificate.
Code Signing as a Service
