
How to Configure your Code Signing for AWS Lambda?

Configuring code signing for AWS Lambda is an essential step in ensuring the security and trustworthiness of your Lambda functions.
Meeting the Prerequisites
A few prerequisites must be met before configuring code signing for a Lambda function. You will need to use AWS Signer to complete the following steps:
Create One or More Signing Profiles:
These profiles will generate the signed code packages for your Lambda function. Refer to the AWS Signer Developer Guide for creating signing profiles. This guide provides comprehensive information on using AWS Signer and covers creating signing profiles.
Use a Signing Profile to Create a Signed Code Package:
Once you have created the signing profiles, you can utilize them to generate signed code packages for your Lambda function. This step ensures that the code packages are securely signed and can be trusted.
Again, the AWS Signer Developer Guide provides detailed instructions on creating signed code packages using signing profiles. Make sure to follow the guidelines for accurate and secure code signing.
Create Code Signing Configurations for the Lambda Function
After completing the prerequisites, you can create code signing configurations for your Lambda function.
Here’s how you can create a code signing configuration using the Lambda console:
Step 1: Open the Lambda console and navigate to the “Code Signing Configurations” page.
Step 2: Click the “Create Configuration” button to create a new configuration.
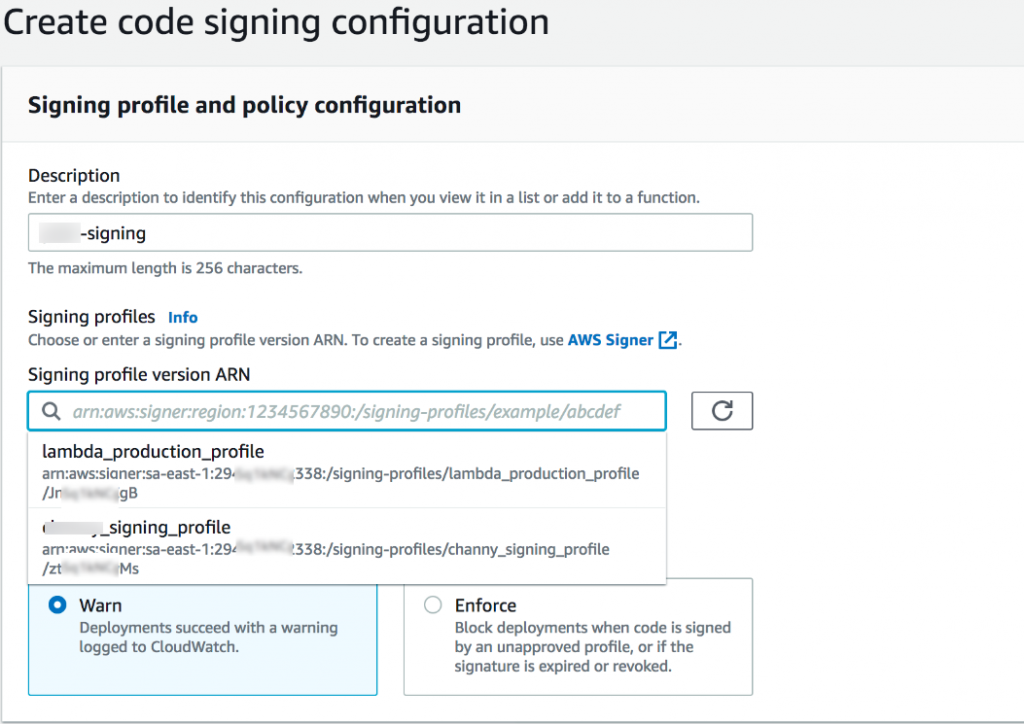
Step 3: Provide a descriptive name for the configuration in the “Description” field. This name should help you identify the purpose or usage of the configuration.
Step 4: Under the “Signing profiles” section, you can add up to 20 signing profiles to the configuration. Select the desired signing profiles from the available options or enter the profile version’s ARN (Amazon Resource Name).
Step 5: If needed, you can add signing profiles by clicking on the “Add signing profiles” button.
Step 6: Choose either the “Warn” or “Enforce” option for the “Signature validation policy.” This policy determines the action Lambda takes if any signature validation checks fail.
Step 7: Once you have provided all the required information, click the “Create configuration” button to create the code signing configuration.
This configuration will define the allowed signing profiles and the signature validation policy, ensuring the security and trustworthiness of your code packages.
Implementing AWS Code Signing
AWS code signing provides several benefits to your process for Lambda functions.
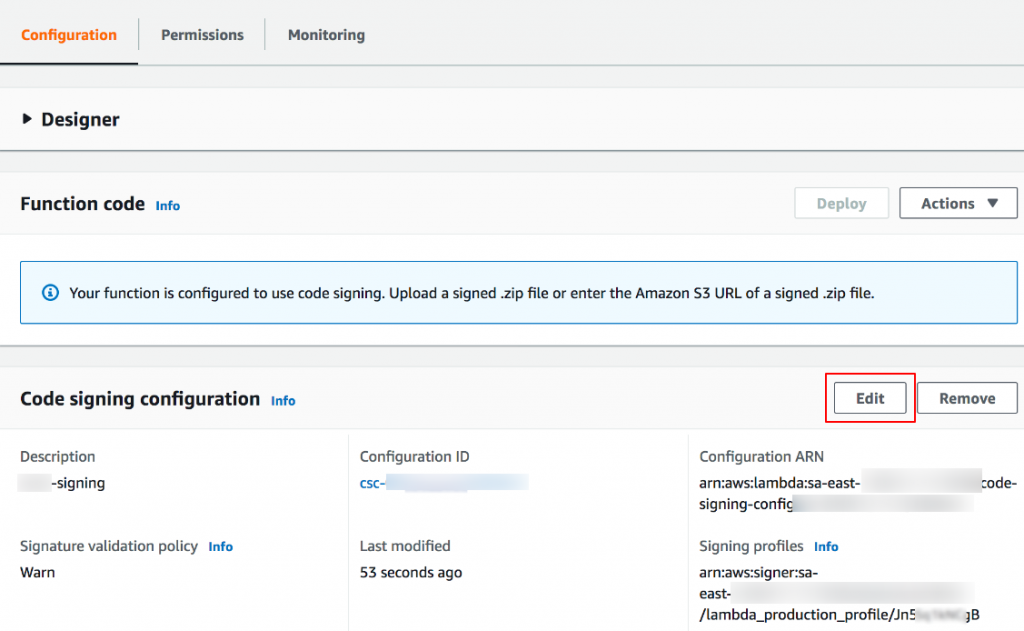
One crucial aspect is that once you add a code signing configuration to a Lambda function, it will automatically disable Inline code Editing for that specific function, regardless of its size.
This ensures that only signed code packages are deployed within the Lambda environment.
To enable code signing for your Lambda function, follow these steps:
Step 1: Access the Configuration tab of the Lambda function in the AWS Management Console.
Step 2: Select the “Code signing” option and click on “Edit.”
Step 3: Choose the code signing configuration you have previously created from the available options.
Step 4: Save the changes to associate the code signing configuration with the function.
Once the code signing configuration is applied, you will notice that Inline Code Editing has been disabled for that function, as indicated in the configuration settings.
Now that you have configured code signing and disabled Inline Code Editing, the next step is to ensure that only signed packages are deployed while preventing the deployment of unsigned packages.
To achieve this, you can create a signing job using AWS Signer. Here’s how you can proceed:
Step 1: Go to the AWS Signer service in the AWS Management Console.
Step 2: Access the “Signing jobs” section and click on “Start signing job.”
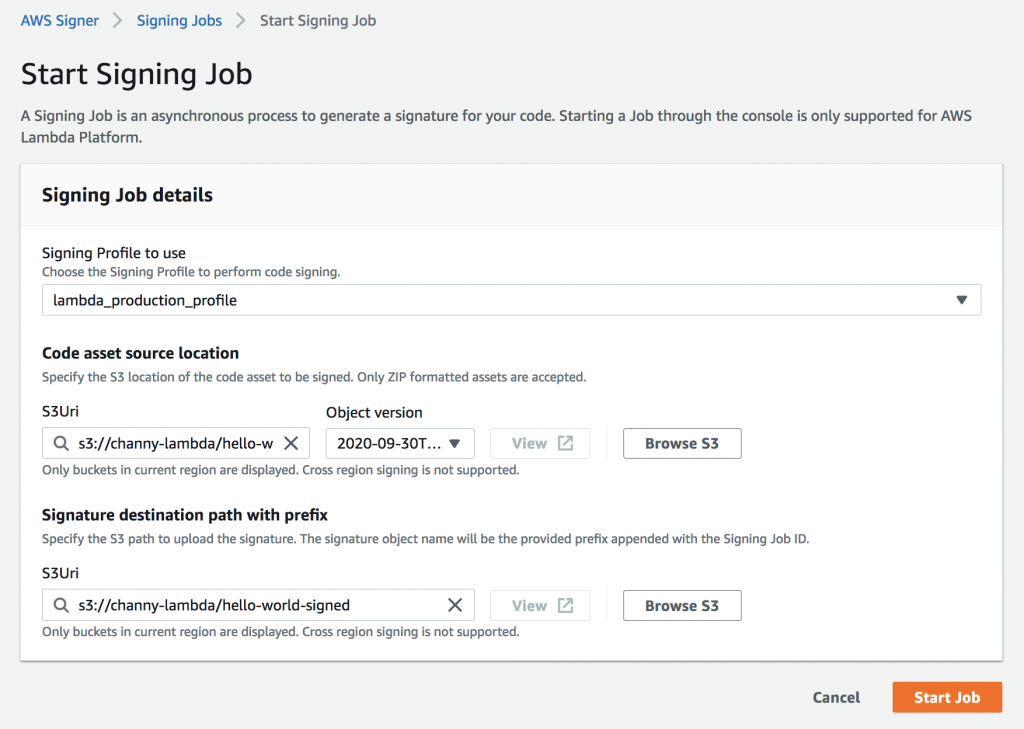
Step 3: Fill in the necessary details for the signing job, including the code package you want to sign.
Step 4: Follow the prompts and provide the required information to complete the signing job.
Creating and executing the signing job generates a digitally signed code package that can be deployed to your Lambda function.
This ensures that only trusted and signed packages are allowed for deployment, maintaining the security and integrity of your Lambda functions.
How to Update a Code Signing Configuration?
Suppose you need to make updates to a code signing configuration. In that case, it’s important to note that these changes will affect future deployments of functions associated with the particular code signing configuration.
Here’s how you can update a code signing configuration using the Lambda console:
Step 1: Open the Lambda console and navigate to the “Code Signing Configurations” page.
Step 2: Select the code signing configuration you want to update and click the “Edit” button.
Step 3: Provide a descriptive name for the configuration in the “Description” field if you wish to update it.
Step 4: Under the “Signing profiles” section, you can add or remove up to 20 signing profiles for the configuration. Choose the desired signing profiles from the available options or enter the profile version’s ARN (Amazon Resource Name).
Step 5: Click the “Add signing profiles” button to include an additional signing profile.
Step 6: Choose either the “Warn” or “Enforce” option for the “Signature validation policy” based on your requirements.
Step 7: After making the necessary changes, click the “Save Changes” button to update the code signing configuration.
Steps to Delete Your Code Signing Configuration
Remember that you can only proceed when deleting a code signing configuration if no functions are currently used.
Here’s how you can delete a code signing configuration using the Lambda console:
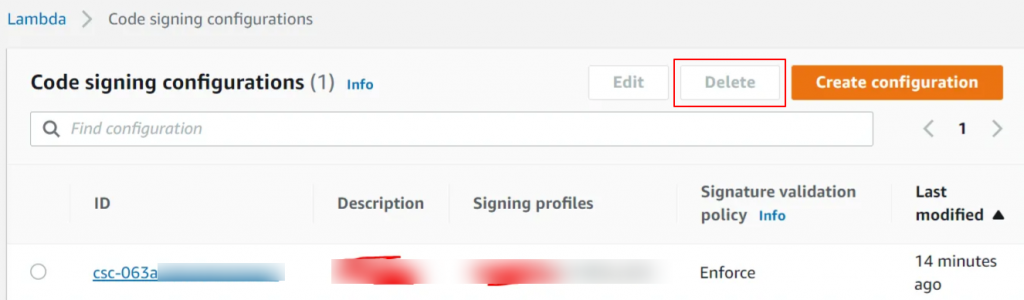
Step 1: Open the Lambda console to the “Code signing configurations” page.
Step 2: Select the code signing configuration you want to delete and click the “Delete” button.
Step 3: Confirm your decision by selecting “Delete” again.
Please note that you can only delete a code signing configuration if no functions currently utilize it. If any functions are still associated with the configuration, you must remove the configuration from those functions before proceeding with the deletion.
How to Associate a Code Signing Configuration?
To enable code signing for a specific function, you must associate a code signing configuration with that function.
Here’s how you can do it using the Lambda console:
Step 1: Open the Lambda console and navigate to the “Functions” page.
Step 2: Choose the function for which you want to enable code signing.
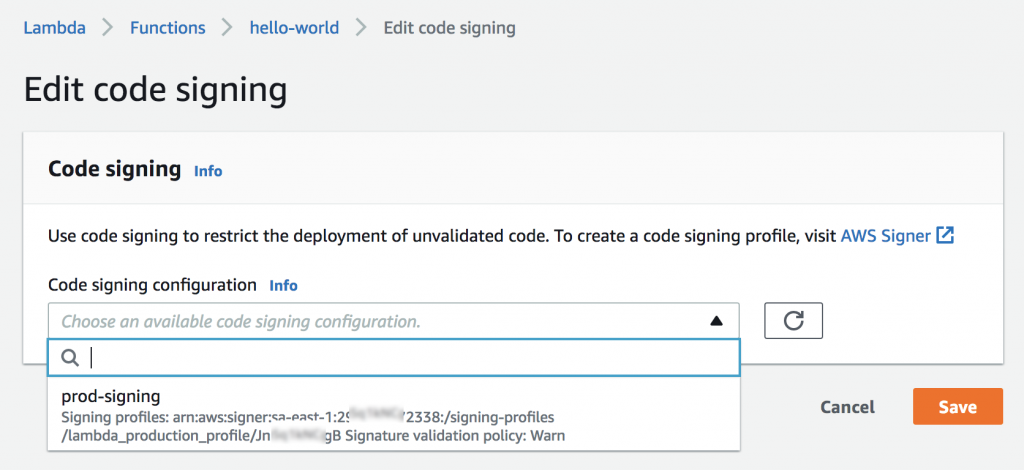
Step 3: Under the “Code signing configuration” section, click on the “Edit” button.
Step 4: In the “Edit code signing” window, select the desired code signing configuration from the available options for this function.
Step 5: After selecting the code signing configuration, click the “Save” button to associate it with the function.
Following these steps, you can enable code signing for the chosen function by associating the appropriate configuration.
Execute Policy Statement to Grants Permissions
When configuring IAM policies for code signing operations, you need to grant the necessary permissions to users or roles. By attaching policy statements to the user policy, you can provide access to the code signing API operations.
Here’s an example policy statement that grants permissions for creating, updating, and retrieving code signing configurations:
{
  "Version": "2022-10-12",
  "Statement": [
    {
      "Effect": "Allow",
      "Action": [
          "lambda:CreateCodeSigningConfig",
          "lambda:UpdateCodeSigningConfig",
          "lambda:GetCodeSigningConfig"
        ],
      "Resource": "*"
    }
  ]
}
Create a Function with a Specific Code Signing Configuration
Administrators can use the ‘CodeSigningConfigArn’ condition key to specify the code signing configurations developers must use to create or update functions. Here’s an example policy statement that grants permission to create a function with a specific code signing configuration:
{
  "Version": "2012-10-17",
  "Statement": [
    {
      "Sid": "AllowReferencingCodeSigningConfig",
      "Effect": "Allow",
      "Action": [
          "lambda:CreateFunction"
        ],
      "Resource": "*",
      "Condition": {
          "StringEquals": {
              "lambda:CodeSigningConfigArn": "arn:aws:lambda:us-west-2:123456789012:code-signing-config:csc-0d4518bd353a0a7c6"
          }
      }
    }
  ]
}
This policy statement includes a ‘lambda:CodeSigningConfigArn’ condition that specifies the allowed code signing configuration. If the ‘CodeSigningConfigArn’ parameter is missing or doesn’t match the specified value in the condition, Lambda blocks any `CreateFunction` API request.
By configuring the appropriate IAM policies, you can effectively manage user access and permissions for code signing operations in Lambda.

Cheap Code Signing Certificates
Prevent Code Tampering and Authenticate Code Integrity by Digitally Sign your Code with Trusted Code Signing Certificates.
Starting at Just $215.99/Year
